(This evaluation has been updated a few hours after it was originally published to include the newly released EVGA Pump Block Software).
The EVGA Closed Loop CPU Liquid Cooler (CLC) at 280mm has arrived at $129.99. This new liquid cooler that we received for testing from EVGA promises excellent cooling performance, low noise, complete software controls, and even RGB lighting. We are testing EVGA’s new 280mm CPU liquid cooler versus the Cooler Master Seidon 240mm, and against the Corsair H60 120mm liquid cooler to see how far we can overclock our i7-6700K.
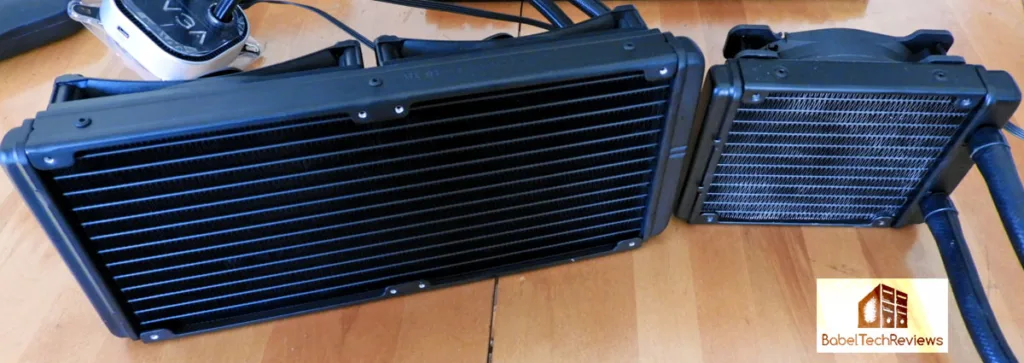
EVGA suggests that their new cooling block offers an improved flowrate and better heat transfer for improved cooling over the stock Asetek 5 cooler that it is based on. EVGA gives the end user the opportunity for further customization by linking up the EVGA CLC cooler with select EVGA graphics cards, and matching the colors directly from software. One button is used to control all RGB color profiles with the option to save a custom profile to firmware.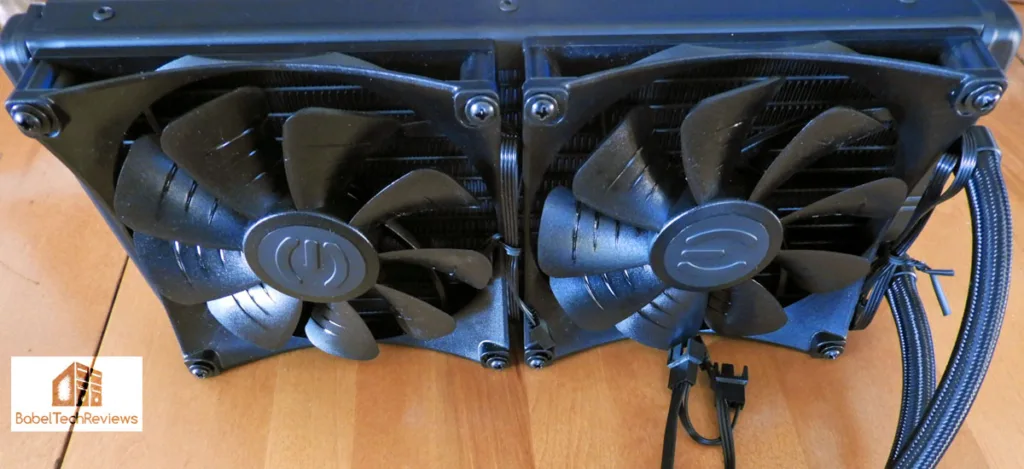
These new fans are dual-purpose and they are built for superior cooling and lower noise. The curved housing is custom-designed by EVGA to reduce noise, and their unique blade design offers improved cooling performance. The Teflon Nano Bearings ensure a long lifespan as the EVGA CLC 280 cooler is warrantied for 5 years.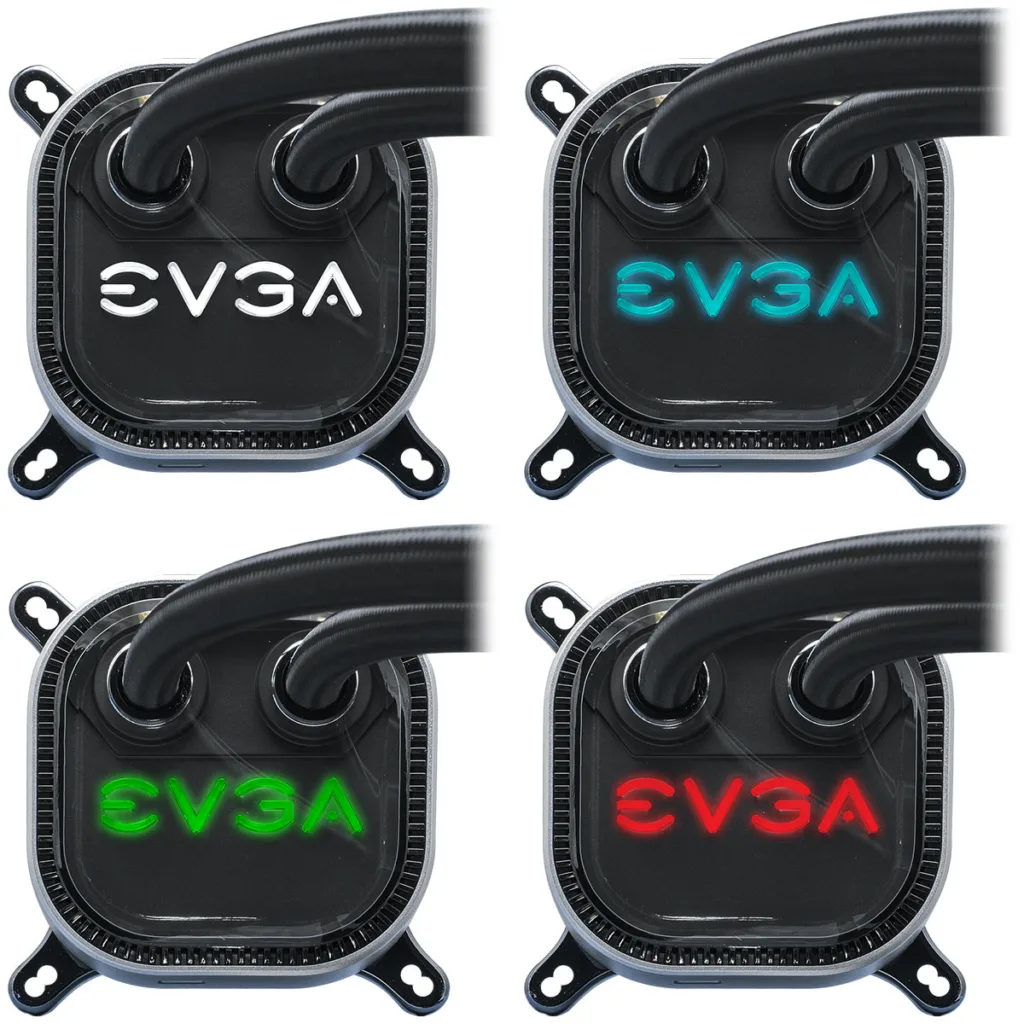
The upcoming EVGA Flow Control software will give full control over the EVGA CLC Liquid Cooler including the fanspeed, RGB lighting, pump control, and profiles. These settings save to firmware which means it only needs to be set once. Unfortunately, at the time of writing, the Flow Control software is not yet available, but we are promised by EVGA that it will be released “soon”. UPDATE: The Pump Block software can now be downloaded from EVGA’s download center and the version for Windows 10 64-bit may be downloaded from here. 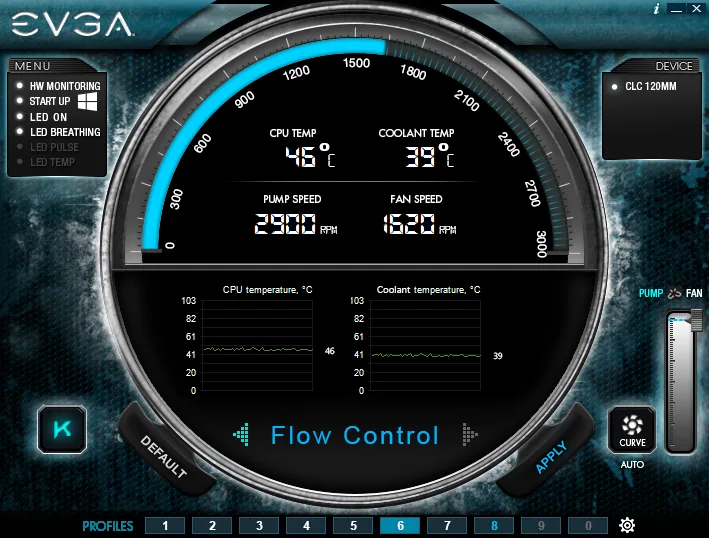
We received the EVGA CLC 280 from EVGA for evaluation ten days ago. Previously we had issues with reaching speeds over 4.5GHz with our Core i7-6700K using our Corsair H60 (120mm) CPU cooler, and we had barely achieved a very hot 4.7GHz using our Cooler Master Seidon 240M (240mm) liquid cooler. Since we are testing faster and faster graphics cards including the Pascal TITAN X, we’d like to increase the speed of our CPU for benching and this is the report of our adventure in overclocking. As the IPC of Skylake and Kaby Lake are the same, we would like to surpass the i7-7700K clocks which turbo to 4.5GHz and we are currently at 4.4GHz with our i7-6700K.
We purchased a Corsair H60 CPU cooler earlier this year when our Thermaltake Water2.0 240mm cooler failed. We paid $50 after mail-in-rebate for it and were able to lock all 4 cores of our Skylake i7-6700K to 4.4GHz for our day-to-day uses including for benchmarking. Unfortunately, 4.5GHz proved too hot under full load at 120mm as this cooler is mid-range for a watercooler. And our Seidon 240M was being used to cool our Devil’s Canyon i7-4970K also at 4.4GHz.
 EVGA offers an easy entry into the world of watercooling with the CLC 280 Liquid CPU Cooler, which is a complete package to offer everything that you need to cool your overclocked CPU, including thermal interface material. The CLC 280 Liquid CPU Cooler ships with an EVGA multi-socket mounting system that has a relatively easy and very straightforward installation. They are also adapted for 115x and 1366 platforms as well as for AMD socket AM2/AM3 and FM1/FM2 platforms. EVGA will also supply a bracket for the upcoming AMD Ryzen CPUs.
As important as saving money on hardware is, this editor believes that the choice of a CPU cooler is critical to any PC build. The cooler should never be cheap. Too much depends on it if you value keeping your CPU cool, or especially if you plan to overclock. It is highly recommended that you instead look for sales and use rebates to save money.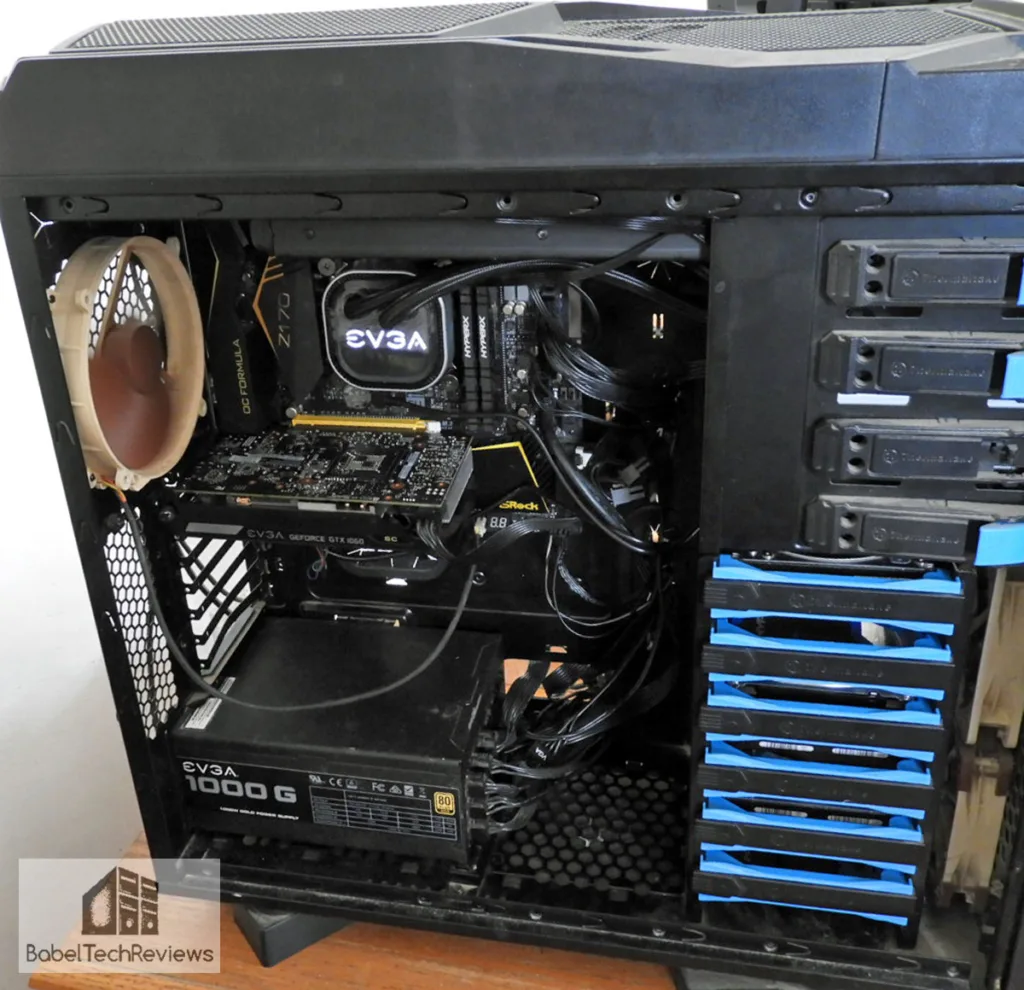
This review is not just about “value”. If you want to cool a stock Intel i7, a value CPU cooler such as a Corsair H60 will suffice until you begin to push the core speeds beyond 4.4GHz or so. Unless you are supplying a relatively high voltage to most CPUs, a budget cooler will work nicely.
Intel’s newest Skylake and Kaby Lake Core i7 CPUs mark a new advance in processing power, but they require a higher quality cooler with a larger radiator than 120mm if you want to overclock them without excessive fan noise. Our review sample of the Intel Core i7-6700K requires excellent cooling once you approach 4.5-4.6GHz as its stock clocks are only 4.0GHz and 4.2GHz with Turbo on for two cores.
The FX series of faster AMD 8-core CPUs almost always require watercooling or a high-end air cooler and a very beefy power supply unit (PSU) if you are really serious about a significant Piledriver overclock. AMD also uses Asetek-built liquid coolers for their top of the line FX series just as EVGA does with its CLC 280. Heat is drawn away from the CPU by the watercooler’s heatsink and is transferred by a liquid that is pumped through flexible tubes up into the array of hi-grade aluminum fins for dissipation in a radiator. In the case of the EVGA CLC 280, two large 140mm fans spin, blowing cooling air through the radiator to cool the CPU-heated liquid which is cycled for as long as the PC is on.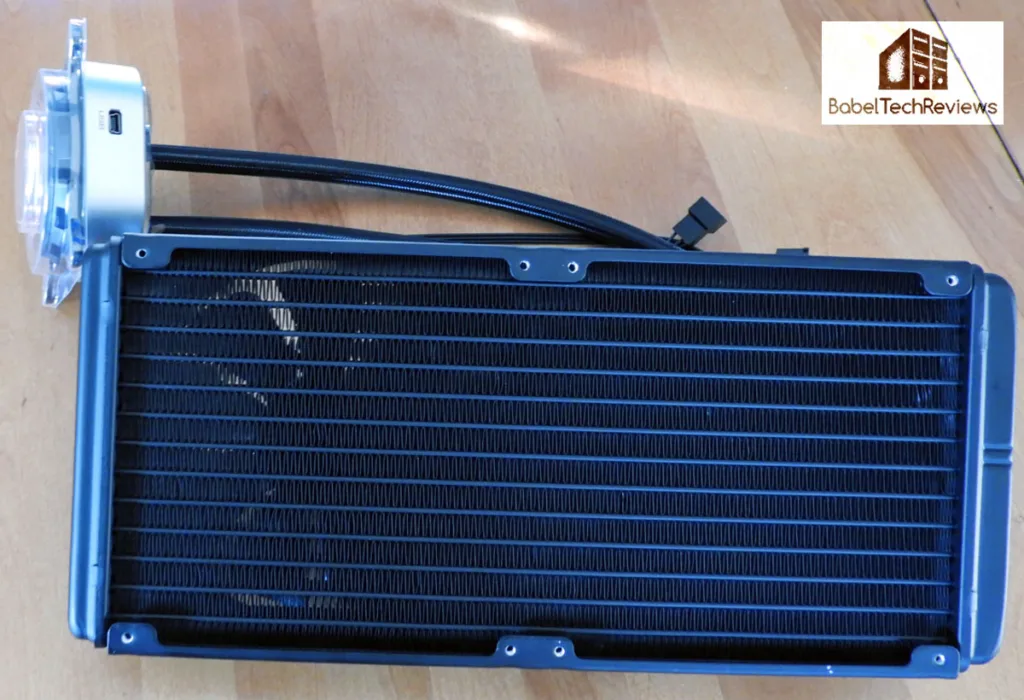
We notice that many of the current compact all-in-one CPU watercoolers such as the EVGA 280 CLC are based on the Asetek 5 unit. In contrast, Cooler Master uses a custom design for their Seidon 240M. The only issue one might have with using a 280mm unit over a 240mm unit is its length – it needs full tower case to install the longer radiator. In fact, we were unable to fit the EVGA CLC 280 cooler into our smaller Thermaltake Overseer tower and had to use the larger Thermaltake Chaser MK 1 full tower instead. Even so, because of our choice of a mini-ITX ASRock motherboard, the CLC 280 was a very tight fit.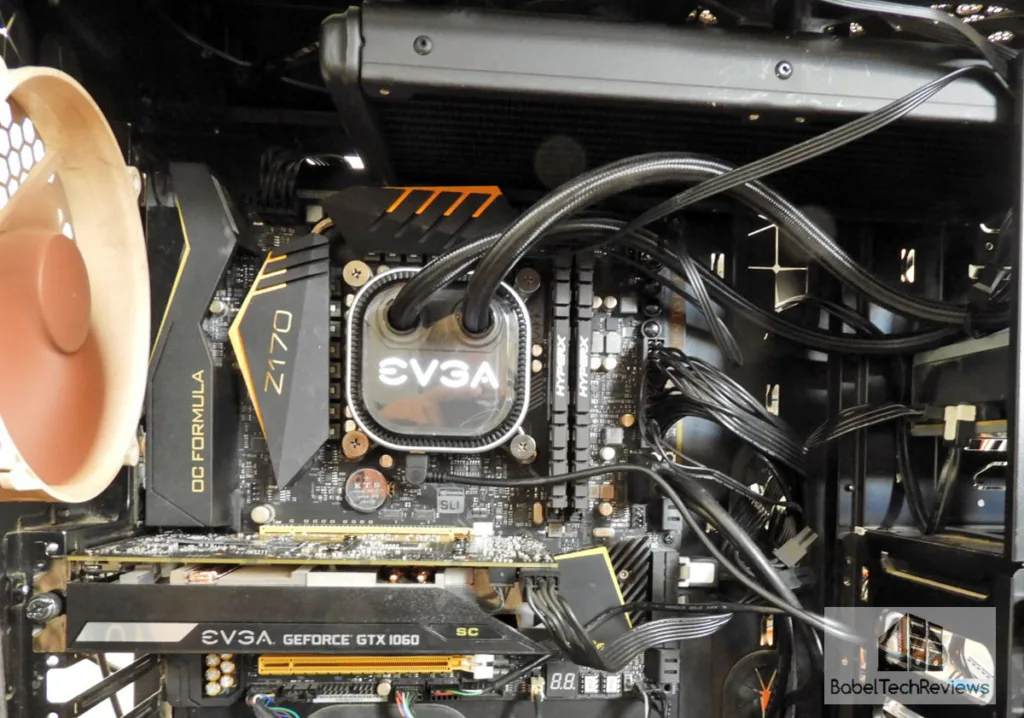
The main question that we want to answer, is the EVGA 280 CLC able to beat the watercooling of our current Seidon 240M which allows us to clock our Core i7-6700K to 4.7GHz with the fans speeds set to ‘performance’ or high? And after spending a week with the EVGA 280 CLC water cooler, we can give you some answers regarding 240mm vs. 280mm radiators, especially regarding convenience, safety, and ease of installation.
Before we compare our three watercoolers, let’s unbox and install the EVGA 280 CLC. We will test all 3 liquid coolers using OCCT 4.1.2 as an extreme test to load all the cores of our CPU to 100%. This thermal torture test produces far more extreme temperatures than you will ever find in gaming and it is a great test of thermal stability.
The Specifications, Unboxing and Installation
Here are the EVGA 280 CLC’s specifications and features from EVGA’s site.
Specifications:
The EVGA 280 CLC arrived in a retro-style retail cardboard box packed with everything necessary to cool any modern CPU that you may buy. This cooler is “universal” – engineered to fit any modern Intel or AMD CPU’s cooling needs – overclocked or stock.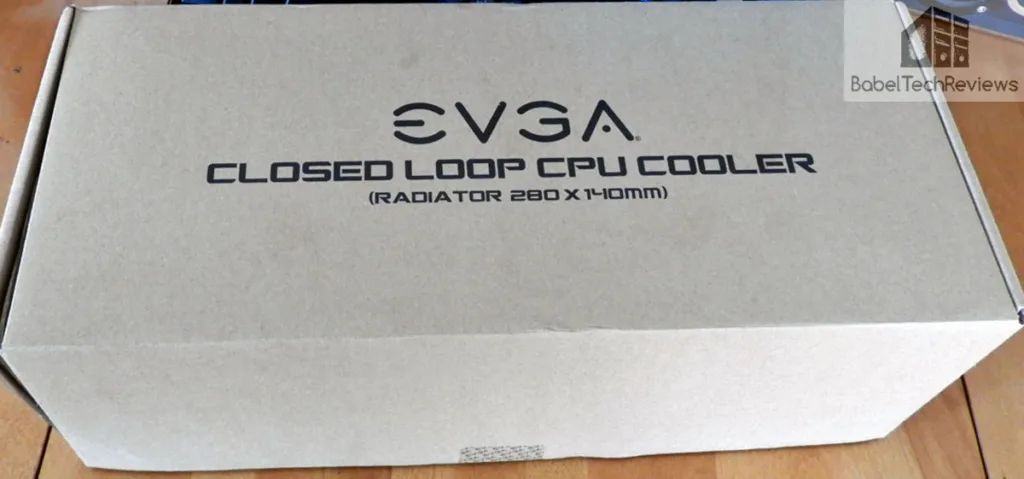
The main difference between the EVGA CLC 280 and the other two watercooling units are the size of their radiators. The 280mm CLC has a much larger cooling surface area as it uses its two 140mm fans side-by-side to cool its large radiator while the Seidon 240M uses two 120mm fans and the Corsair H60 uses a single 120mm fan. 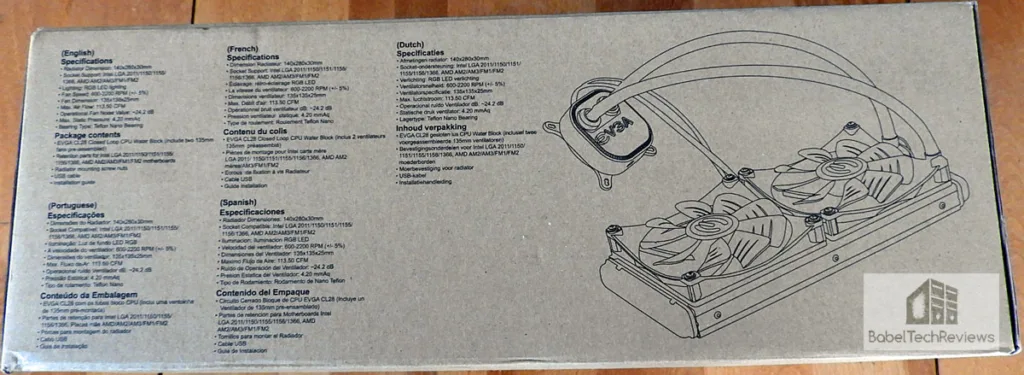
The EVGA CLC 280 specifications are printed on the other side of the box.
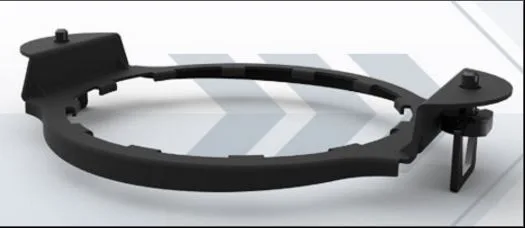
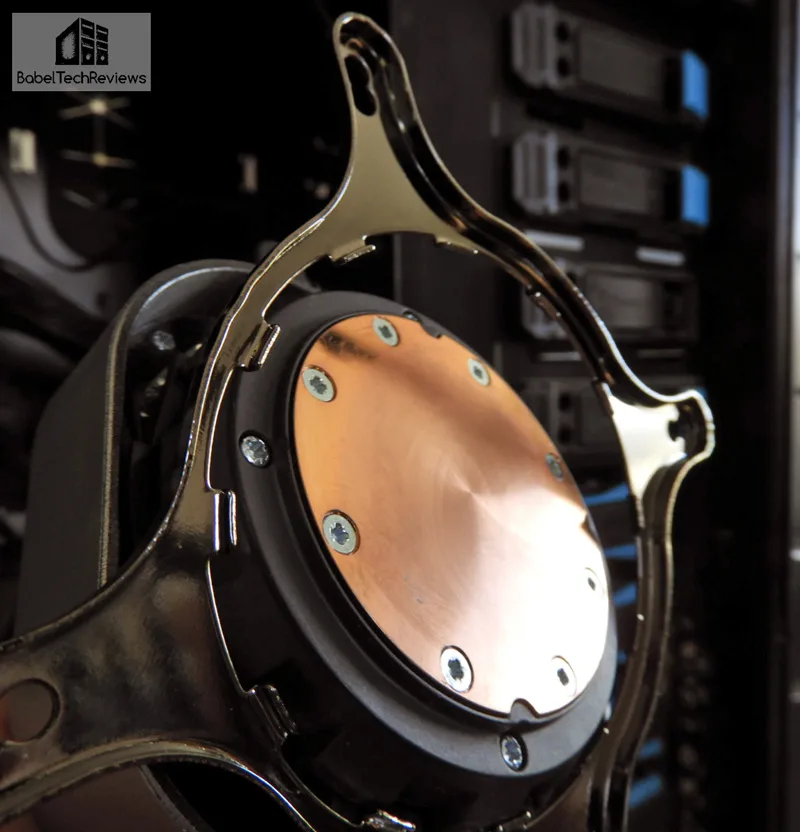 The contact plate itself is very smooth and it uses a retention ring that pre-installed for Intel CPUs. The ring is easily removable so as to use the AMD retention ring instead. The thermal interface material (TIM) is pre-applied by the factory but we used Arctic Silver 5 for all of our thermal testing. Having the TIM pre-applied in addition to including a tube of it might be a real plus for subsequent installations as the pre-applied TIM can only be used once.
The EVGA CLC 280 is fully featured and the specifications are excellent so let’s get it out of the box and install it.
Unboxing
The EVGA CLC 280 is well packaged inside its cardboard box.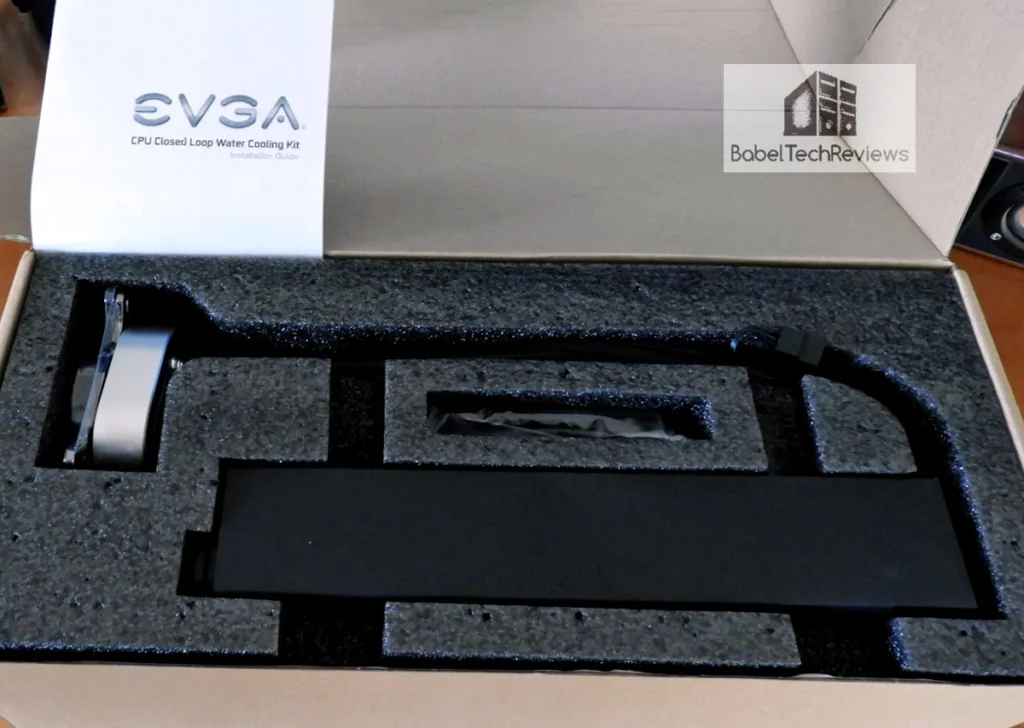
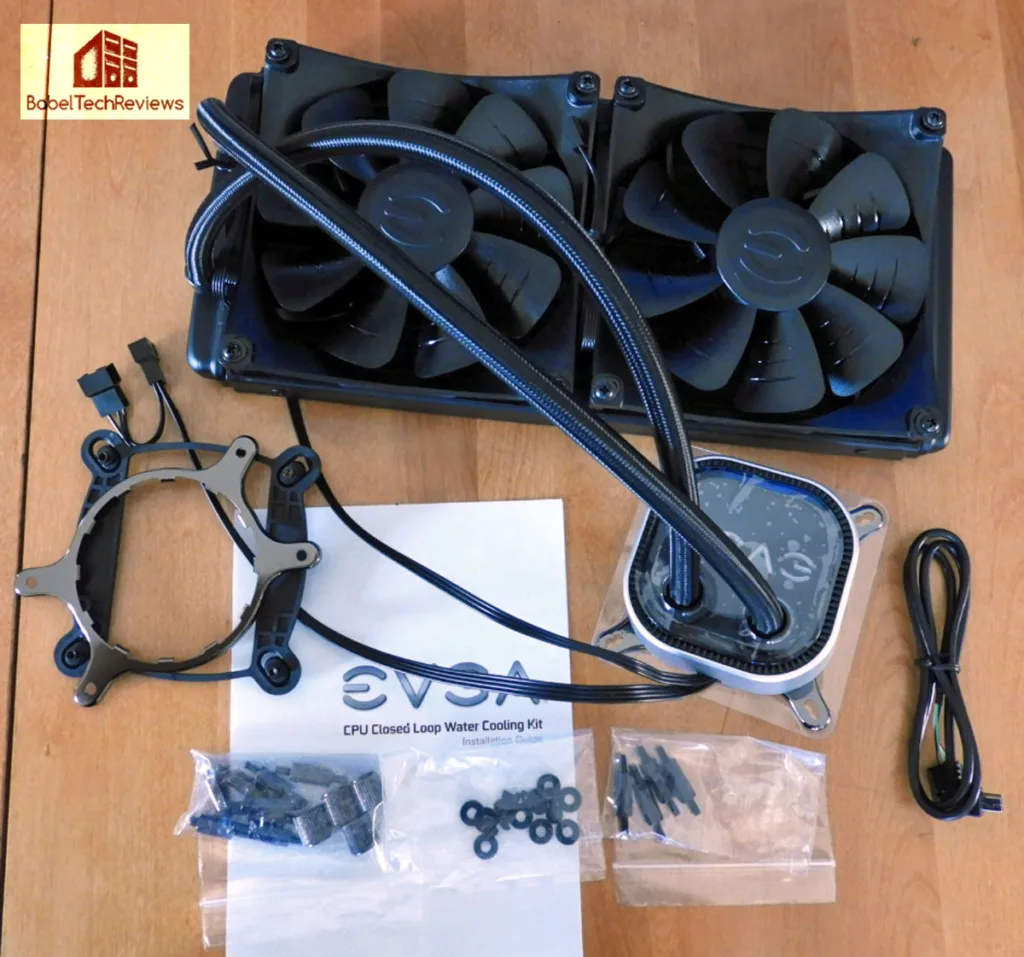
Here is everything out of the box.
There are common parts and also parts included specifically for Intel and for AMD CPUs.
We had no difficulty following the instructions for installing a watercooler on either an Intel or AMD CPU platform as we were already used to working with other liquid cooling systems, but we soon found out that the mounting instructions for the EVGA CLC 280 are very different than for the Seidon 240M.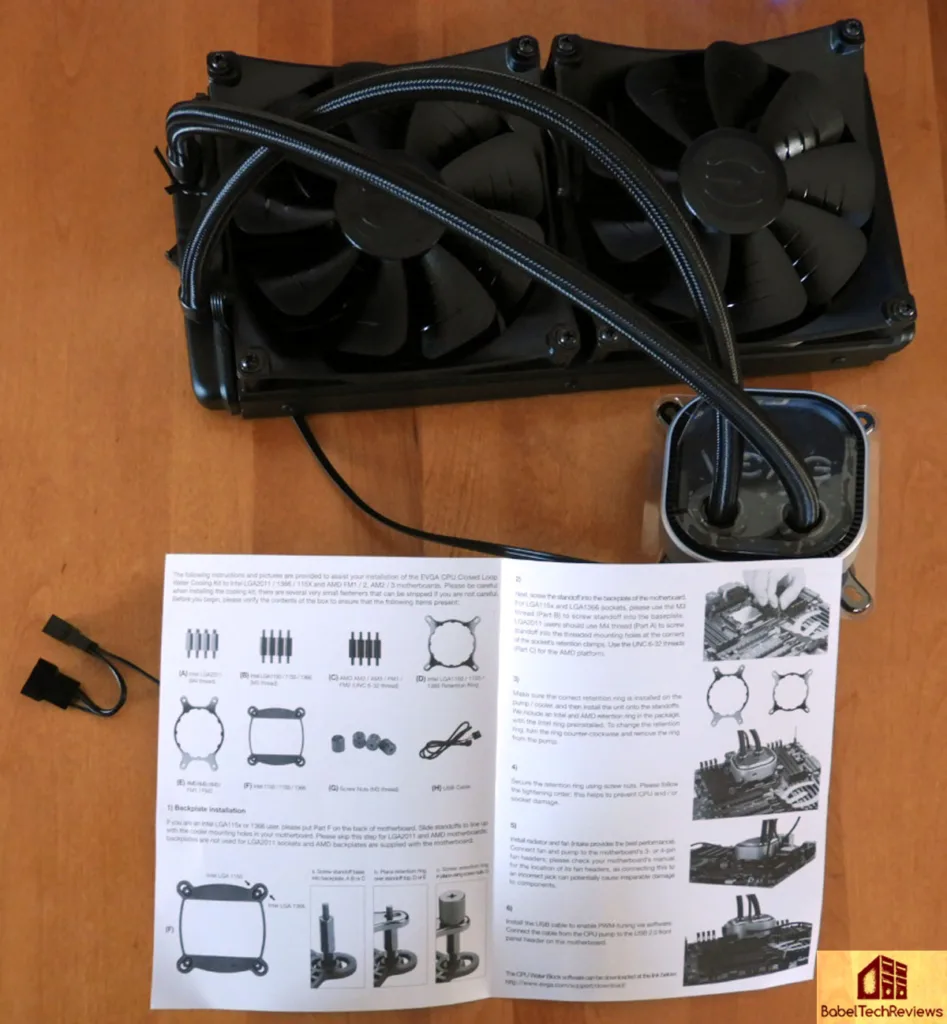
Above is our EVGA CLC 280 out of the box and ready for installation. There are very clear step-by-step instructions supplied.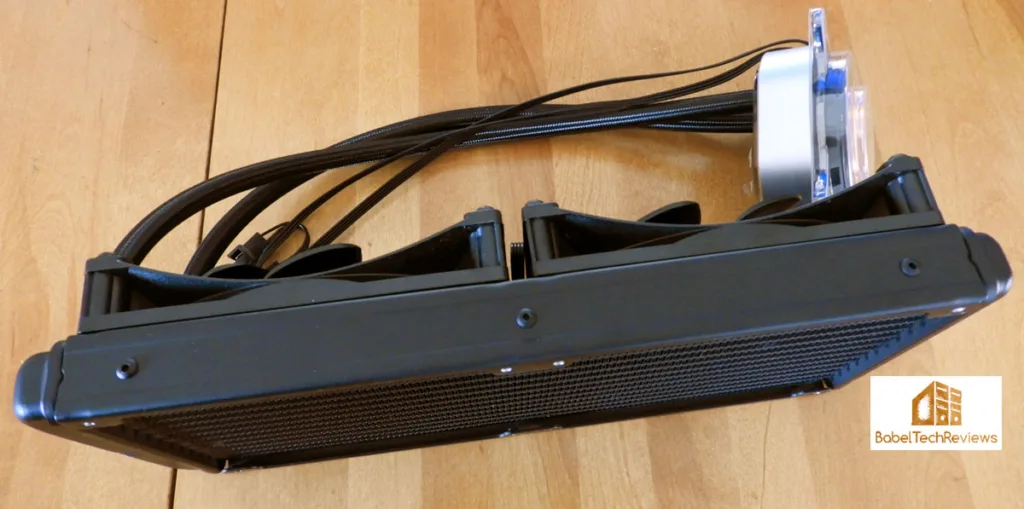
The fans work next to each other and they already pre-installed directly onto the radiator. These fans are not as well protected as other fans, so one must be aware of finger placement when they are spinning.
We’re ready to go! Let’s install the EVGA 280 CLC.
Installation
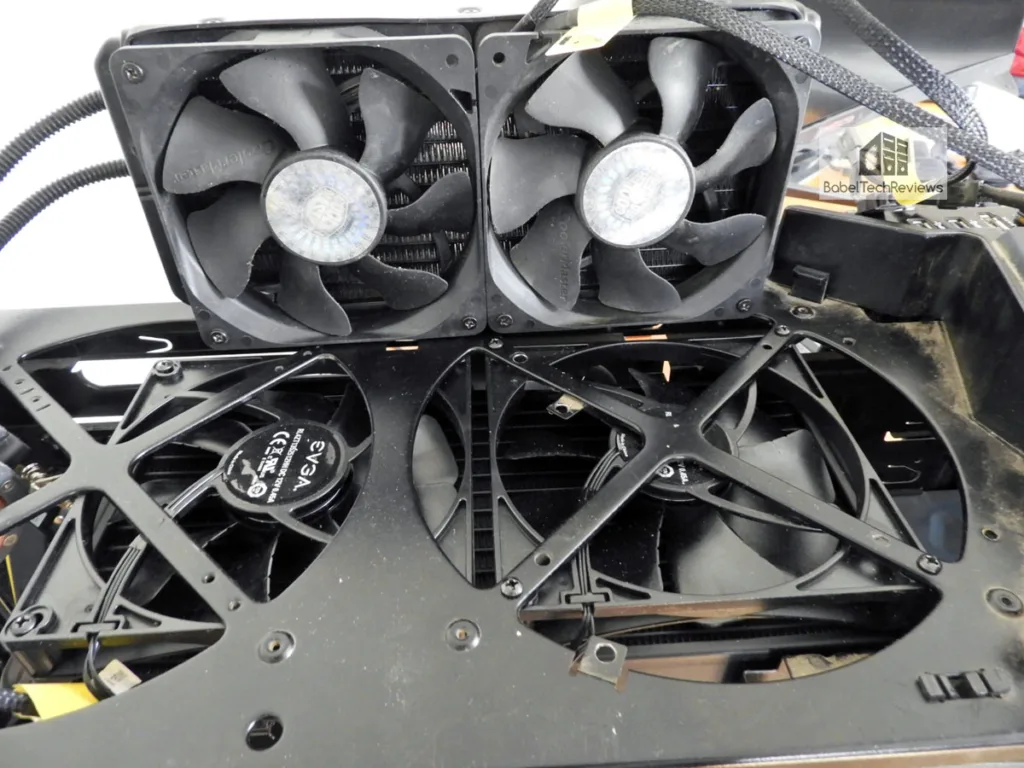
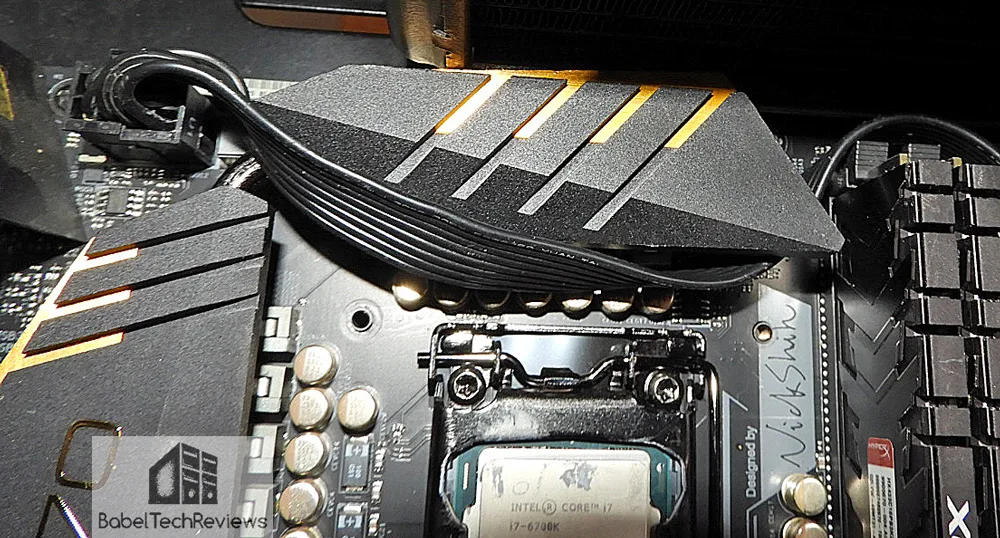
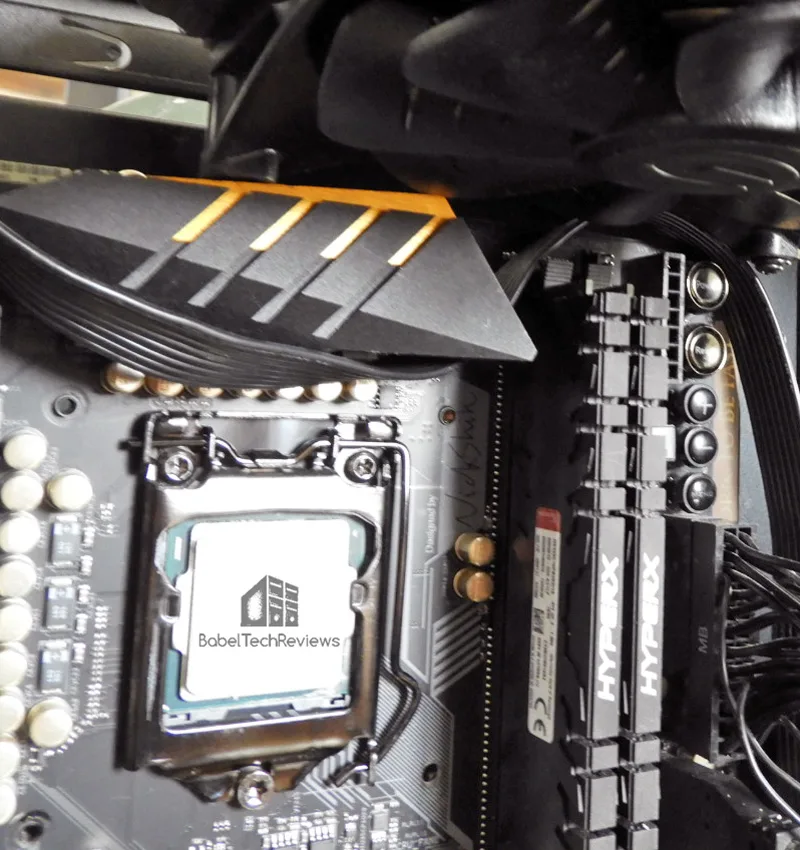 The installation of the EVGA CLC 280 is pretty straightforward. The radiator needs to fit properly and the “normal” installation with the fans below the radiator caused the blades to contact the heatsink of our ASRock Z7170M mITX board. Our solution was to turn the radiator and fans over and fit the radiator which is slightly recessed right on top of the heatsink with zero room for any further tolerance.
We rotated the fans in relation to the radiator so that they would be bringing in cool air directly in from the top of our case. That means that we have two 140mm intake fans bringing in cool air from the top of the case and two more 140mm intake fans at the front of our case. To keep a positive and balanced airflow through our tower, we use our 150mm exhaust fan at the back of our case coupled with a 480mm exhaust side case fan.
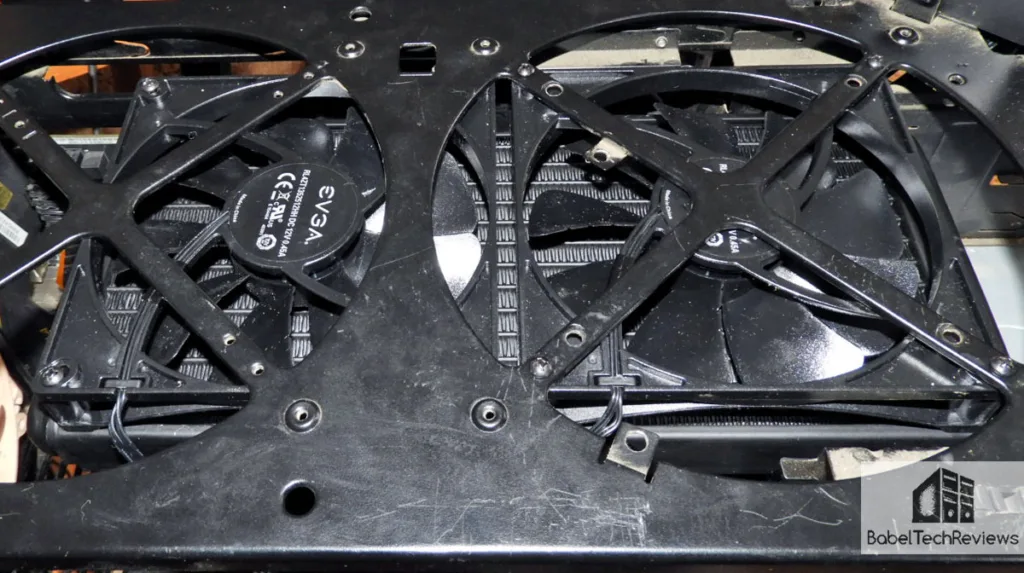
We were able to use 4 pre-drilled holes in the top of the chassis of our Chaser MK-1 Tower to securely lock down the EVGA 280mm CLC radiator.
Next we installed the backplate behind the motherboard taking care to line up the mounting holes.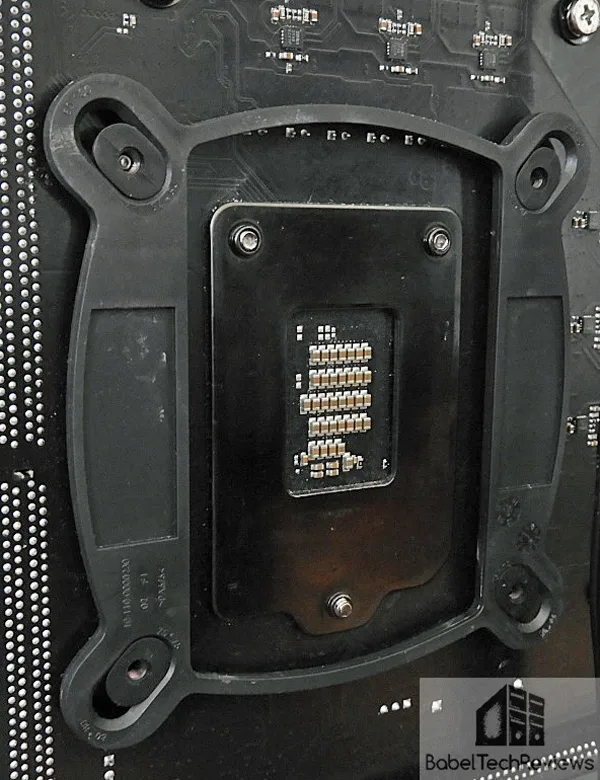 Installing the radiator was a really tight fit. Because we use a fully-featured mini-ITX ASRock Z7170M motherboard, there was zero tolerance between the top heatsink and the radiator cooling fins.
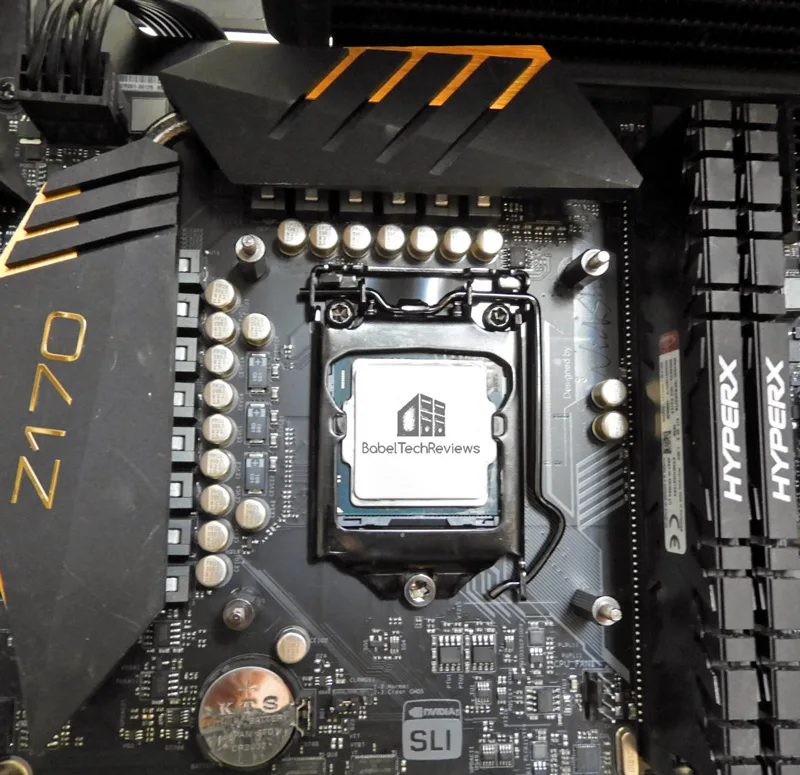
Next we installed the risers into the standoffs which come through the motherboard. Unlike most coolers that we have installed where the risers are held firmly to the motherboard, in this case, the risers are quite loose. We had some difficulty installing the cooler head so that it made firm contact and EVGA sent us a second backplate that had slightly shorter risers.
Even with the second backplate, we noticed the risers’ looseness and we then called EVGA’s toll free phone number for assistance. Although we called on a Friday morning and didn’t mention that we were reviewing the cooler, we had no wait time and we were soon routed to a tech support person who actually had experience installing the EVGA CLC 280. He assured us that the entire assembly would tighten down once the cooler head was fully installed and he was right about the second backplate.
Below, the cooler head of the EVGA CLC 280 is tightened down with a screwdriver onto the risers and it finally makes a very solid contact. Make sure to not overtighten the screws!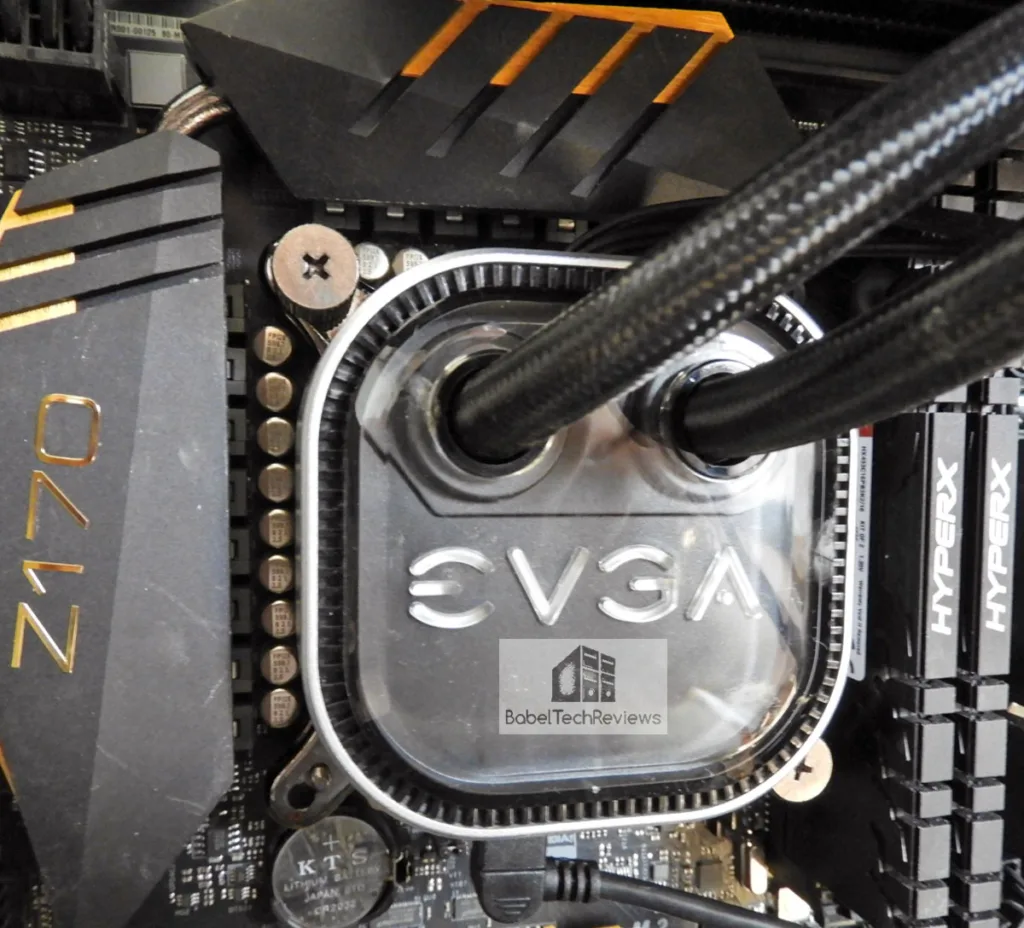
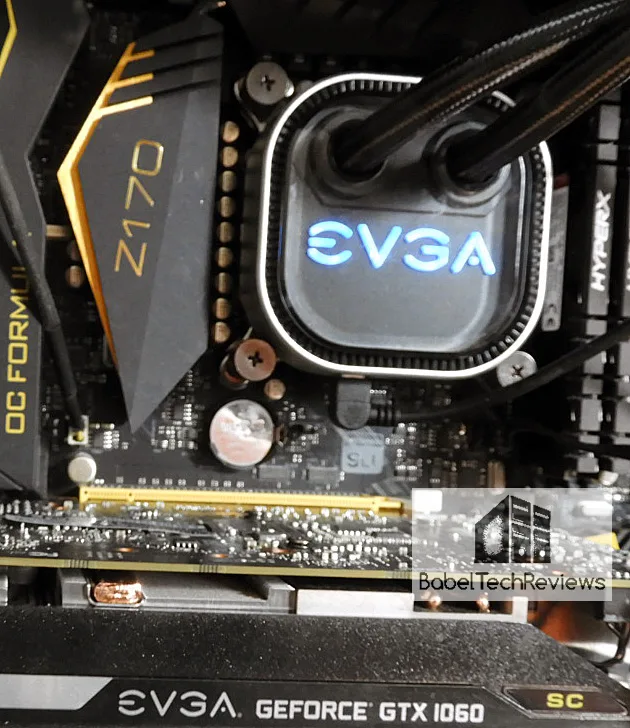
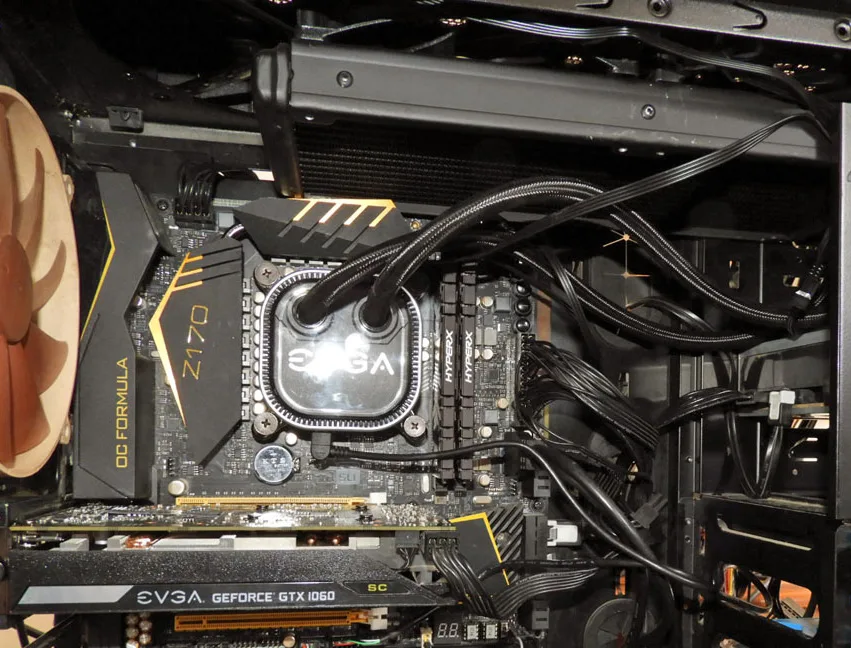
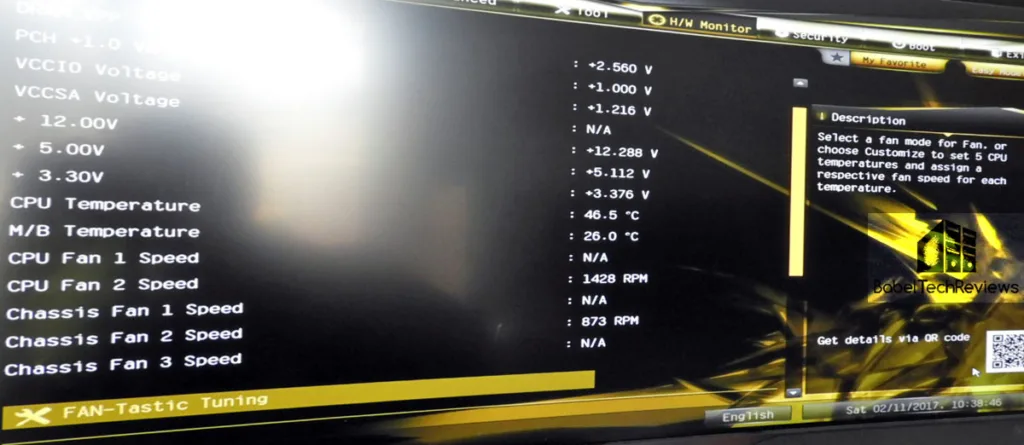
Below is the EVGA CLC 280 fully installed. The bottom of the cooler head has a connnector for a supplied USB cable that may be installed into the motherboard’s USB 2.0 front panel header to enable PWM-tuning via software. The two fans’ power leads fit into a Y-adapter that connect via a single power lead into the motherboard’s CPU fan header, and the fan speed may be adjusted in the BIOS now as we await EVGA’s Flow Control software.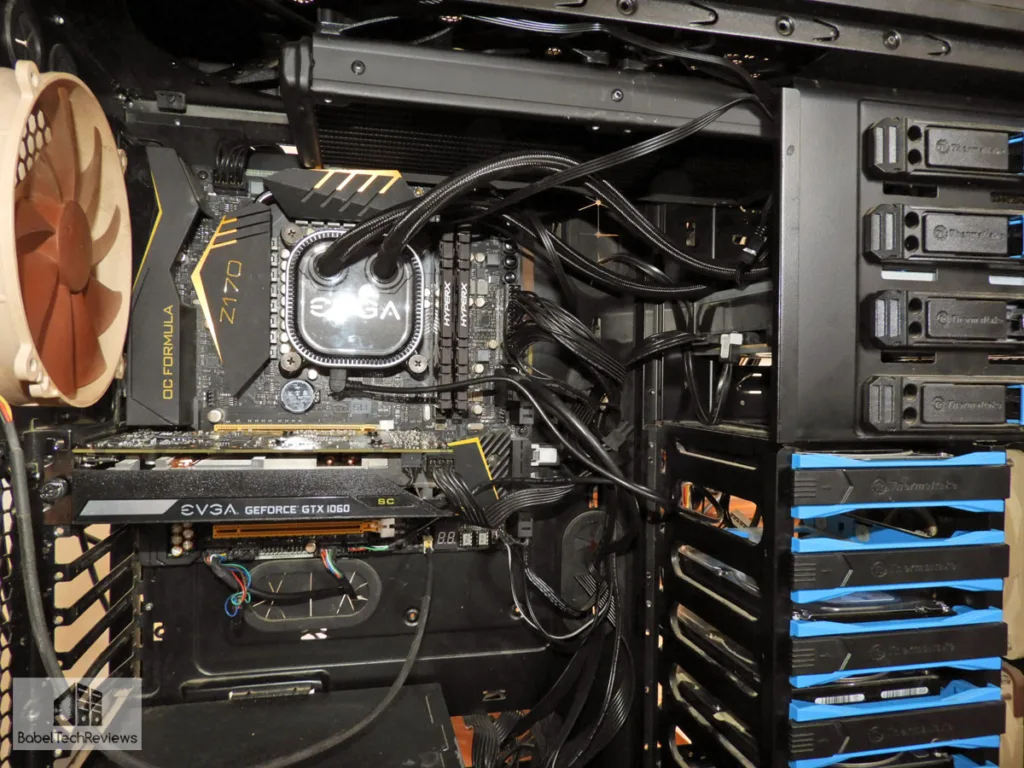
Here’s a look at our PC with everything running below. Along with two 140mm intake fans at the front of the case, the EVGA CLC 280’s two 140mm fans bring cooling air from the top of the case through the radiator, and two large exhaust fans keep the PC’s air flowing through the case.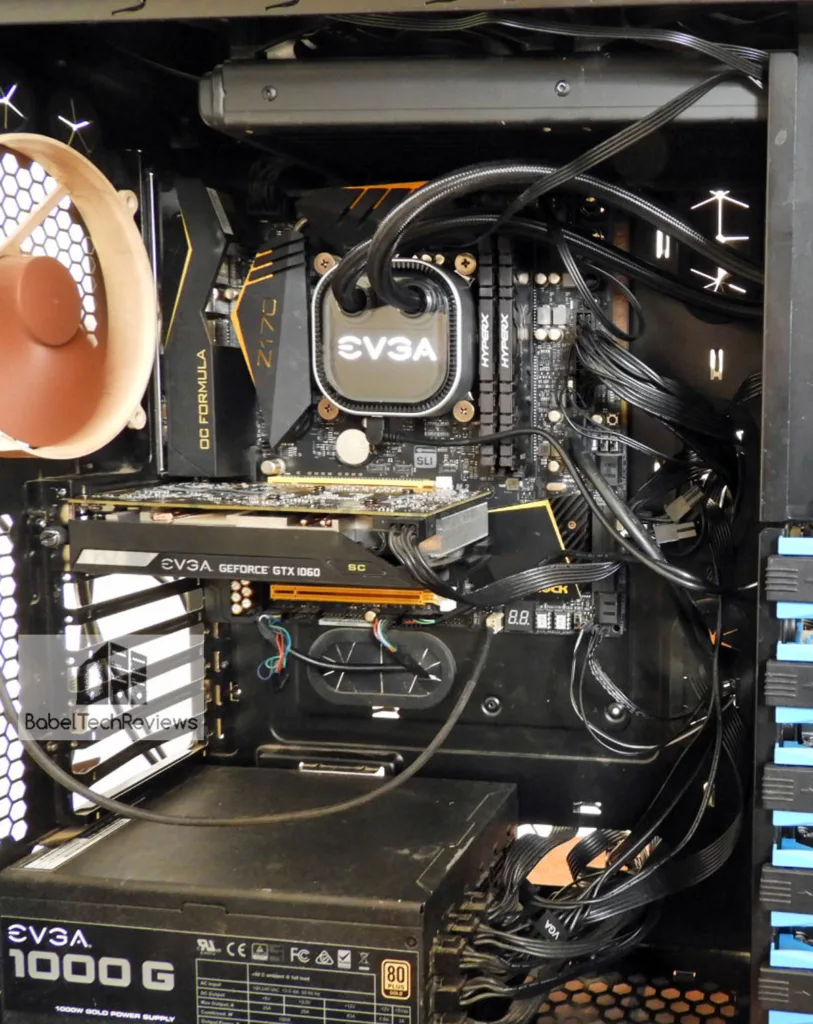
Except for our original issue with the original backplate and our questioning of the looseness of the risers, installing the EVGA CLC 280 was reasonably quick considering the large size of the cooler and that it barely fit.
EVGA has an excellent video which details the step-by-step installation of the CLC 280. However, when the tech says do not overtighten the risers, he does not mention that “loose” is normal.
Noise
The custom EVGA fans do a fine job of quietly keeping the radiator and the liquid cool at regular rpm using power management with our BIOS set to ‘normal’. However, under ‘performance’ mode (high), when the cooler is under load, the fans spin up as the CPU is overclocked and you can hear them. In contrast, when the fans are set to ‘silent’ (low) in the BIOS, the pump can be heard over the fans.
Let’s head over for the thermal test.
The Test Configuration and Thermal Testing
We have been living with the EVGA CLC 280 inside our Chaser MK-1 for one week, and we love it for all of our needs including for maximum CPU overclocking. Almost any decent aftermarket cooler will allow one to clock the Core i7-6700K to 4.4GHz, but then as voltages increase, so do the cooling needs and starting at about 4.6GHz, it requires a high-end cooler.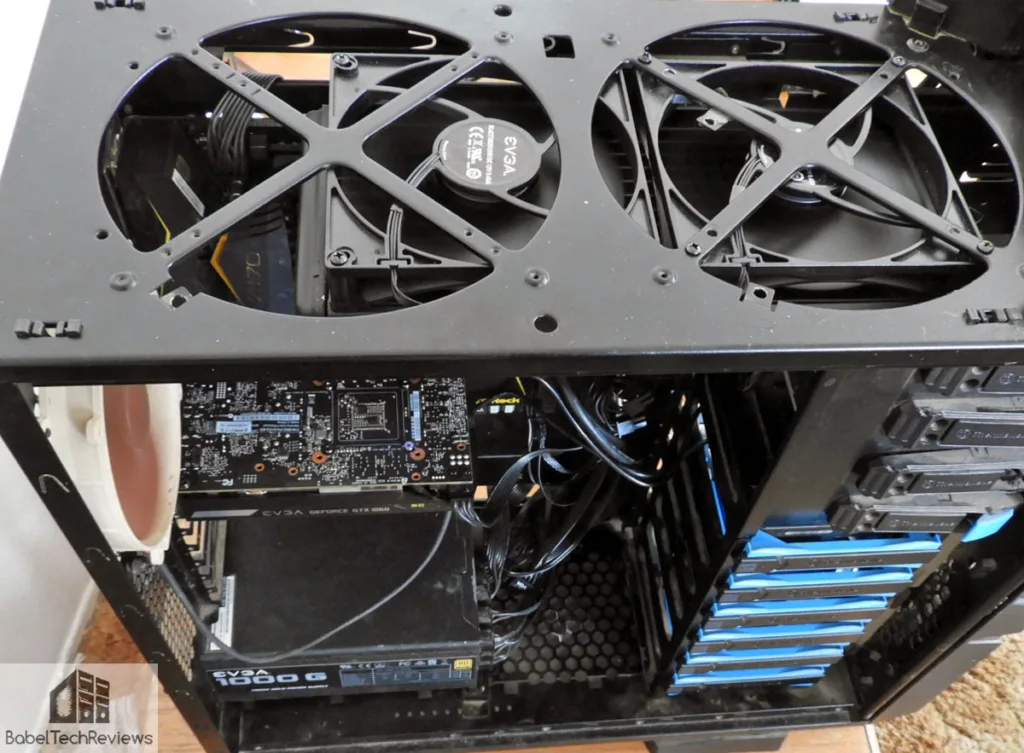
Let’s take a look at our setup:
Test Configuration – Hardware
- Intel Core i7-6700K (reference 4.0GHz, HyperThreading and Turbo boost is on to 4.4GHz-4.8GHz; DX11 CPU graphics).
- ASRock Z7170M OC Formula motherboard (Intel Z7170 chipset, latest BIOS, PCIe 3.0/3.1 specification, CrossFire/SLI 8x+8x)
- HyperX 16GB DDR4 (2x8GB, dual channel at 3333MHz), supplied by Kingston
- EVGA GTX 1060 SC 6GB
- 2TB Seagate FireCuda 7200 rpm SSHD
- EVGA 1000G 1000W power supply unit
- EVGA CLC 280 watercooler supplied by EVGA
- Cooler Master Seidon 240mm liquid cooler, supplied by Cooler Master
- Corsair H60 120mm liquid cooler
- Onboard Realtek Audio
- Genius SP-D150 speakers, supplied by Genius
- Thermaltake Chaser MK-1 full tower case, supplied by Thermaltake
- ASUS 12X Blu-ray writer
- Monoprice Crystal Pro 4K
- Arctic Silver 5 Thermal Interface Material
Test Configuration – Software
- Nvidia’s GeForce WHQL 378.49 drivers. High Quality, prefer maximum performance, single display.
- VSync is off in the control panel.
- Highest quality sound (stereo) used in all games.
- Windows 10 64-bit Home edition. Latest DirectX
- All games are patched to their latest versions at time of publication.
- MSI’s Afterburner, latest beta, was used for the GTX 1060 to set power/temp limit to maximum.
- OCCT 4.4.2
- Core Temp 1.5
The Test
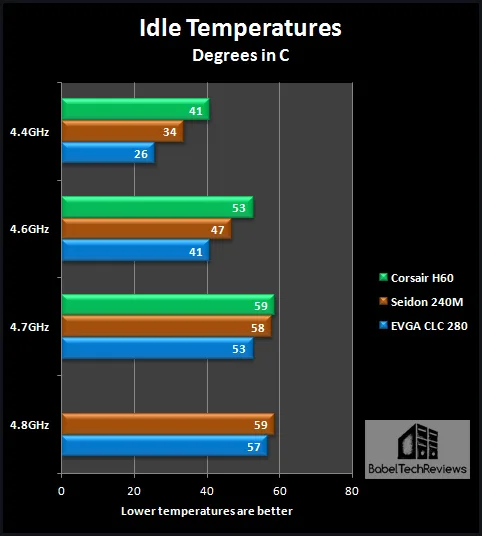
First we tested our idle temperatures at the desktop. All 3 coolers can easily manage 4.6GHz desktop temperatures although the Corsair H60 is starting to get warm and it cannot handle 4.8GHz desktop temperatures at all.
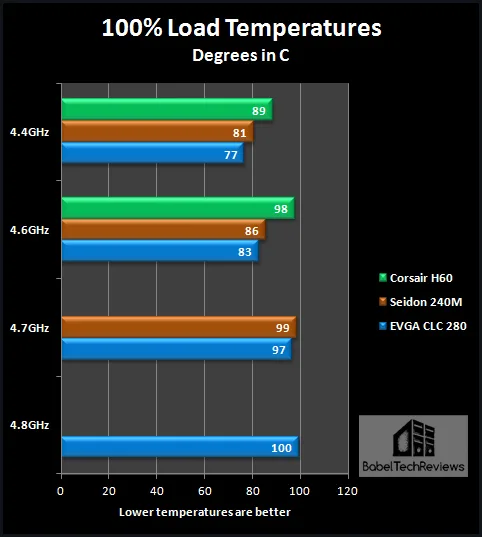
For our load test, we ran OCCT 4.4.2 for at least 15-20 minutes and recorded the highest peak temperature reported by a single core at maximum load. From 4.4GHz to 4.8GHz we used the auto overclocking function in the ASRock Z7170M’s BIOS which used a lot of extra voltage to get us to higher overclocks.
With all 4 cores locked to 4.4GHz by the automatic overclocking function available in our ASRock Z7170M’s BIOS, we noted the CPU needed 1.25V. At 4.6GHz, the CPU voltage increased to 1.31V and at 4.7GHz required 1.36V.
It appears that 4.8GHz for our i7-6700K is not practically or safely attainable with our level of watercooling with any cooler that we have used under OCCT’s thermal torture test as voltage had increased to over 1.4V by the time our PC crashed, and it was not thermally related as we did not hit 100C long enough to trigger thermal shutdown. 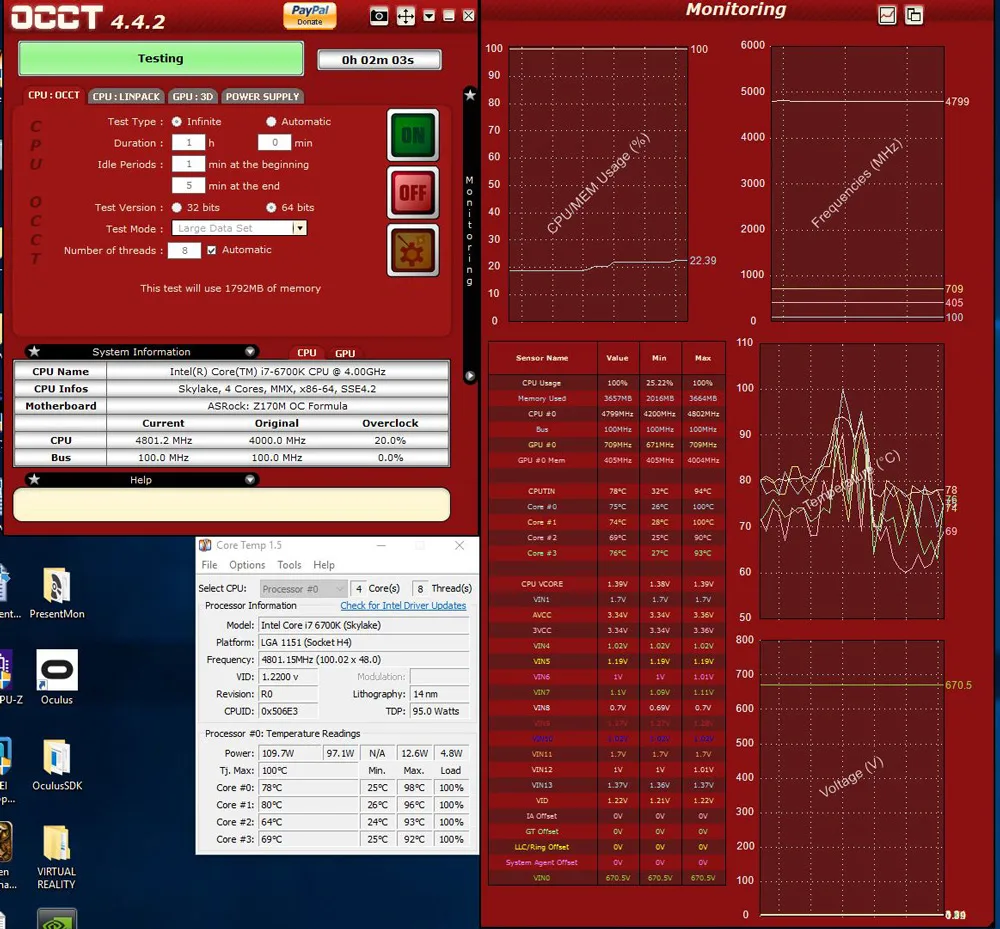
It appears that our limit for benchmarking our particular i7-6700K is at 4.7GHz, and at 4.6GHz for day-to-day use. In gaming, maximum CPU temperatures rarely get out of the 60s C using our EVGA CLC 280 and we shall now benchmark all of our games at 4.6GHz from now on. The Corsair H60 would not be able to run at 4.6GHz with its comparatively small 120mm radiator, and the Seidon 240M would need its fans set to “performance” to match the EVGA CLC 280’s fans on “silent”.
Variable controlled fans allow dynamic fan speed based on CPU temperature, and the water cooling efficiency means the fans can operate at a lower speed to reduce noise. In fact, we tested all of our fans at ‘normal’ or at default BIOS settings, but we also used “Silent” mode which is quiet indeed. Under full load at 4.6GHz with the fans barely audible, the noise of the EVGA pump could be heard over all of the fan noise. Of course, temperatures under full-load OCCT rose into the middle 80sC with the fans on ‘silent’, but it would be fine for gaming or day-to-day use while overclocked to 4.6GHz with a nearly silent PC.
The CPU Water Block Software
After we posted this evaluation, we found that the brand new beta CPU CLC software could be found on EVGA’s download site under Drivers and BIOS-Other Products-Closed Loop Coolers – or directly linked from here for Windows 10 64-bit.
It is brand new software and yet it works to not only to show coolant temperatures and fan speeds, but a means to also set fan speeds.
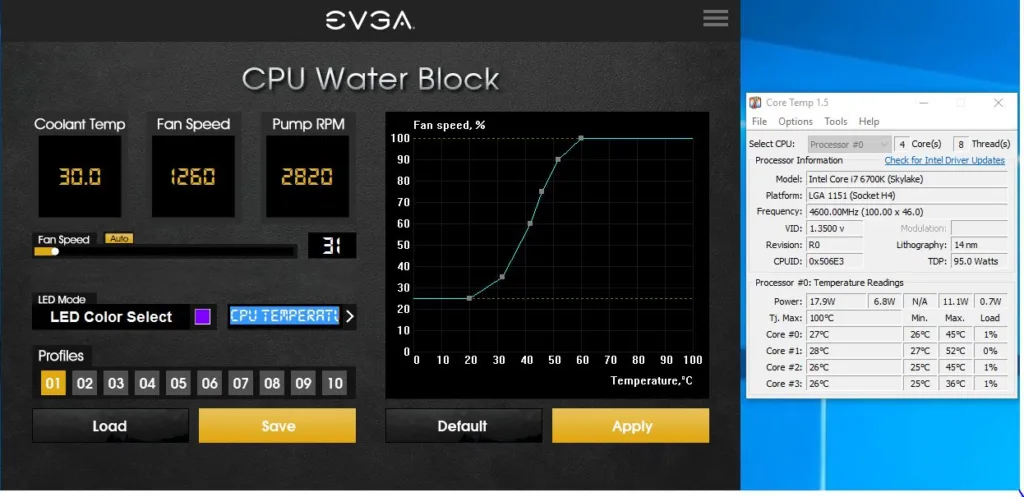 Above are the desktop conditions and resultant fan speed in relation to the cooler temperatures.
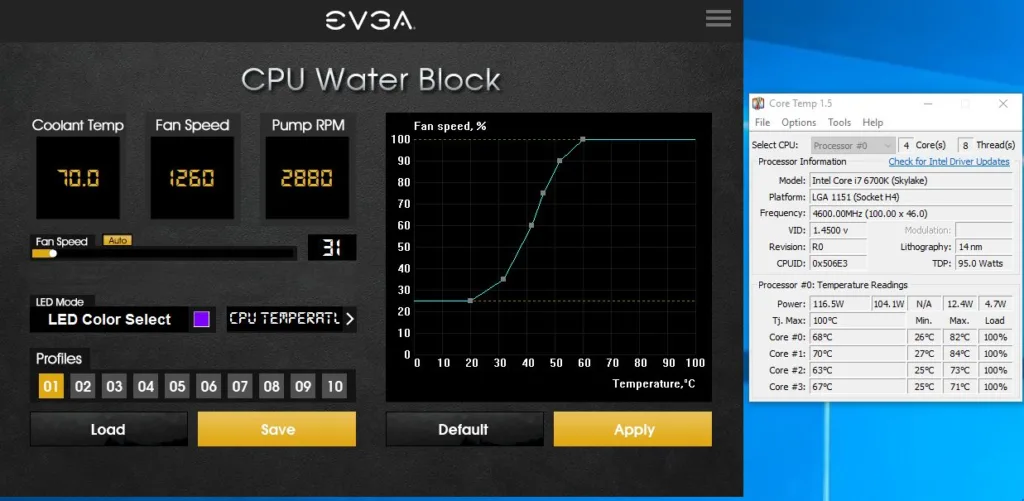 Even though OCCT’s full load is running, the fans speed and pump speeds are still set to ‘silent’ in the BIOS . When we changed to “Standard” or default normal fan settings, the temperatures dropped into the mid-30s while the pump speeds only increased to just below 3000 rpm while the fan speed increased to about 1440 rpm under full OCCT load at the same 4.6GHz overclock. We would suggest that the normal standard preset set in the BIOS is a great compromise for low noise and high performance for keeping one’s CPU cool while fine-tuning the fan and pump settings from the desktop using the new EVGA Water Block software.
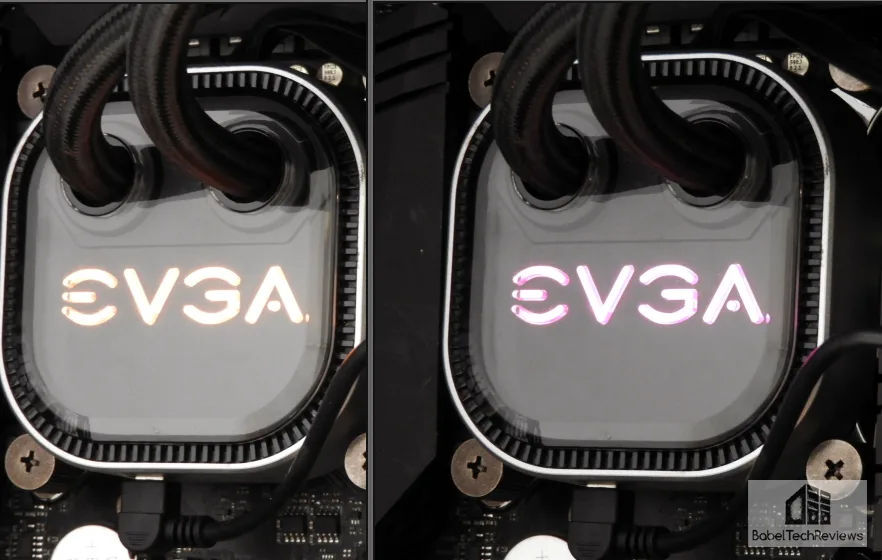
You can set the LED colors to match two predefined colors of the EVGA logo on the cooler head – one color each for hot and for cool CPU temperatures, and we hope EVGA adds more options to add more colors so as to watch the in-between temperatures change. We picked “Rainbow” for our own choice as the logo colors cycle through several color choices. We look forward to further development of this software and find that it is useful right now.
Conclusion
When it comes to cooling your overclocked hot Intel or AMD CPU efficiently and quietly, EVGA is now a great company to turn to and we are quite impressed with their first 280mm CPU liquid cooler. We see the EVGA CLC 280mm cooler easily surpasses the cooling ability of our Seidon 240mm cooler and its fans can be set to be much quieter.
If you have a Core i7 or FX CPU that you really want to push to its maximum overclock, the EVGA CLC 280 is a great choice if your case has the room. The EVGA CLC 280 is also very quiet unless the fans are set for ‘performance’ mode which we found unnecessary at 4.6GHz or even at 4.7GHz.
The EVGA 280 CLC
Pros:
- The EVGA CLC 280 is a great watercooling solution for overclocking almost any modern Intel or AMD CPU to its limits and it surpasses the Cooler Master Seidon 240M.
- The EVGA CLC 280 is a complete self-contained compact liquid system that never needs refilling
- Everything is included for installation.
- EVGA’s 24/7 phone tech support is awesome.
- Parts are well marked and the instructions are clear and well written and the installation video is great for watercooling novice builders.
- The PWM fans are quiet and they can be managed in the BIOS as well as further fine-tuned in the software.
- The just released CPU Waterblock SW gives the ability to set fan speeds and also control the RGB lighting.
- Warranty is five years.
Cons:
- Size. The EVGA CLC 280 radiator is large and it will not easily fit inside smaller cases other than in a large full tower. Measure your case first.
The Verdict
EVGA’s 280 CLC is an excellent no-compromise all-in-one quiet cooler for a reasonable price considering its build, ease of installation, and all-inclusive package. It is well-deserving of our “Editor’s Choice” award and it easily cools our own overclocked hot-running Skylake i7-6700K to 4.7GHz. Highly recommended!
Our next evaluation will feature 2TB Seagate 7200 rpm FireCuda SSHD performance versus a 2TB Toshiba 7200 rpm HDD. There is a lot coming from us at BTR.
Happy Gaming!


Comments are closed.