The EVGA DG-77 Case Review featuring the Star Wars TITAN Xp
The EVGA DG-77 mid tower case was created for gamers who want all of the advantages of a full tower in a smaller footprint. It also is a show-off case with see-through tempered-glass panels which can transform into a RGP light show at the touch of a button. It can also be purposed more conservatively as we have done featuring our TITAN Xp Star Wars Collector’s Edition as a beacon of Light in a Dark place.
The DG-77 is EVGA’s new $139.99 flagship case now available for pre-order from Newegg, and we have received a black edition for review at our request from EVGA. There is also an all-white edition which sells for ten dollars more. The EVGA DG-77 has all of the features of high-end watercooling-friendly cases, including dust filters, but its most compelling feature for us is its ability to display a video card in a vertically mounted position. The DG-77 is a complete rethinking of modern case design since there is no hard drive cage although there is room to install 2 SSDs and 2 HDDs with lots of extra room for even hard-core watercooling setups.
The EVGA DG-77 has good airflow partly thanks to 4 factory-installed 120mm fans (2 top, 2 front) with options to install extra fans for cooling more extreme hardware. However, after we replaced the front two fans with the EVGA 280mm CLC CPU radiator, it was insufficient by itself to draw enough cooling air in from the front of the PC as the glass panel partially restricts the airflow, but we solved this issue.
We have used a full tower Thermaltake Chaser MK-I for the past five years, and although it has largely gone out of style, we like its roominess. We need to regularly switch hardware in and out for benchmarking, and up until now, only a full tower would do. However, after we received our TITAN Xp, we wanted a better-looking case and the EVGA DG-77 delivers in spades without compromising one bit on convenience or on roominess.
The aim of EVGA is to give their customers value and functionality with a handsome and especially roomy high-end mid-tower that can be easily customized. The DG-77 has a look that each gamer can define for himself. We chose a very conservative build. Others may choose differently as demonstrated by EVGA’s professionally imaged picture below.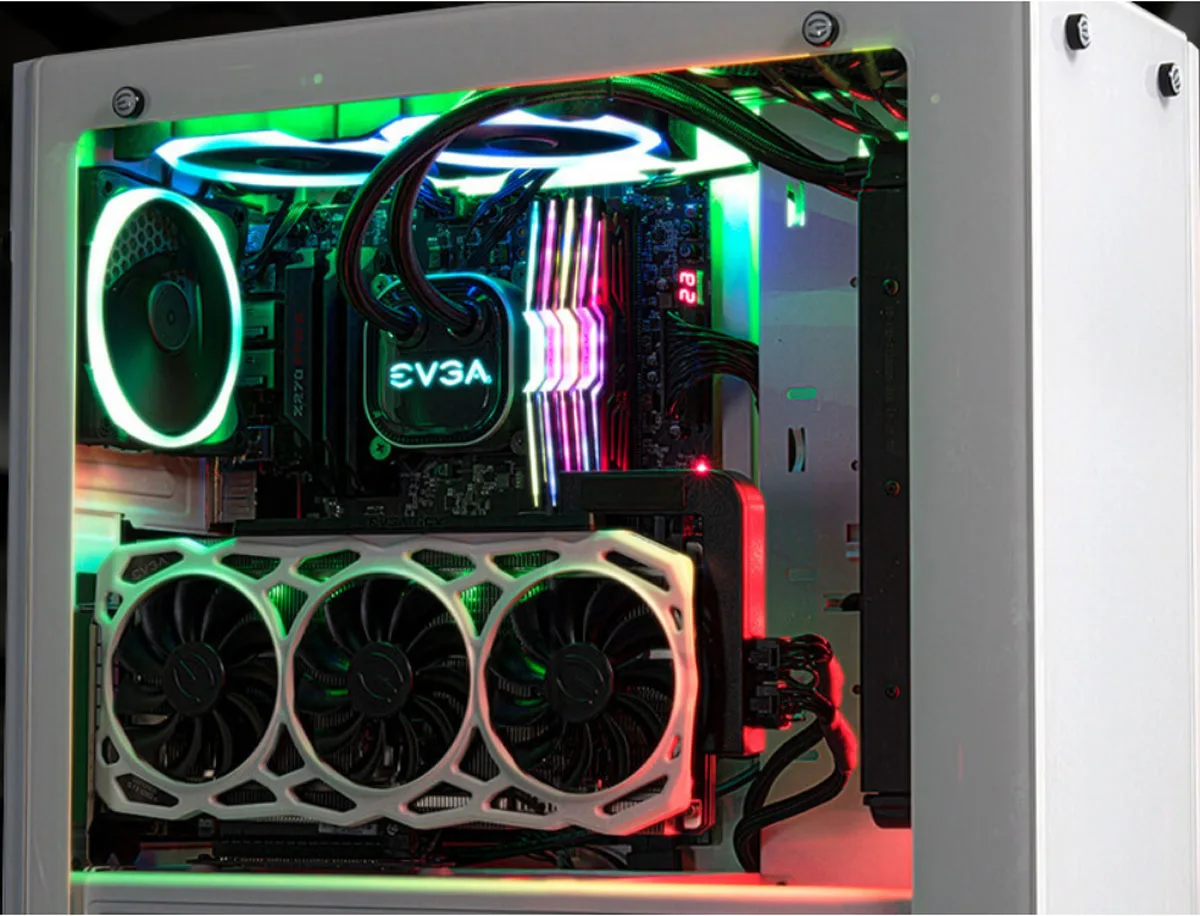
The EVGA DG-77 is a mid-tower case with a large, roomy all-matte black interior, and we found it really easy to fit our hands around the hardware that we installed inside. Until now, we believed that there was much more room in a full tower over a mid-tower, but the DG-77 case has changed our mind.
The EVGA DG-77 case is an extraordinarily handsome case but a picture does it little justice compared to “in person” and our own images will simply attempt to capture the excitement and experience that we had when building a new PC with this well thought-out mid-tower case. This case is also the most challenging that we have ever attempted to photograph since 3 sides are a dark tempered glass that reflect like mirrors.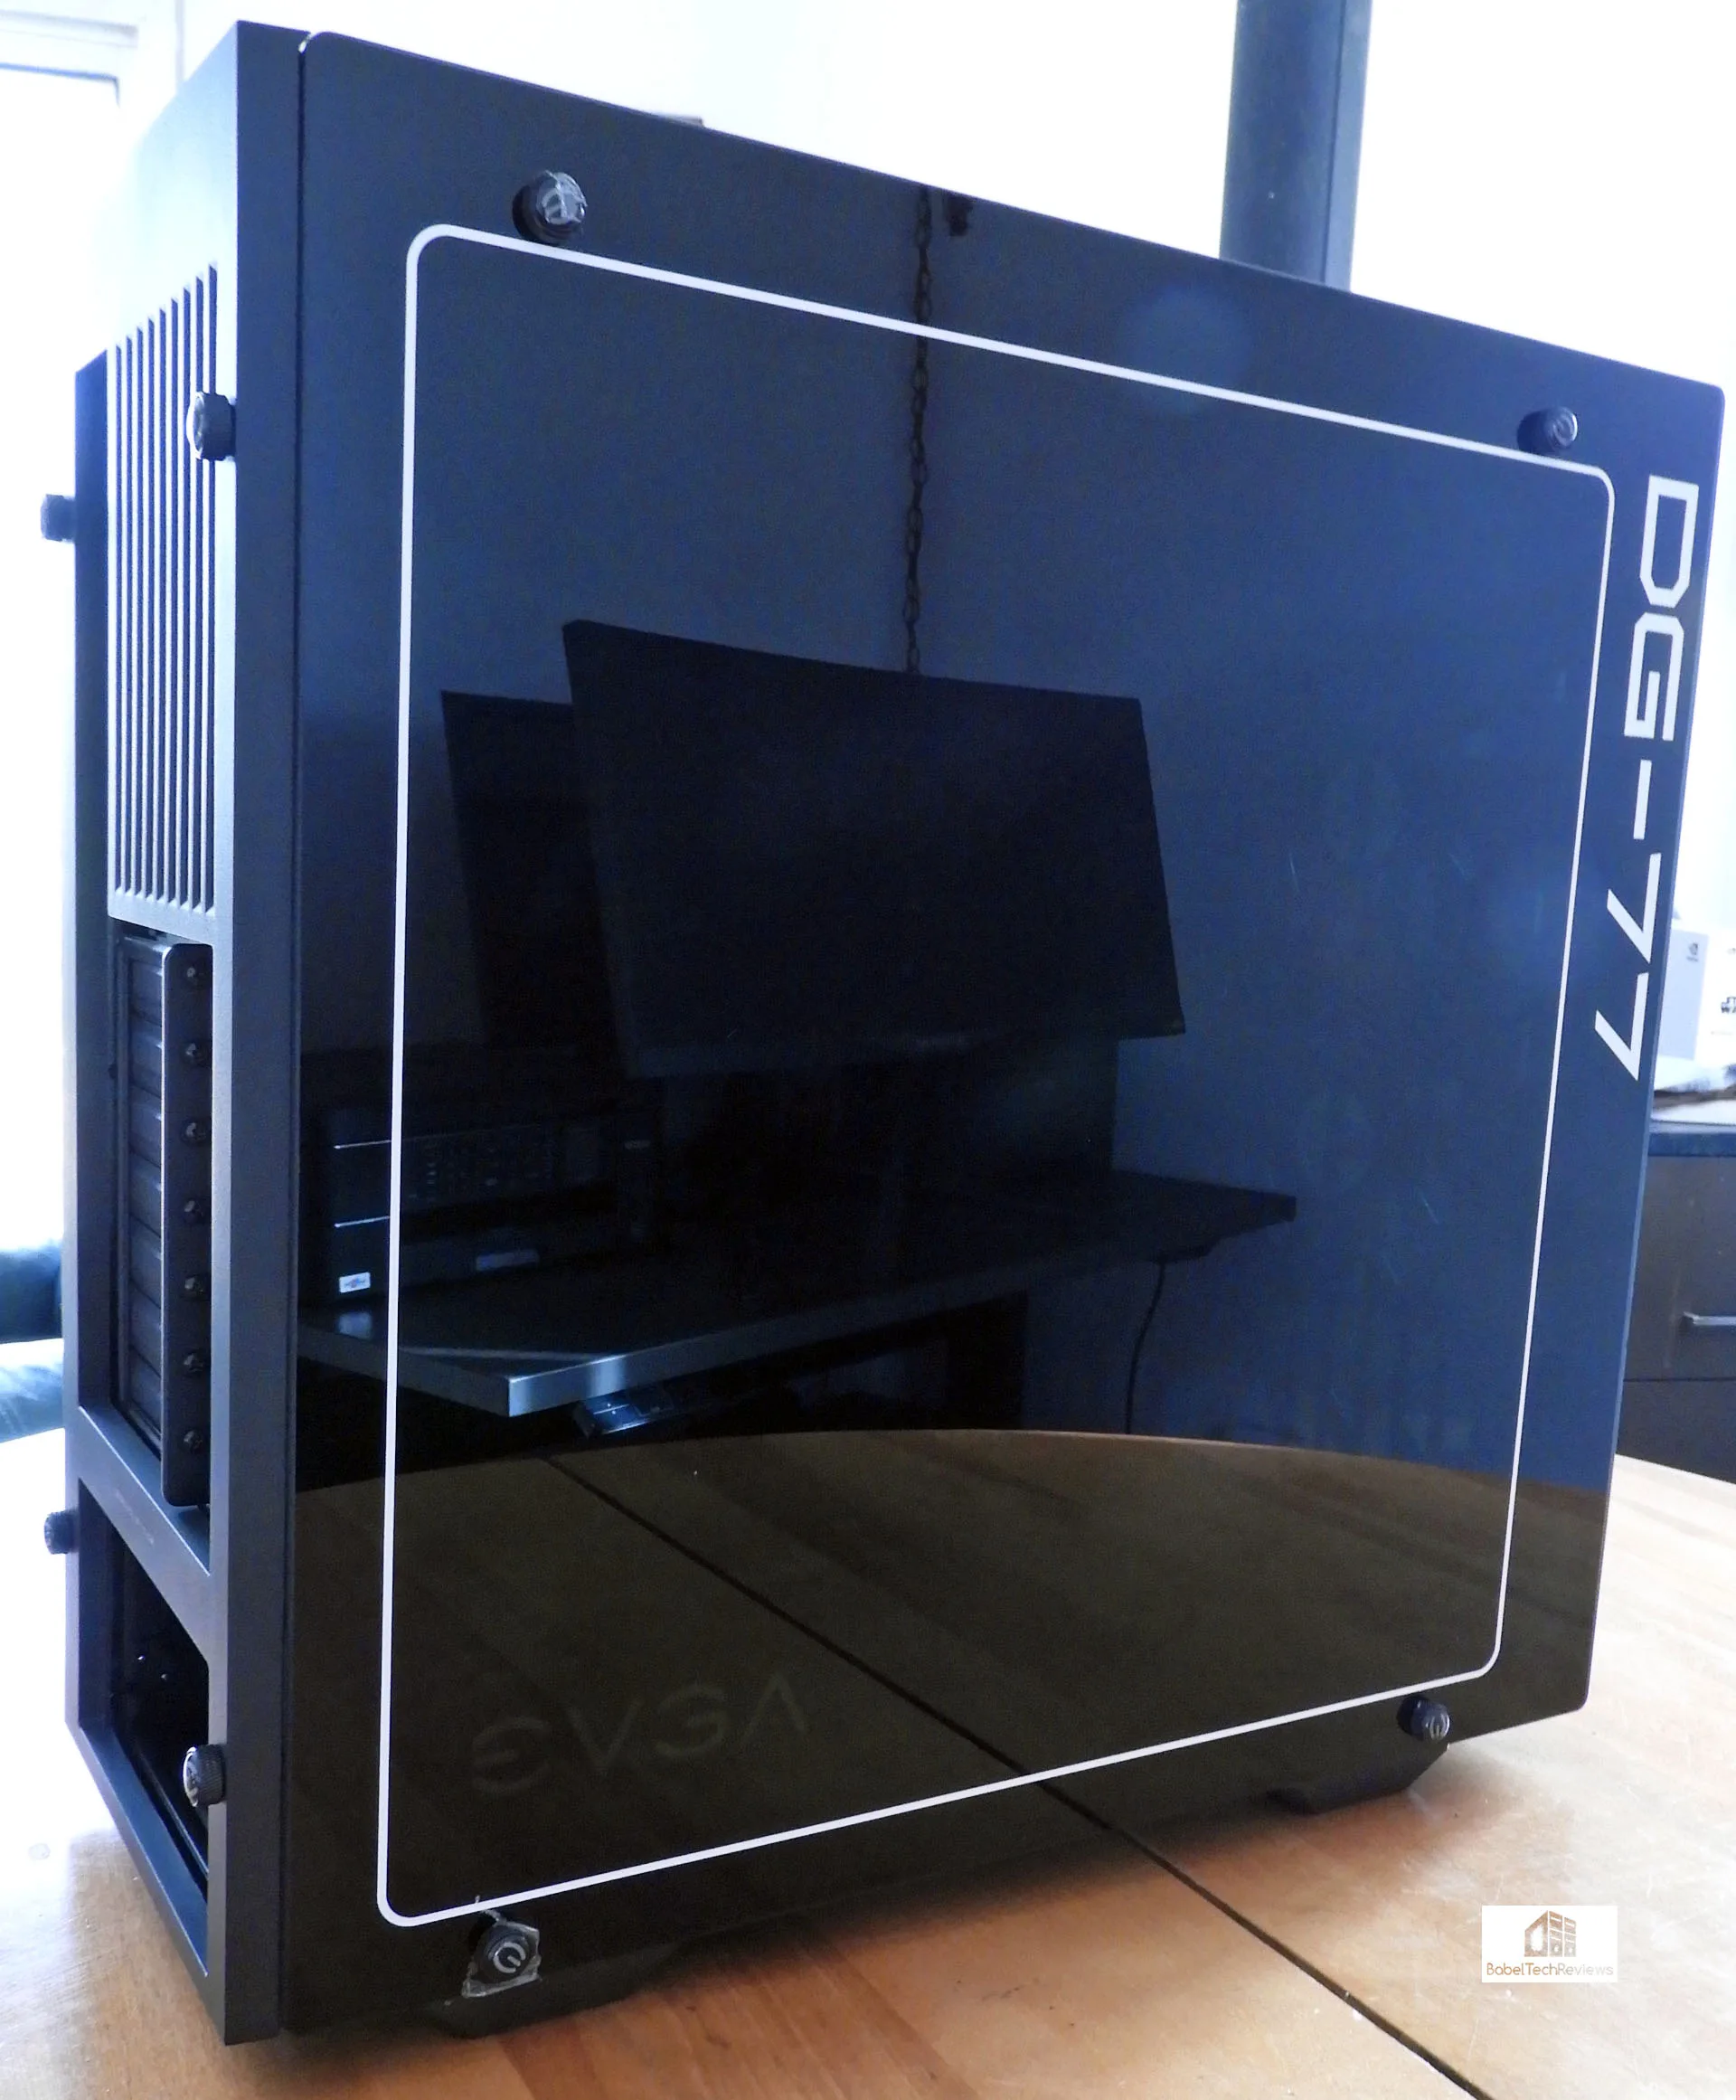
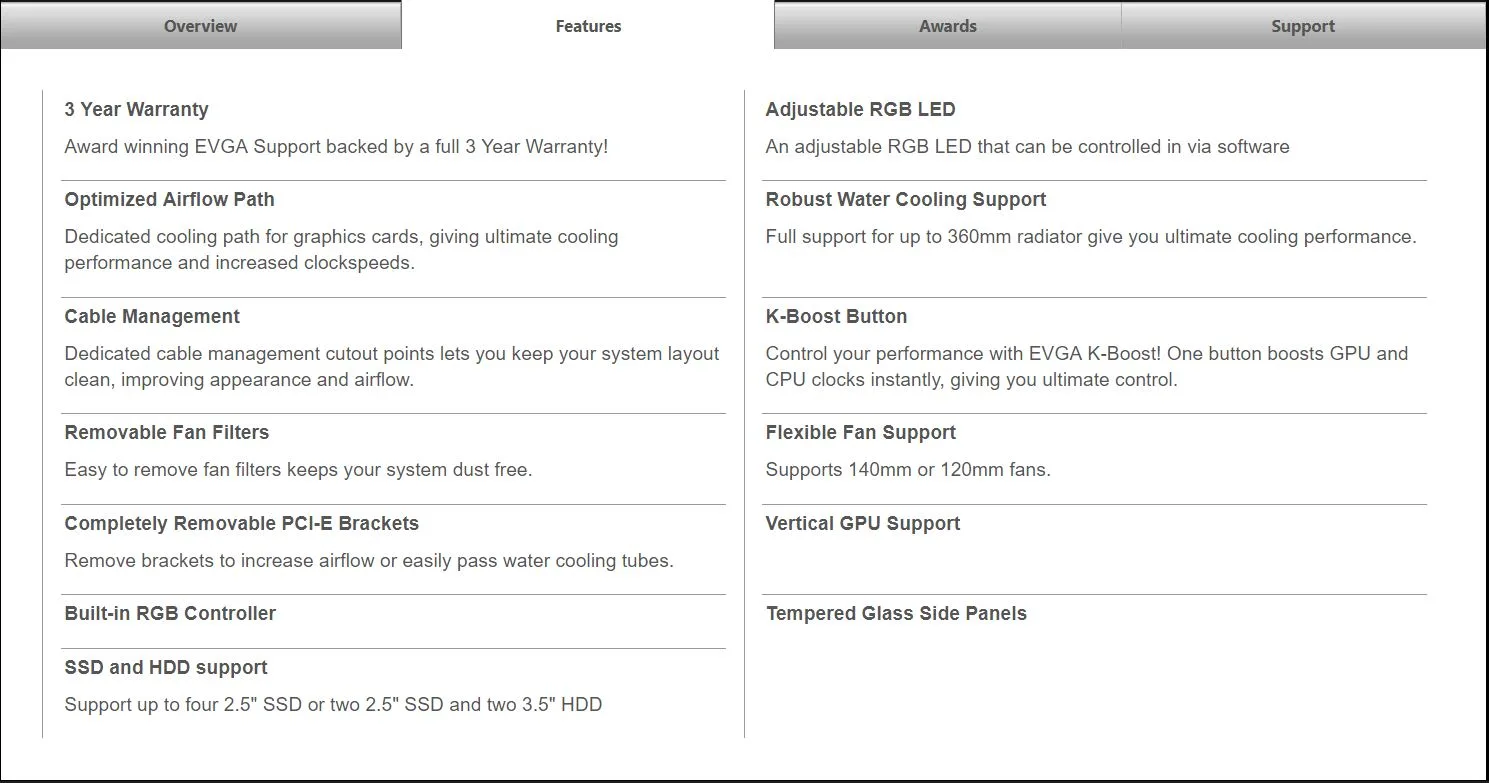
As befits a high-end case, the fans are protected by filters that act to prevent dust build up. In addition, the cable routing and management are excellent as this build turned out not only to be relatively quick and easy, but one of the cleanest builds that this editor has attempted. Gamers are given full control over RGB lighting using EVGA’s DG tuner, and enthusiasts can overclock at the touch of a case button using the K-Boost feature.
There is a 3 year warranty on the DG-77 as noted by the specifications and the features from EVGA’s website:
Here is a Youtube video introducing the case from EVGA;
There are three other cases in the DG lineup. Here are the details from EVGA’s website.
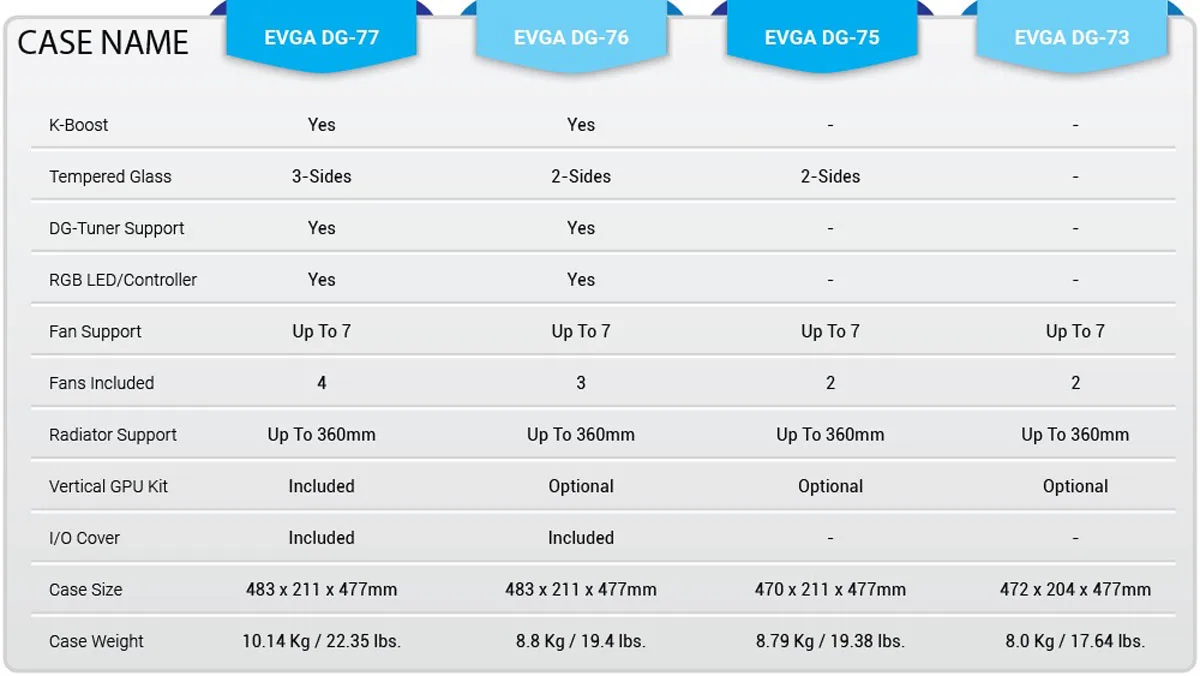
It looks like a very good case line-up from EVGA. Let’s unbox the DG-77 and then build our system.
The DG-77 Unboxing
The EVGA DG-77 comes well-packed in a tough cardboard box that also advertises its features in retail stores. Although it looked like the delivery company might have used the box for target practice, its contents were perfectly preserved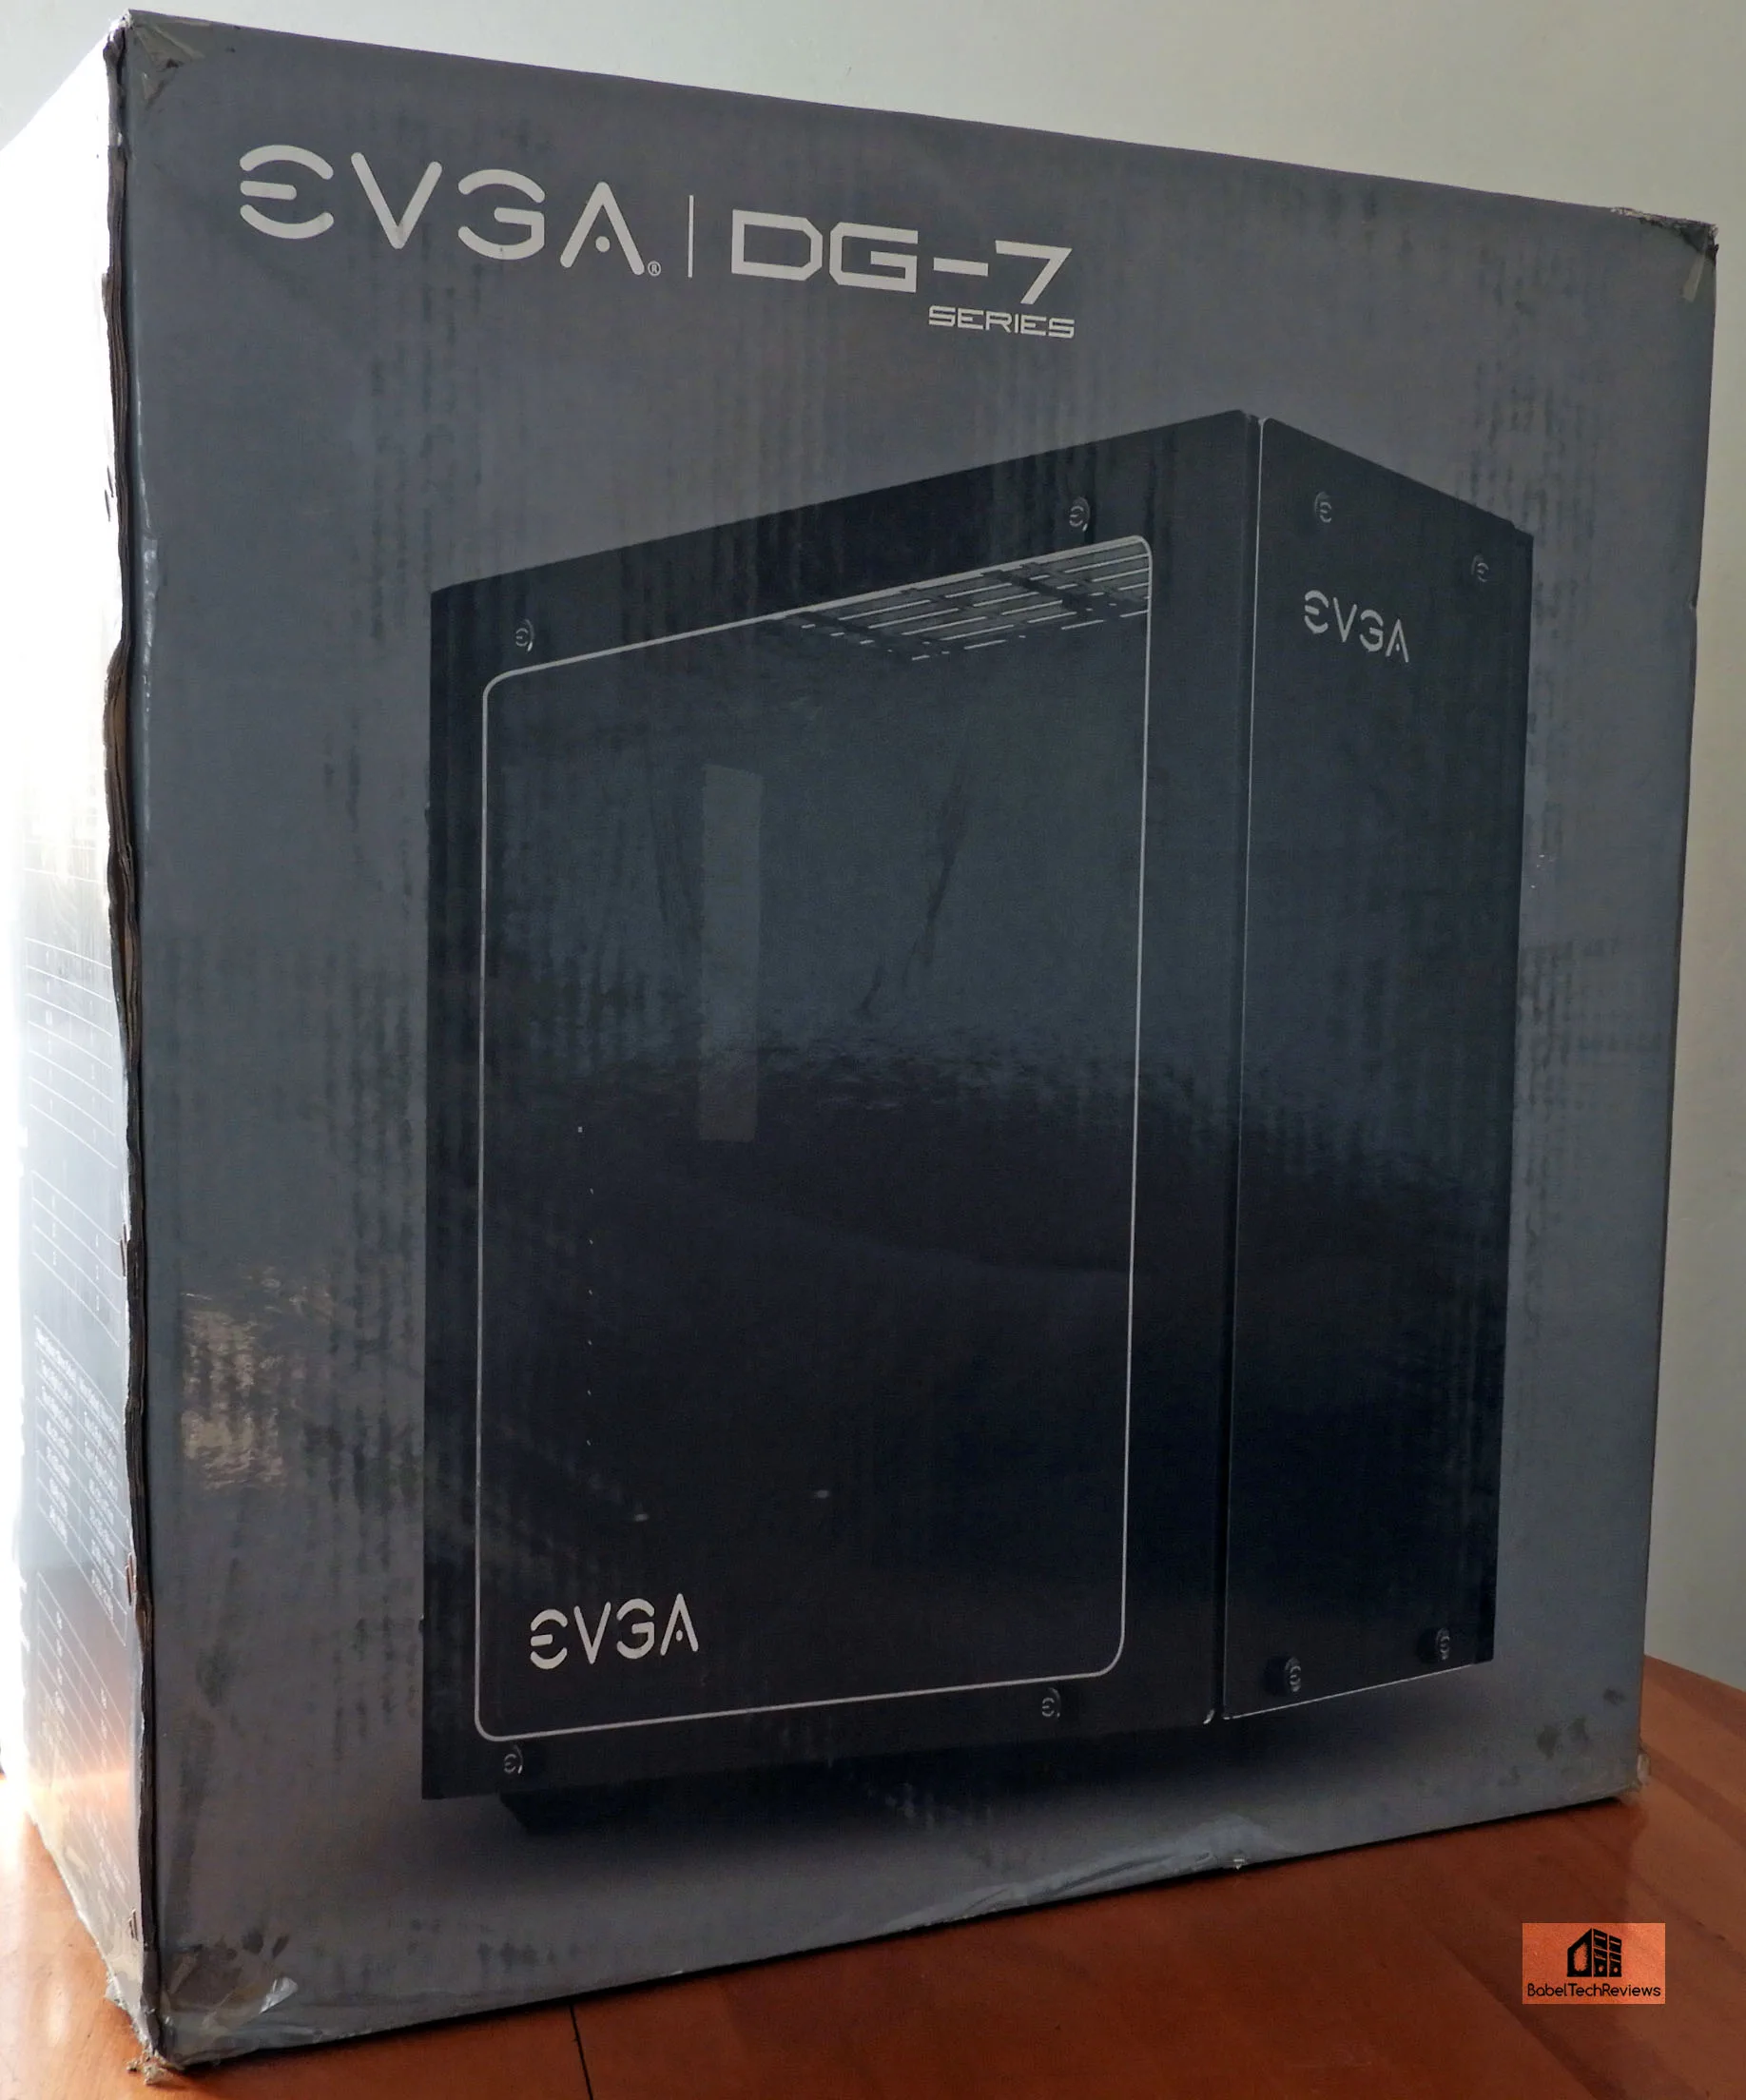 The box also advertises the EVGA DG-77’s features. The main differences between the DG-77 over the DG-76 is that the 77 has 3 glass panels instead of 2, a vertical video card mounting kit is included, and there are three included fans instead of two.
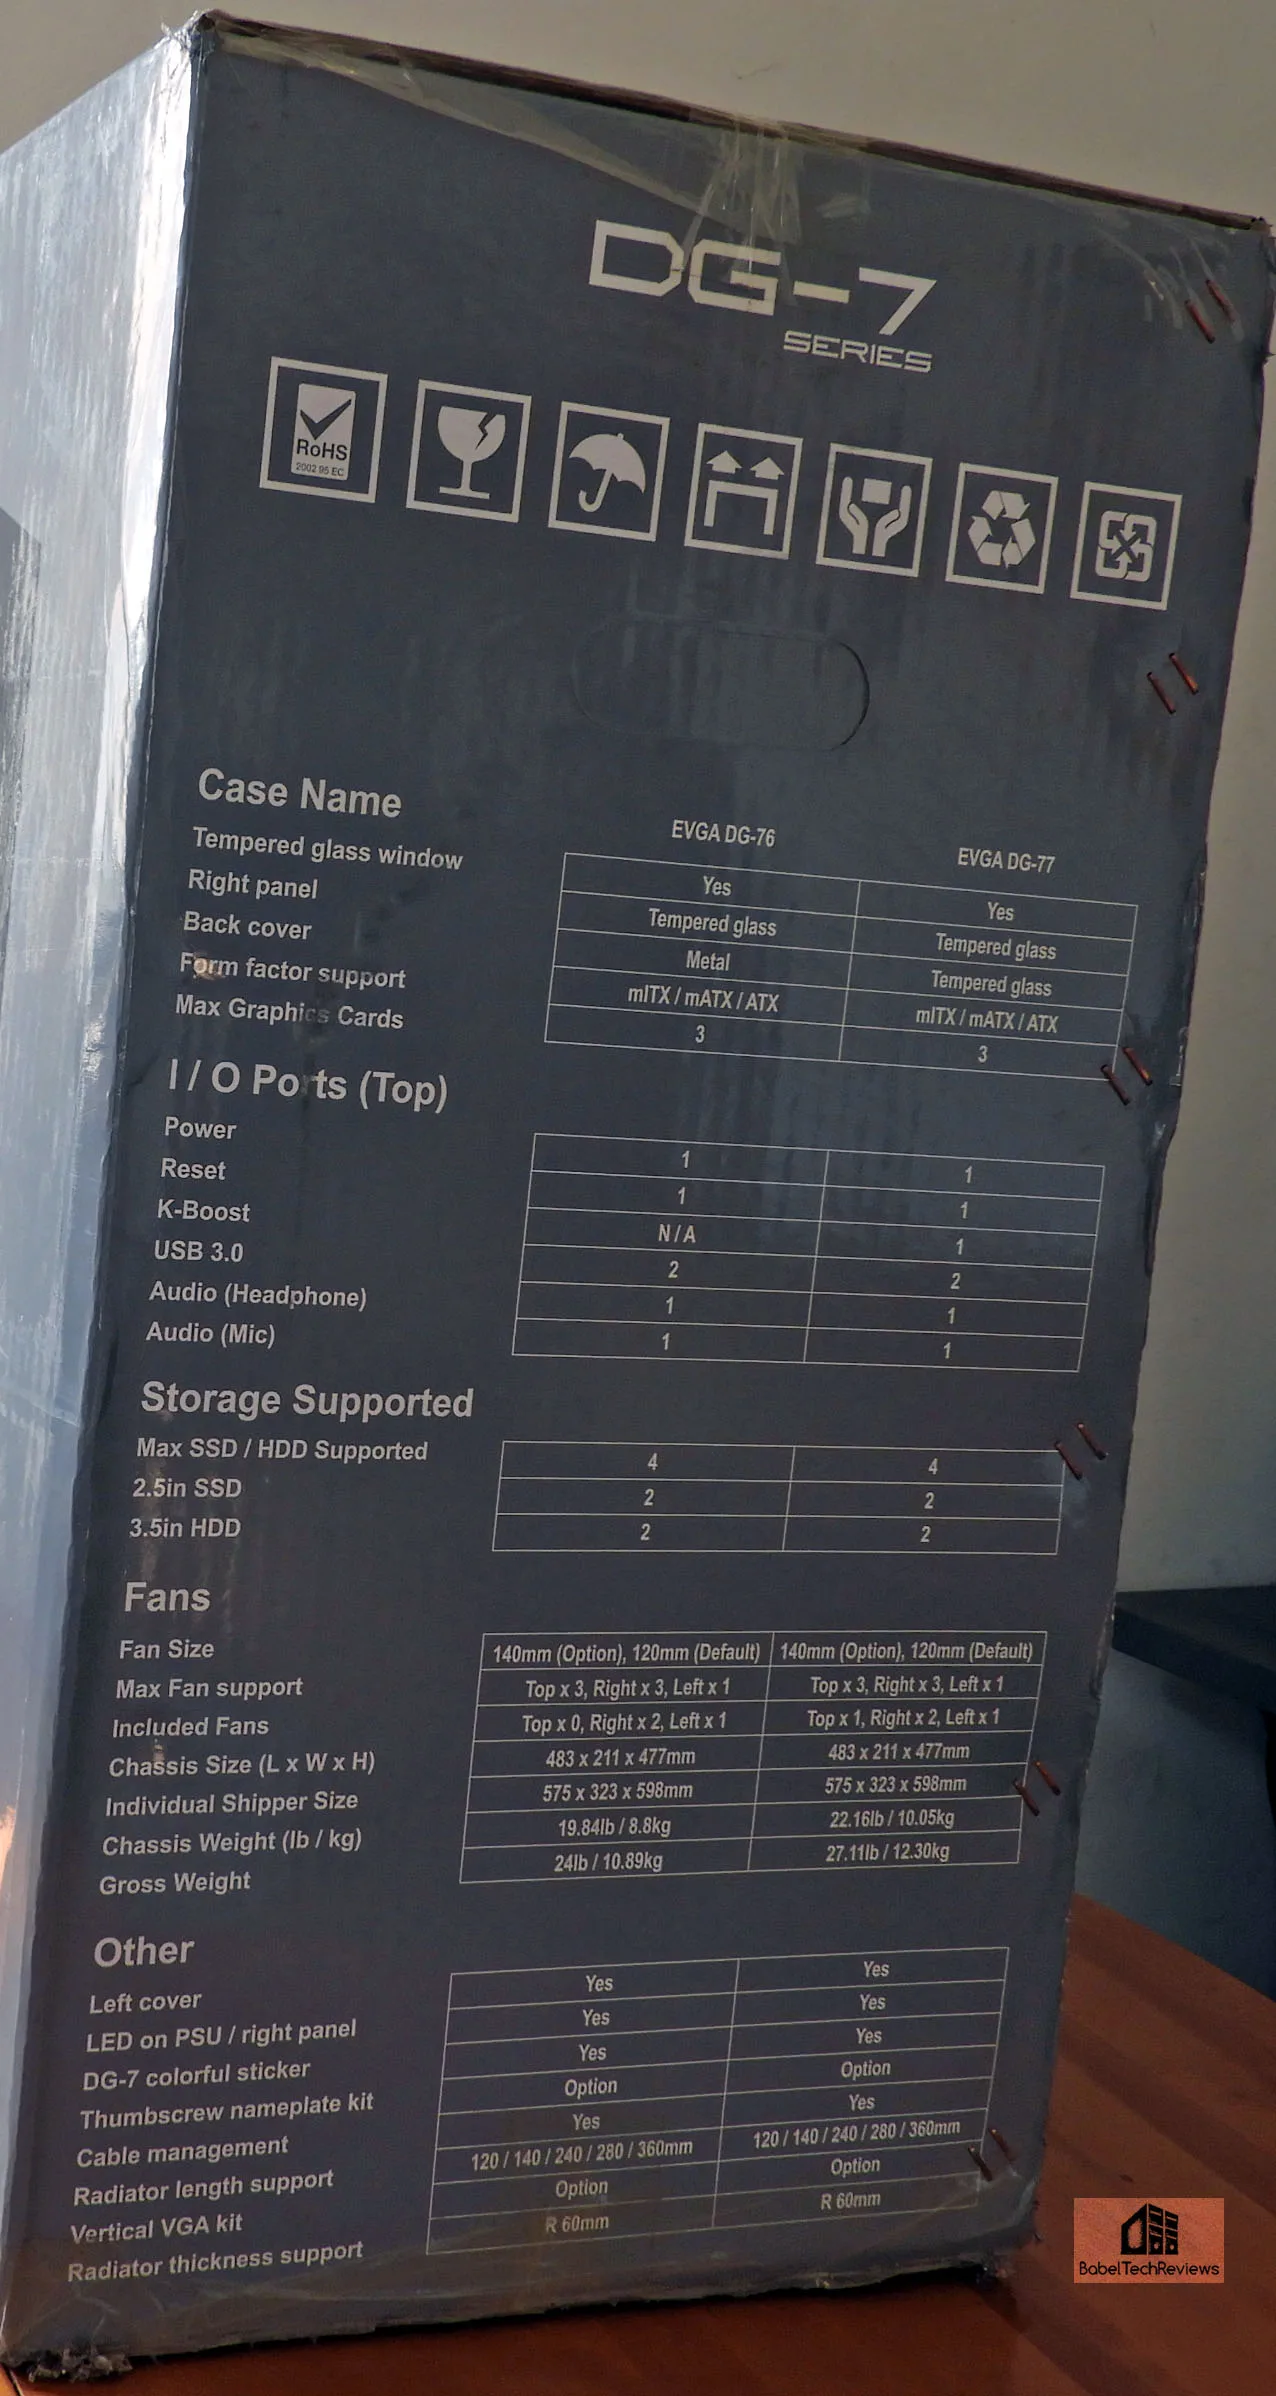
Here is another side but the box was damaged during shipping.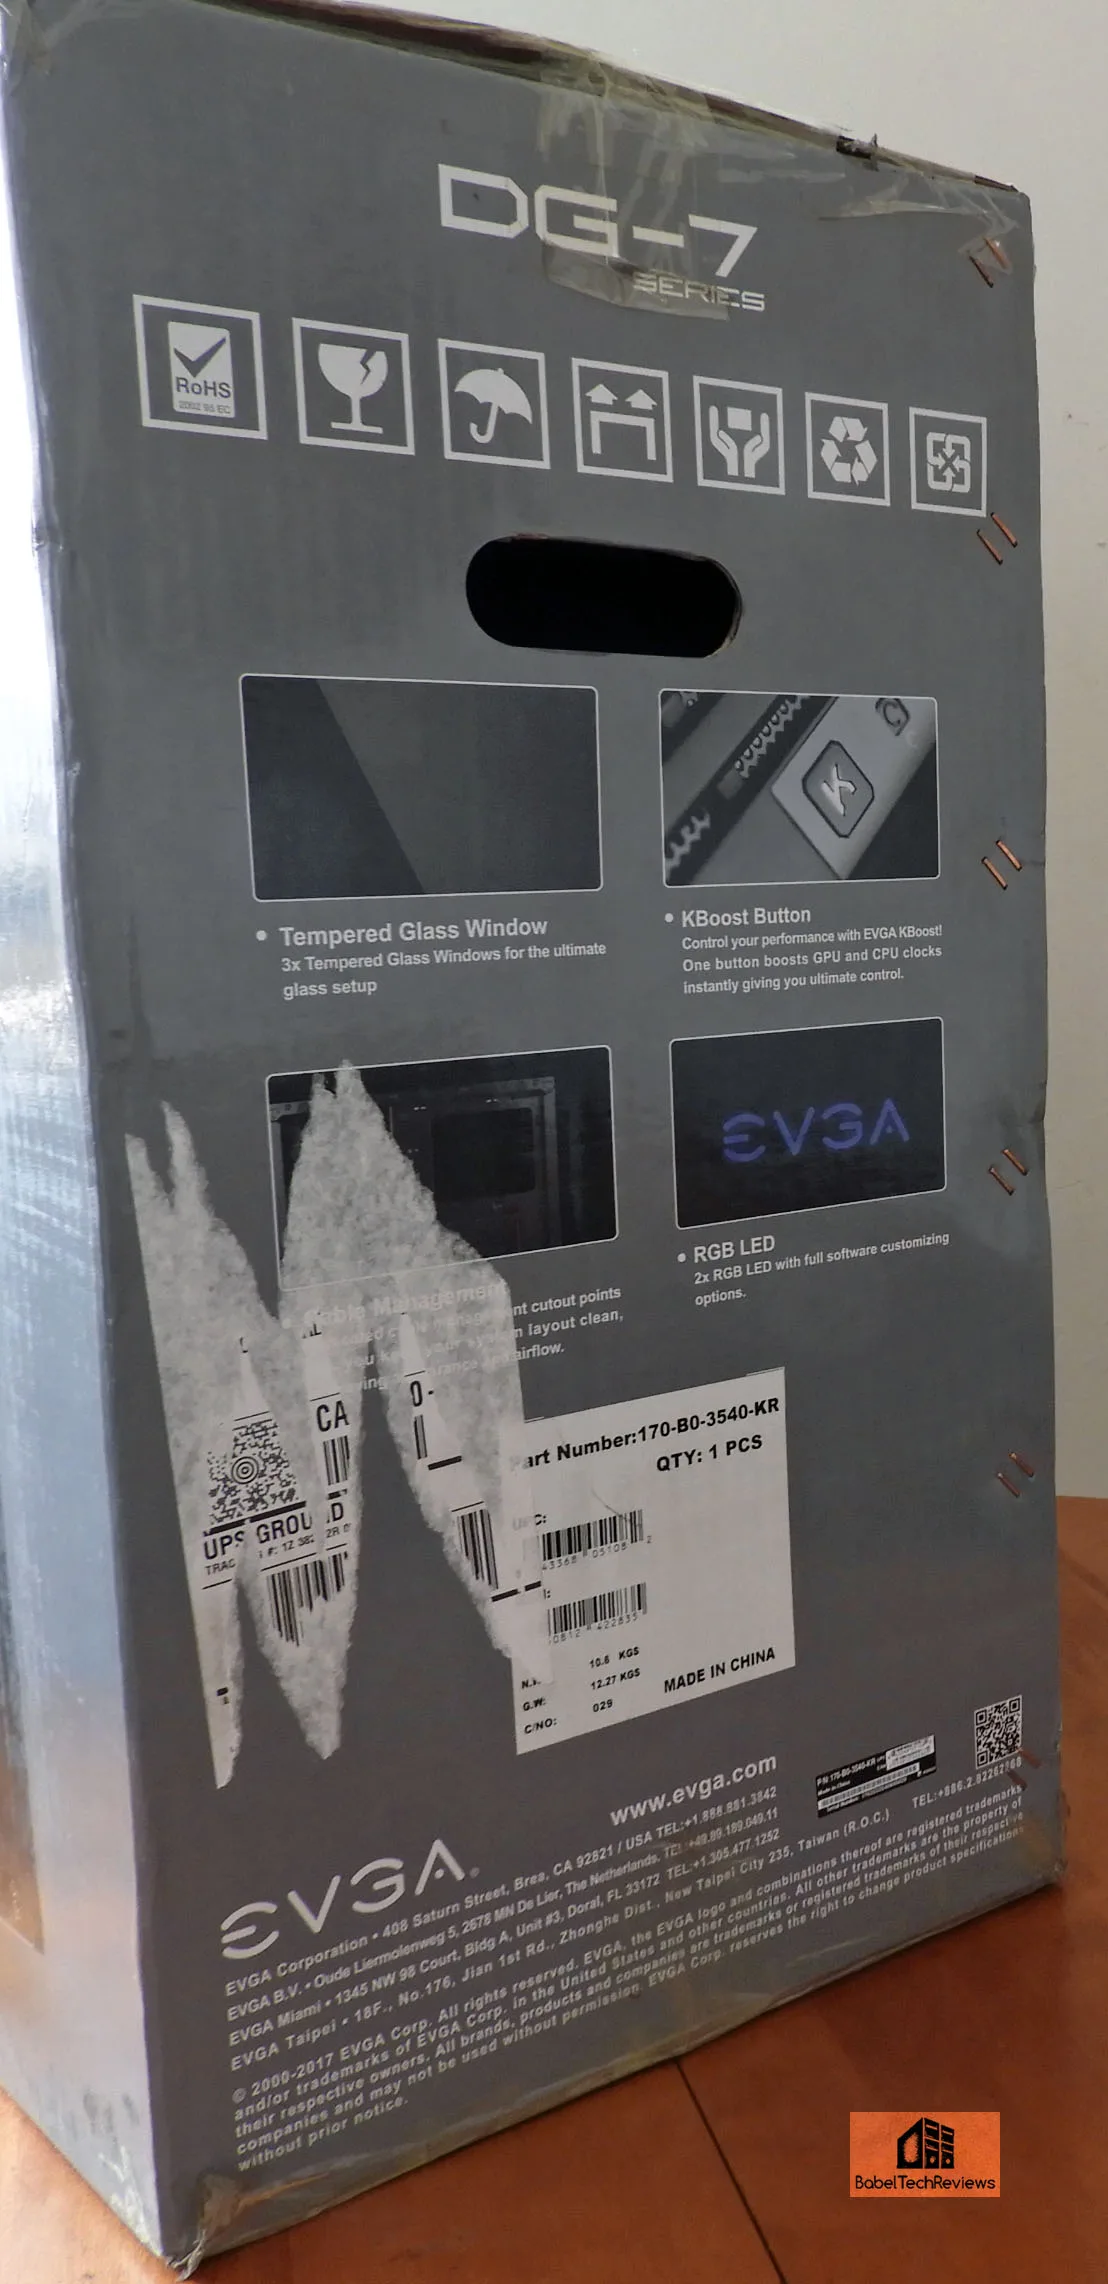
Fortunately, the EVGA DG-77 comes packaged with thick foam and a cloth covering to protect it. It is a minimal but effective use of packing and there is less to recycle.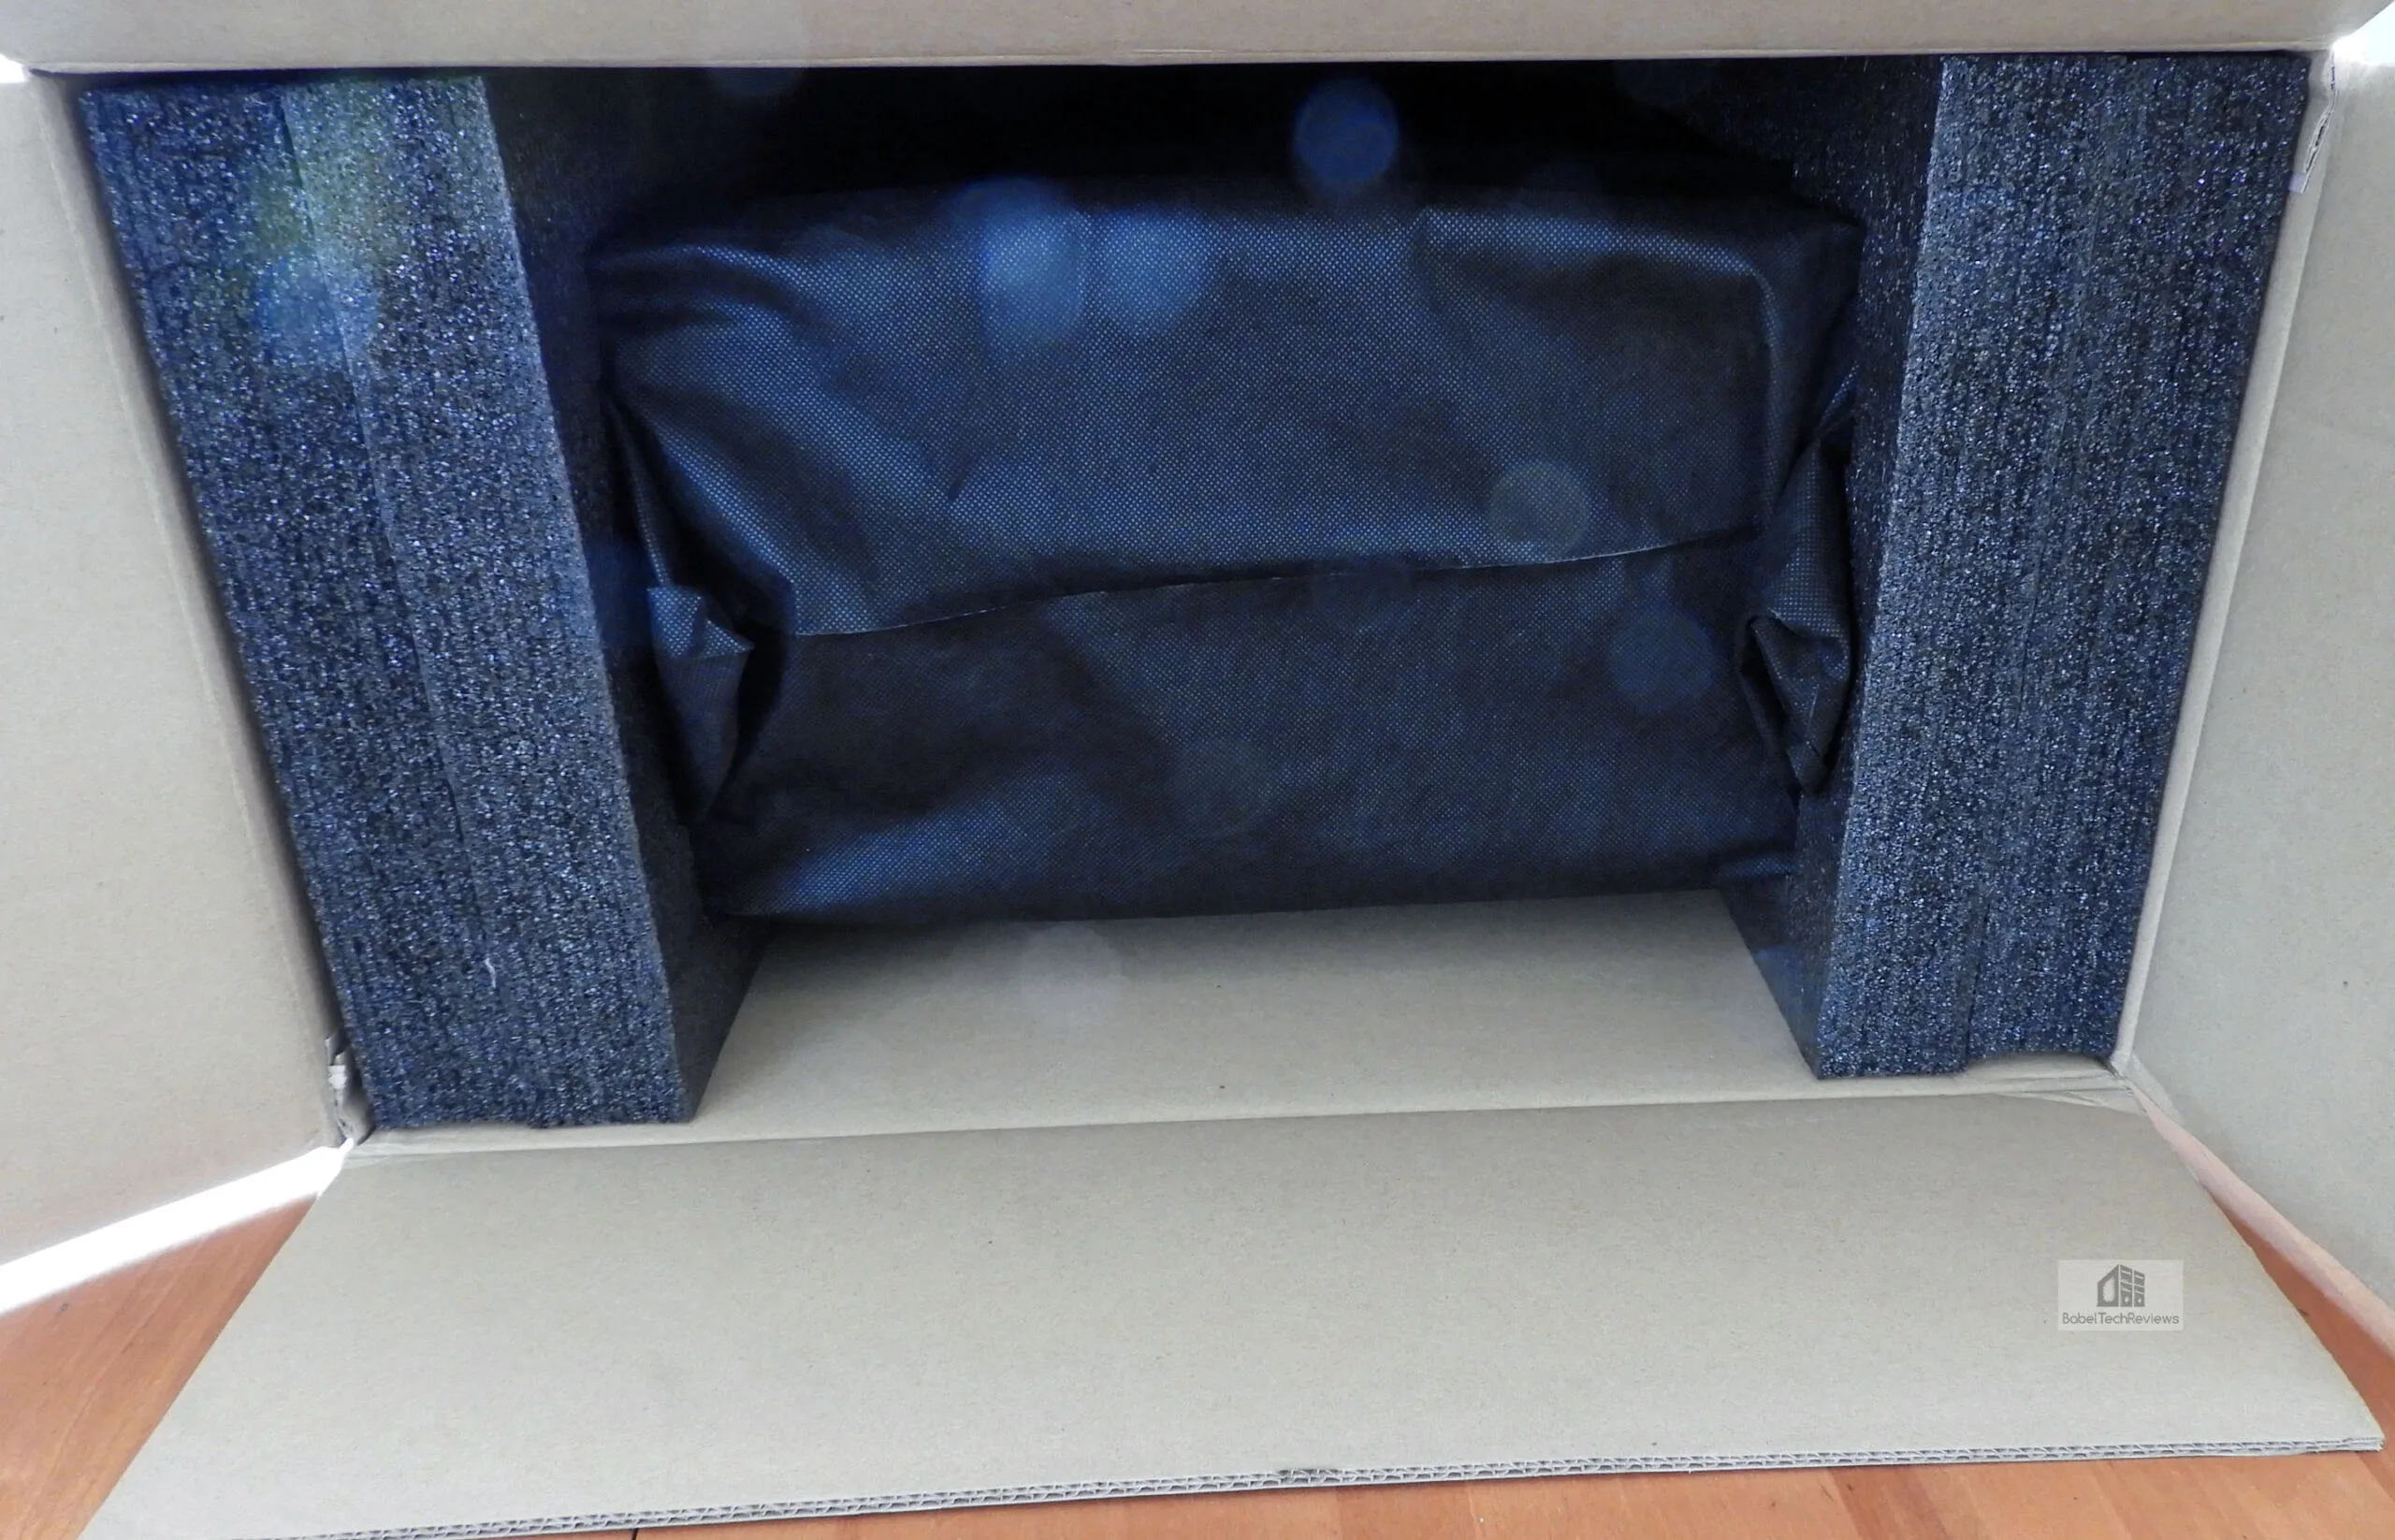
We give our thumbs up for the packing.
Building the EVGA DG-77
Here we see the EVGA DG-77 with the side panel off. The inside of the case is very nicely painted black. Not painting a case’s interior is a major cost-saving feature for a manufacturer and it often is used to differentiate a mid-range case from a high-end one. Inside the EVGA DG-77 is sufficient room for two large video cards and for large CPU air coolers. Here we see the interior of the case after we unpacked it for our build.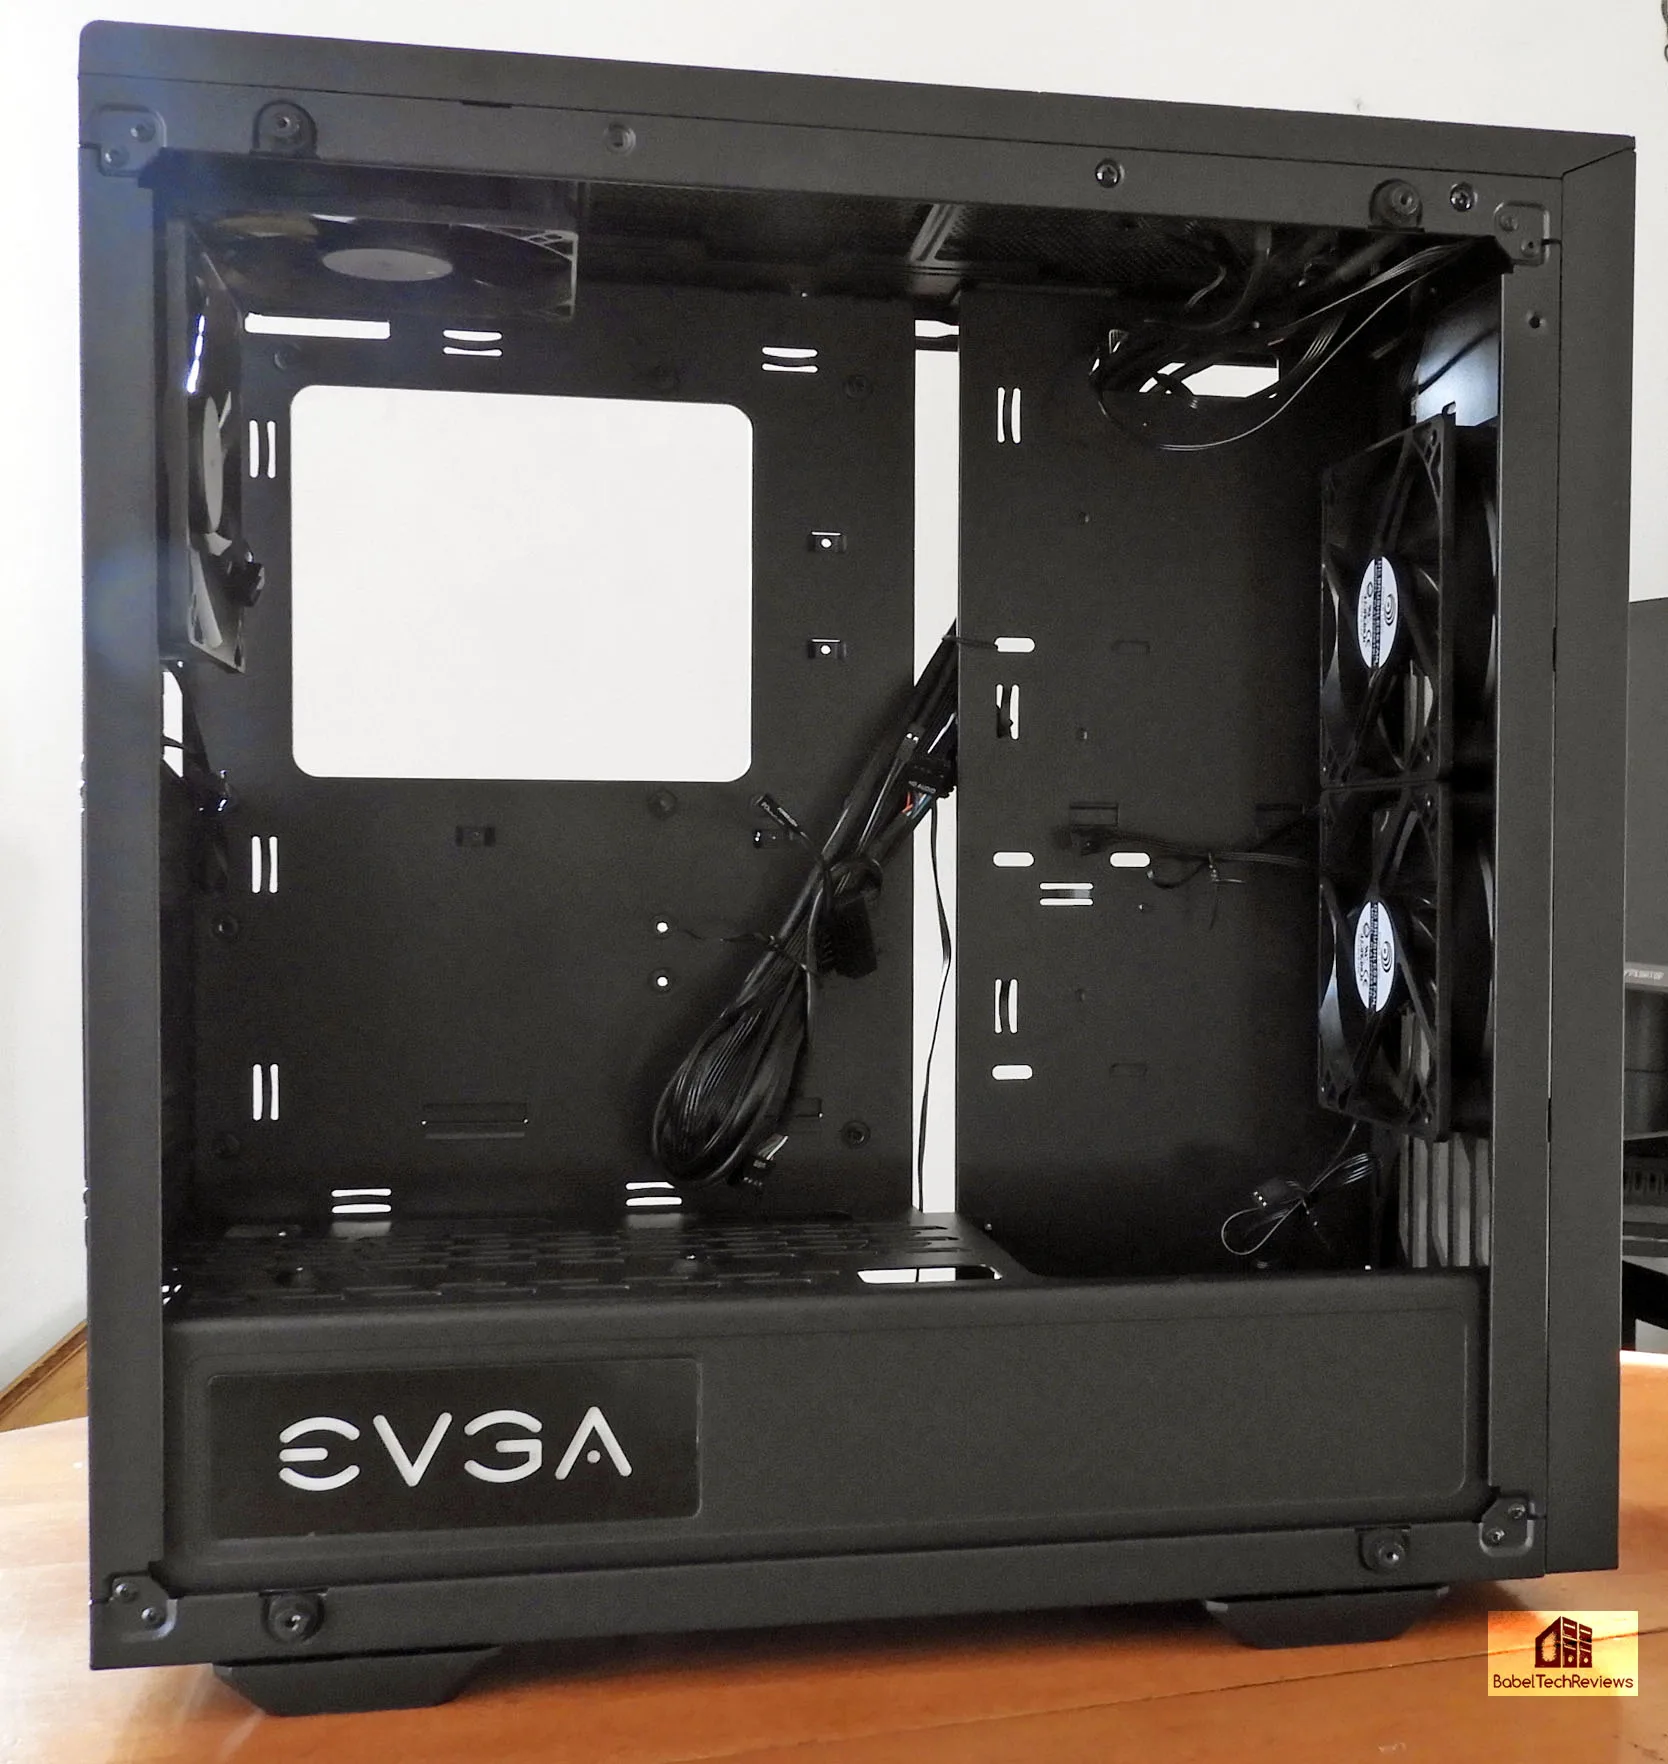
A full tower can be any size, but not a mid-tower. The secret of a successful mid-tower gamers’ case is to have it large enough for most enthusiasts without causing them suffering with the installation. In this regard, the EVGA DG-77 delivers as there is plenty of room with no sharp edges. There is a large cutout for the motherboard so that you don’t have to remove it just to install a CPU cooler or to upgrade a CPU.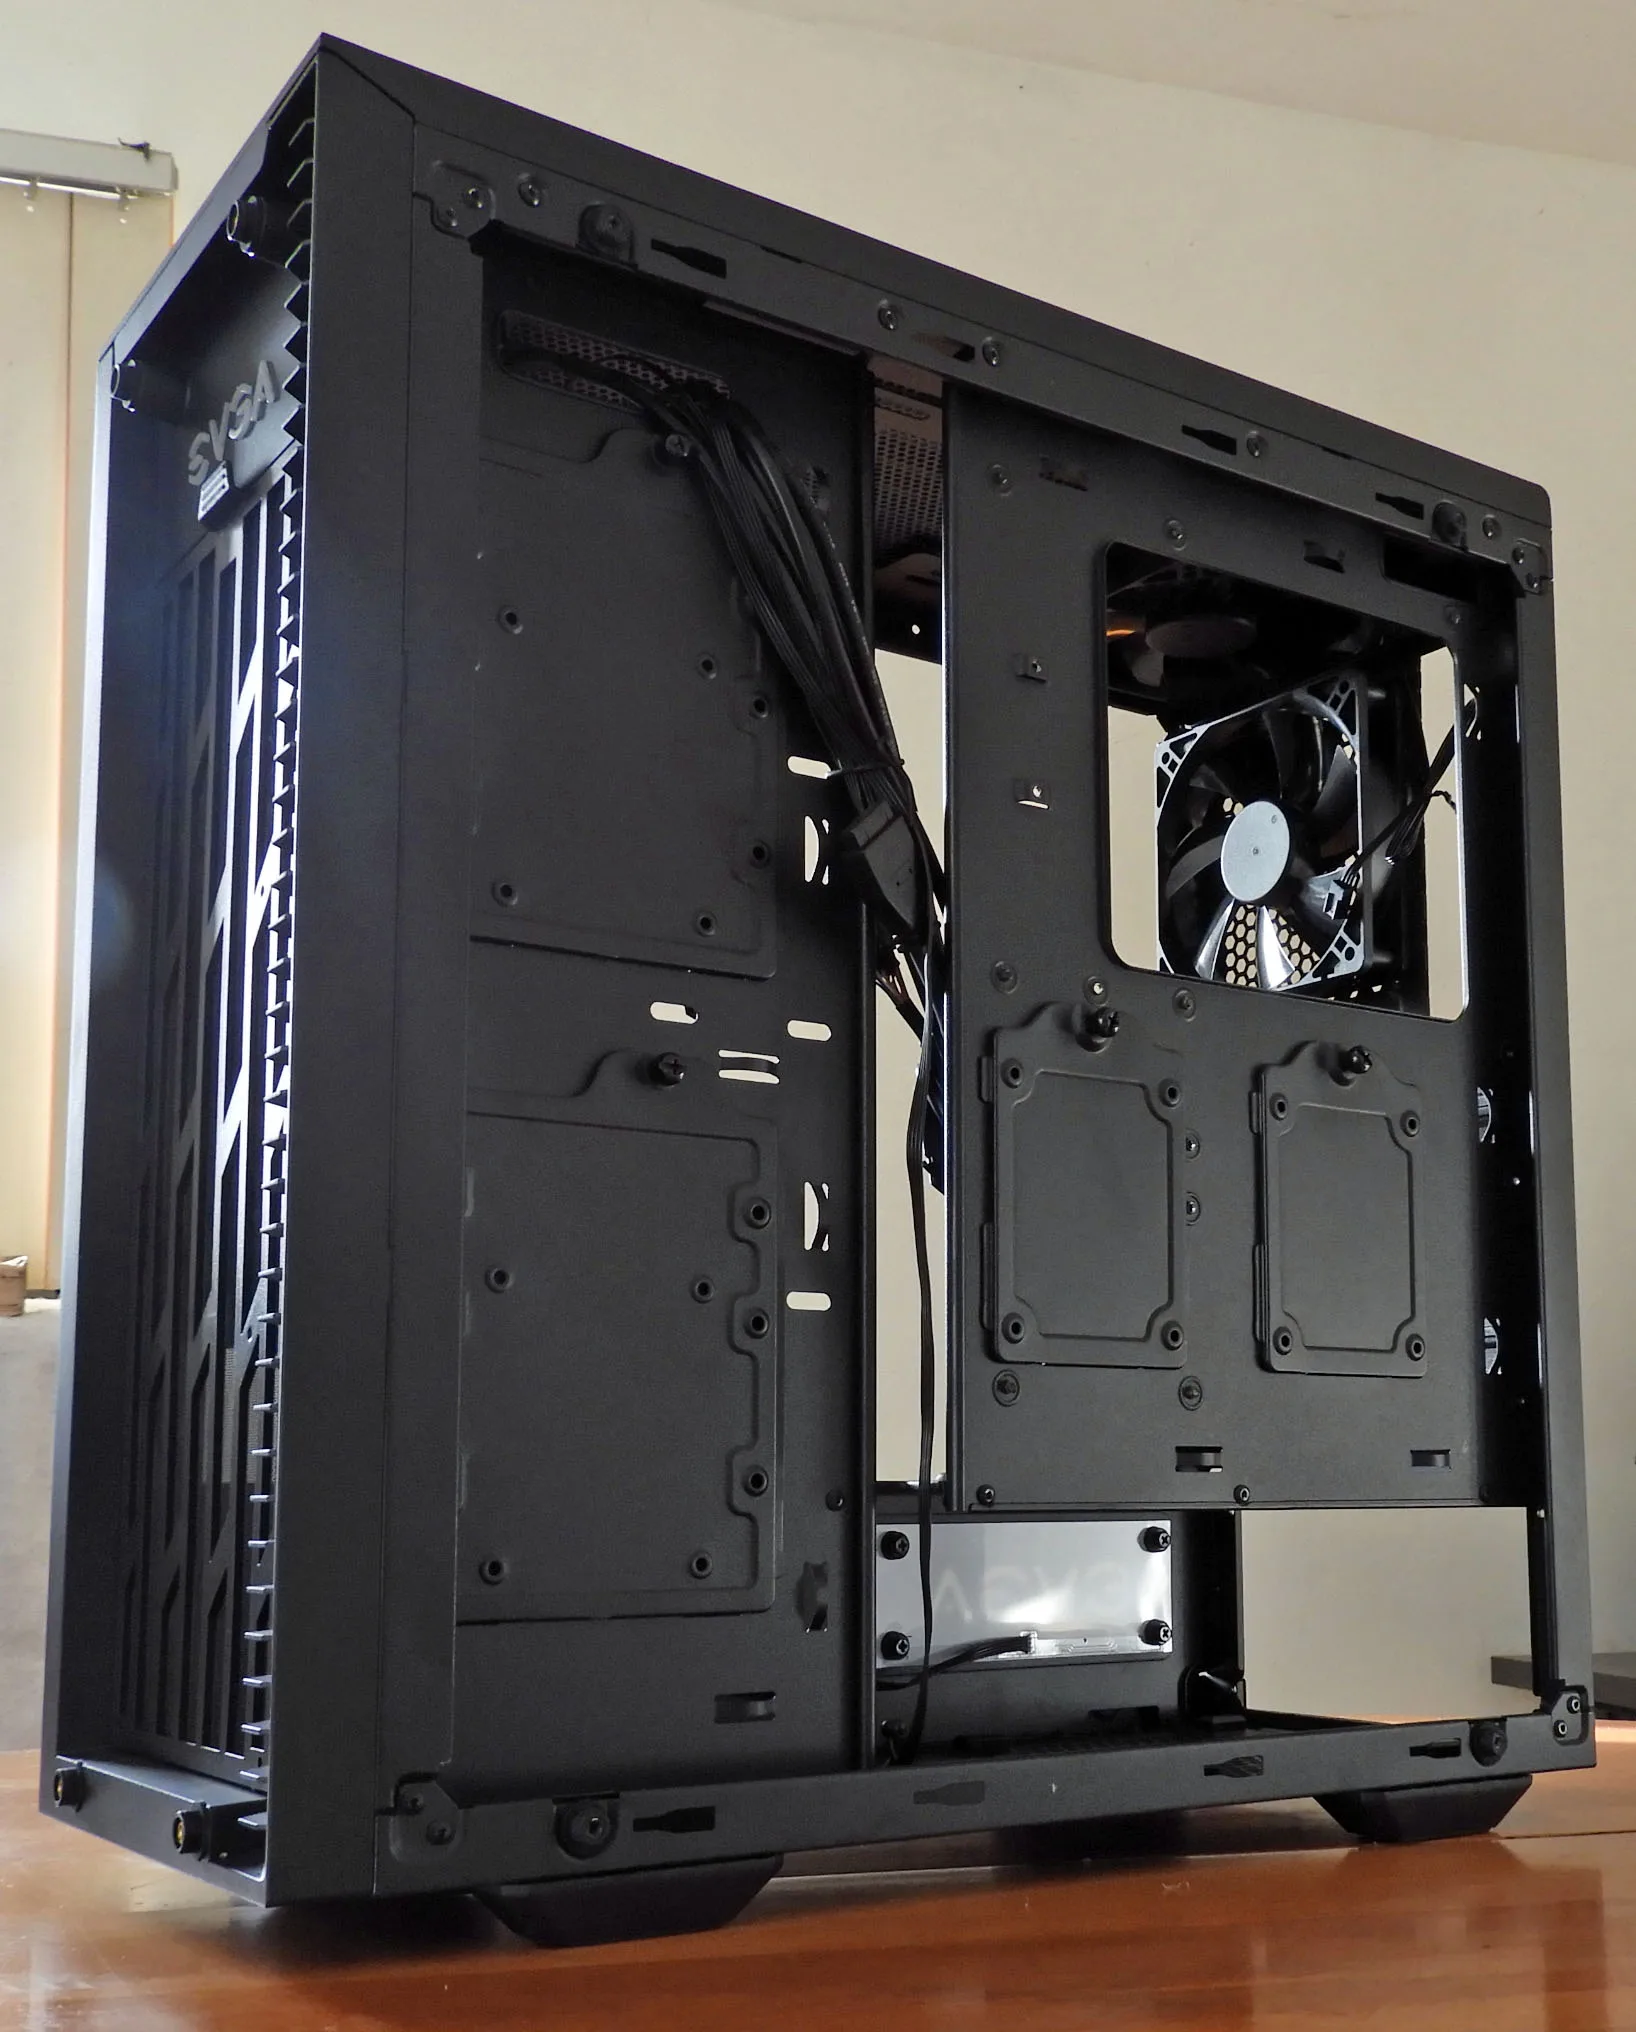
There are no rubber grommets covering the pass-through holes for cable management or for watercooling although the way the DG-77 case sections are partitioned, cable management is extremely easy. There is no hard drive cage which is part of the secret to efficient mid-tower case size management although there is room to install 2 SSDs and 2 HDDs on the section partitions. If you have more drives, you can use the bottom of the case in front of the PSU. If you want an internal optical drive, however, you are out of luck and will have to settle for an external USB 3.0 drive to watch your Blu-Ray movies.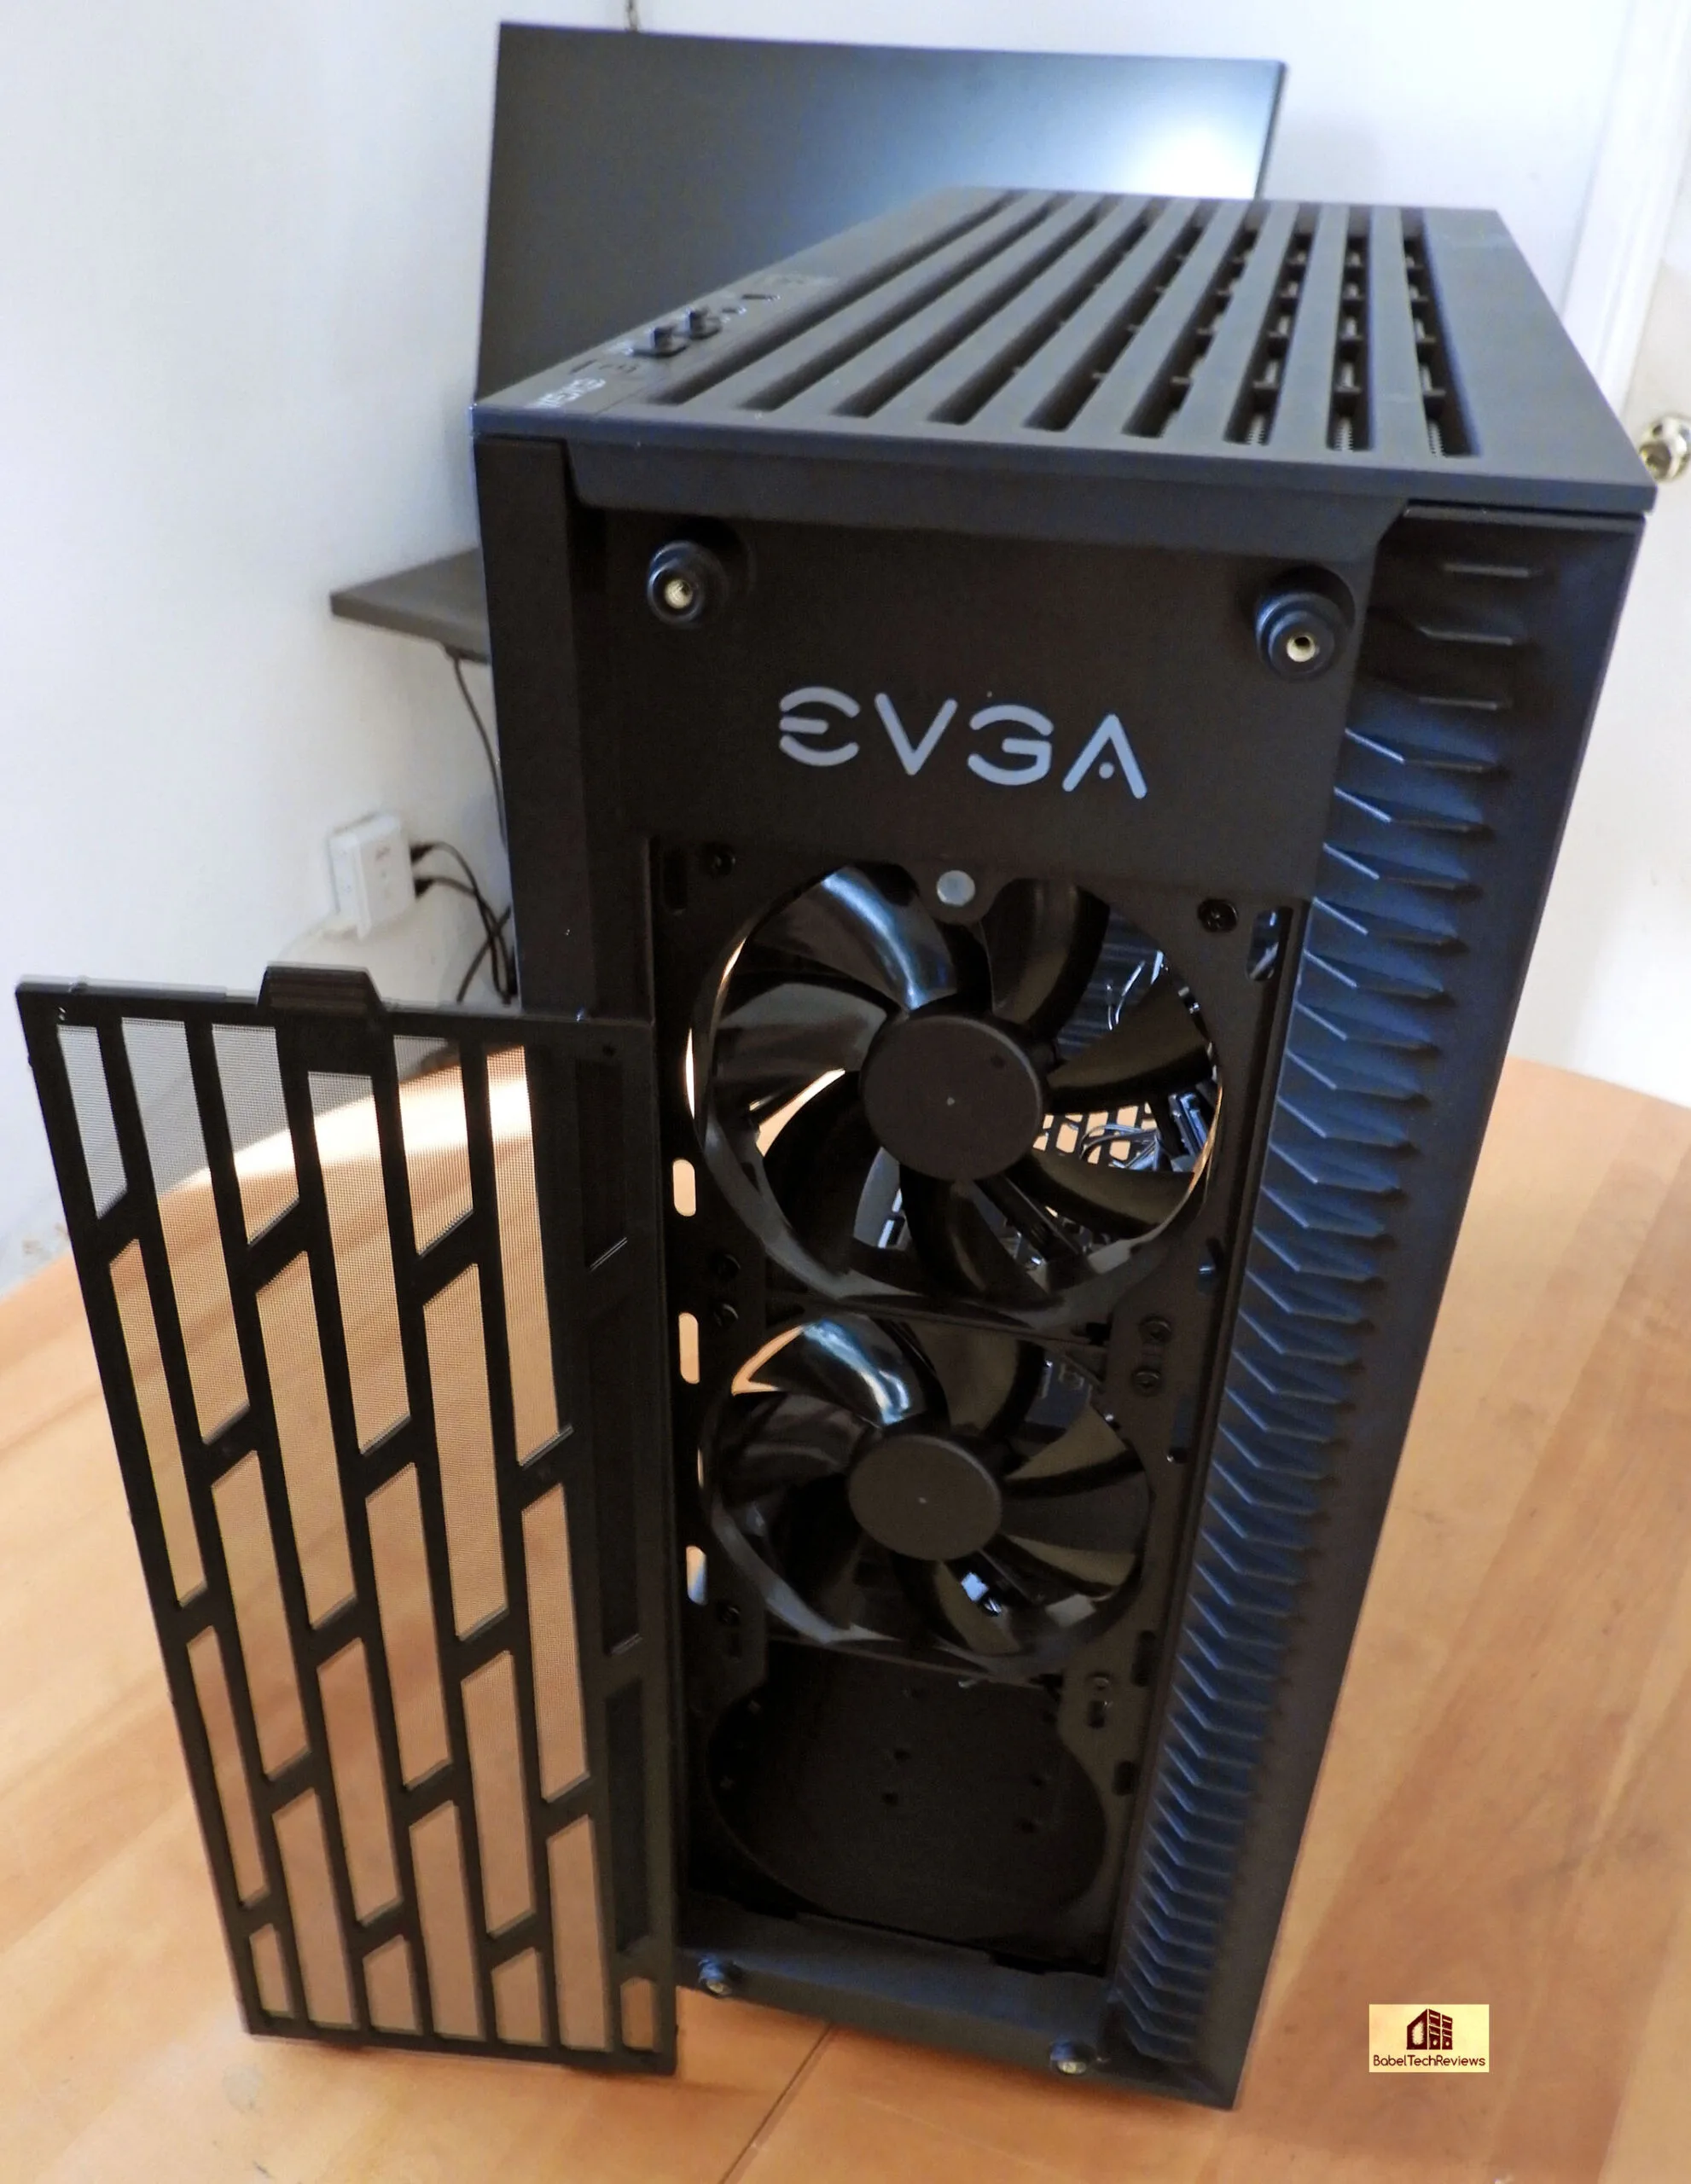
The front has dust filters over the front intake fans. You can also see the channels built into the case which are designed to funnel air inside when the front glass panel is installed.
At the top of the case there are metal large mesh filters, but at the back there are no dust filters as the air mostly moves out of the case. The filters do a superb job of trapping dust. Even the metal mesh is designed to keep your case interior dust-free as on the bottom of the case, protecting the PSU.
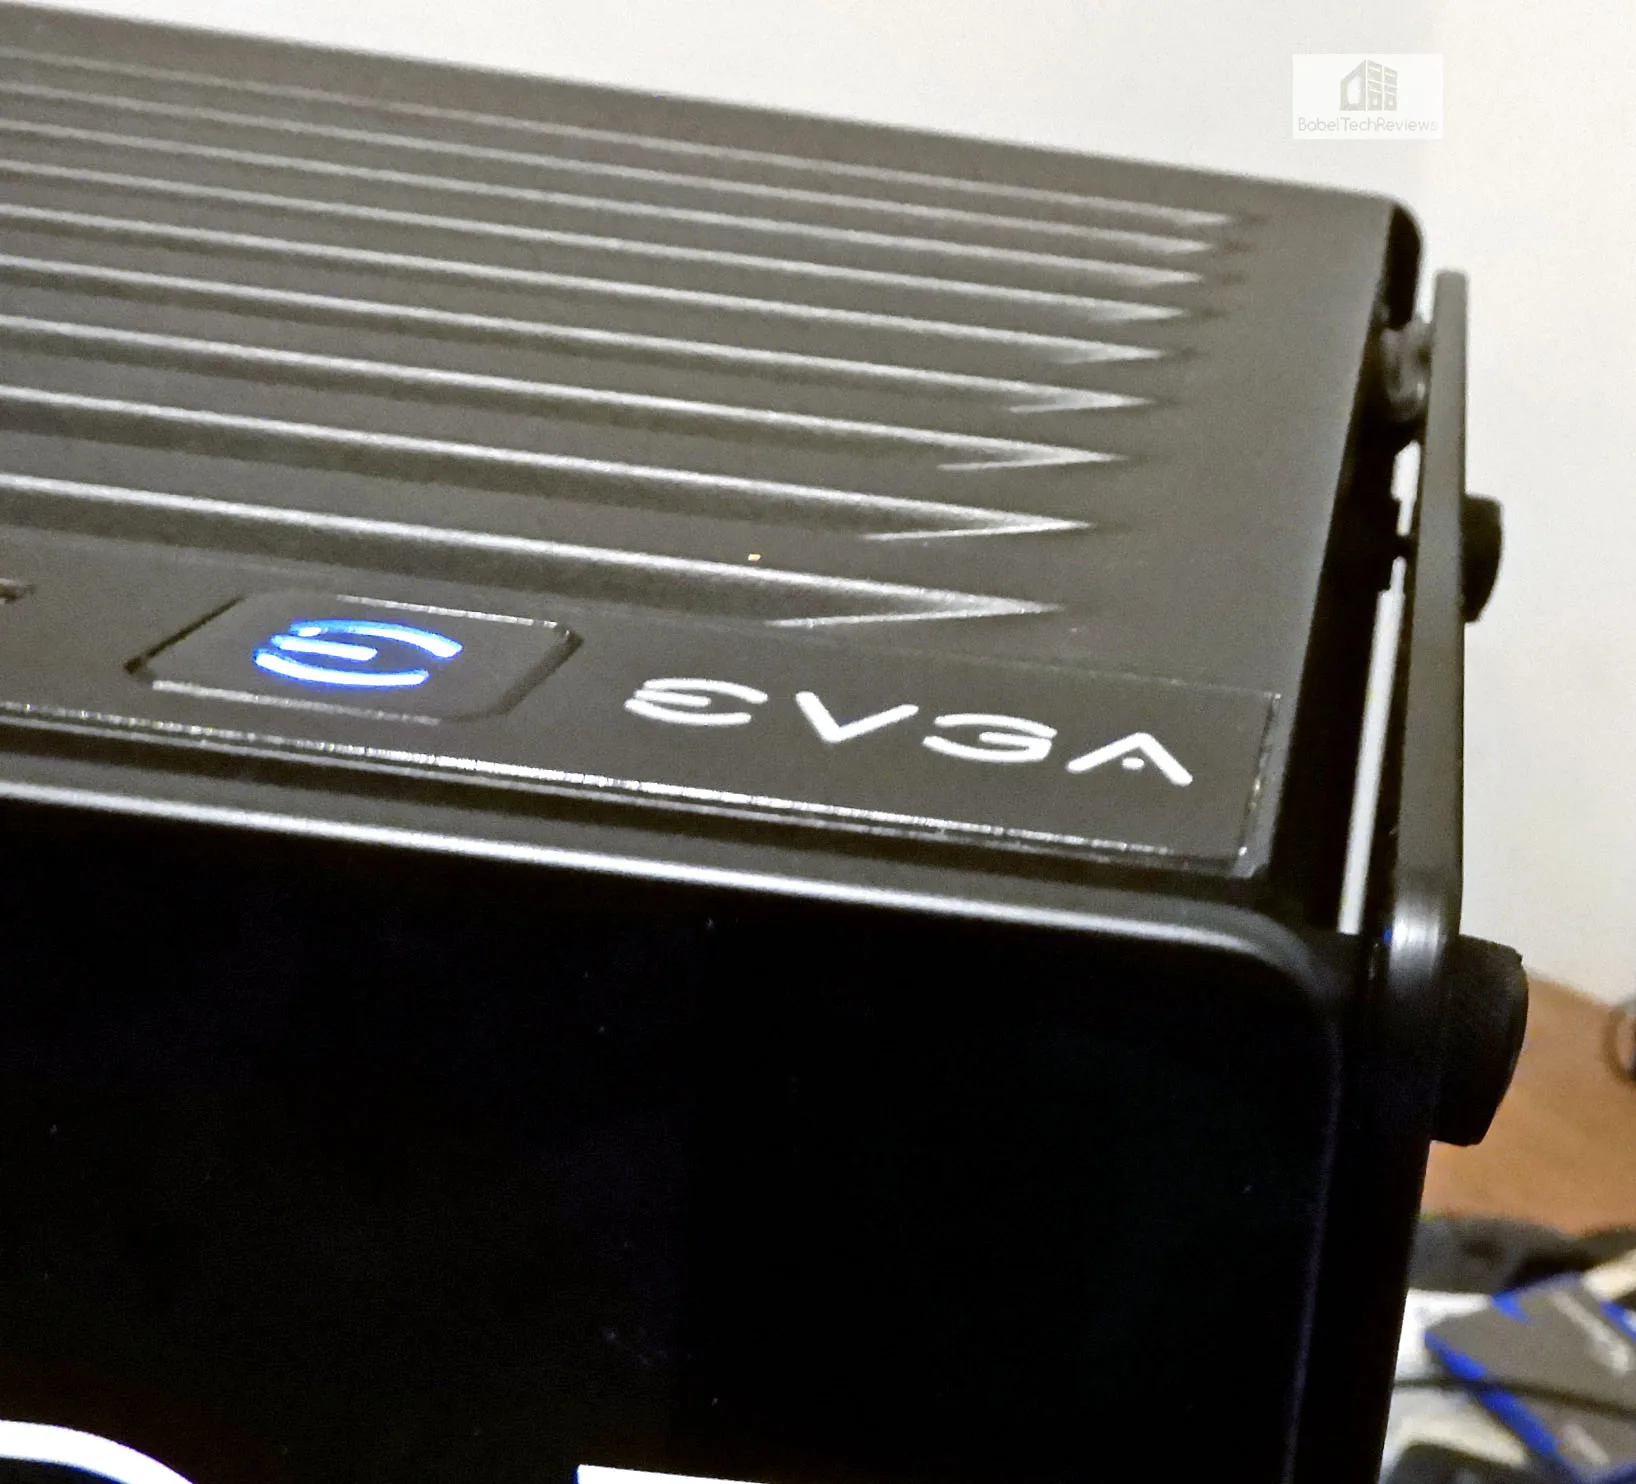
The EVGA DG-77 comes with the standard external case control panel which include two USB 3.0 connectors, headphone/microphone inputs, and the power and reset buttons, in addition to the K-boost which will automatically overclock your CPU and (EVGA) GPU automatically if it is connected to the motherboard’s internal USB 2.0 connector. We were somewhat disappointed that we cannot use the K-boost and our EVGA 280mm CLC’s Flow Control software together on our EVGA Z370 FTW motherboard since it only has one USB 2.0 header. We either need to buy an additional adapter to use both programs simultaneously or pick another motherboard with more than one USB 2.0 header.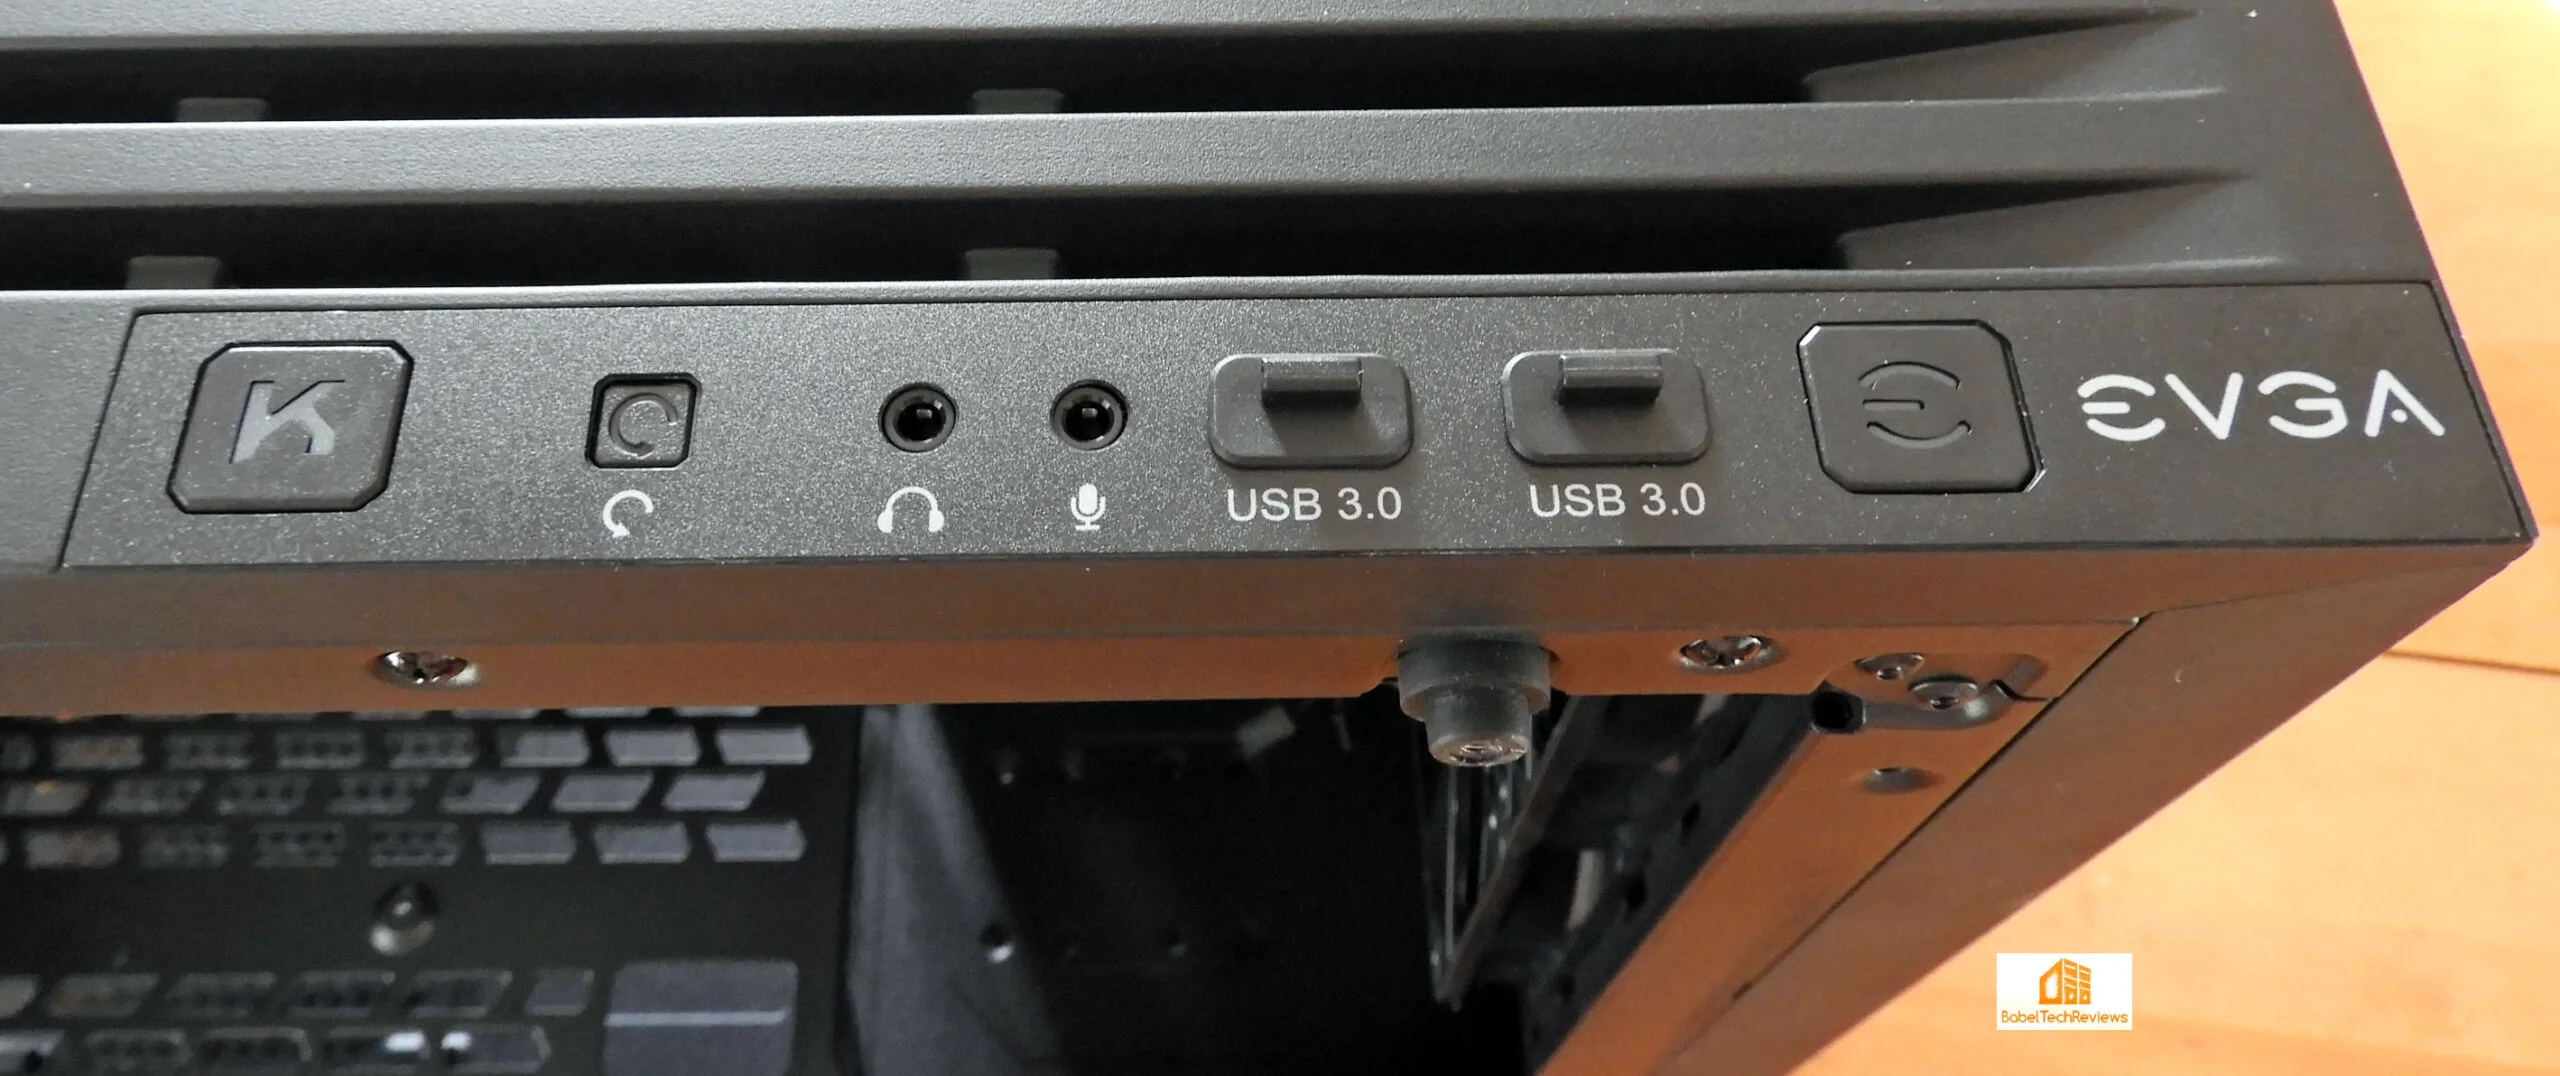 The back of the case offers the choice of using the regular expansion shots for a video card or cards, or to use the cutout provided for a vertically mounted video card. There is also a plastic cover that is secured to the back of the case with four thumbscrews.
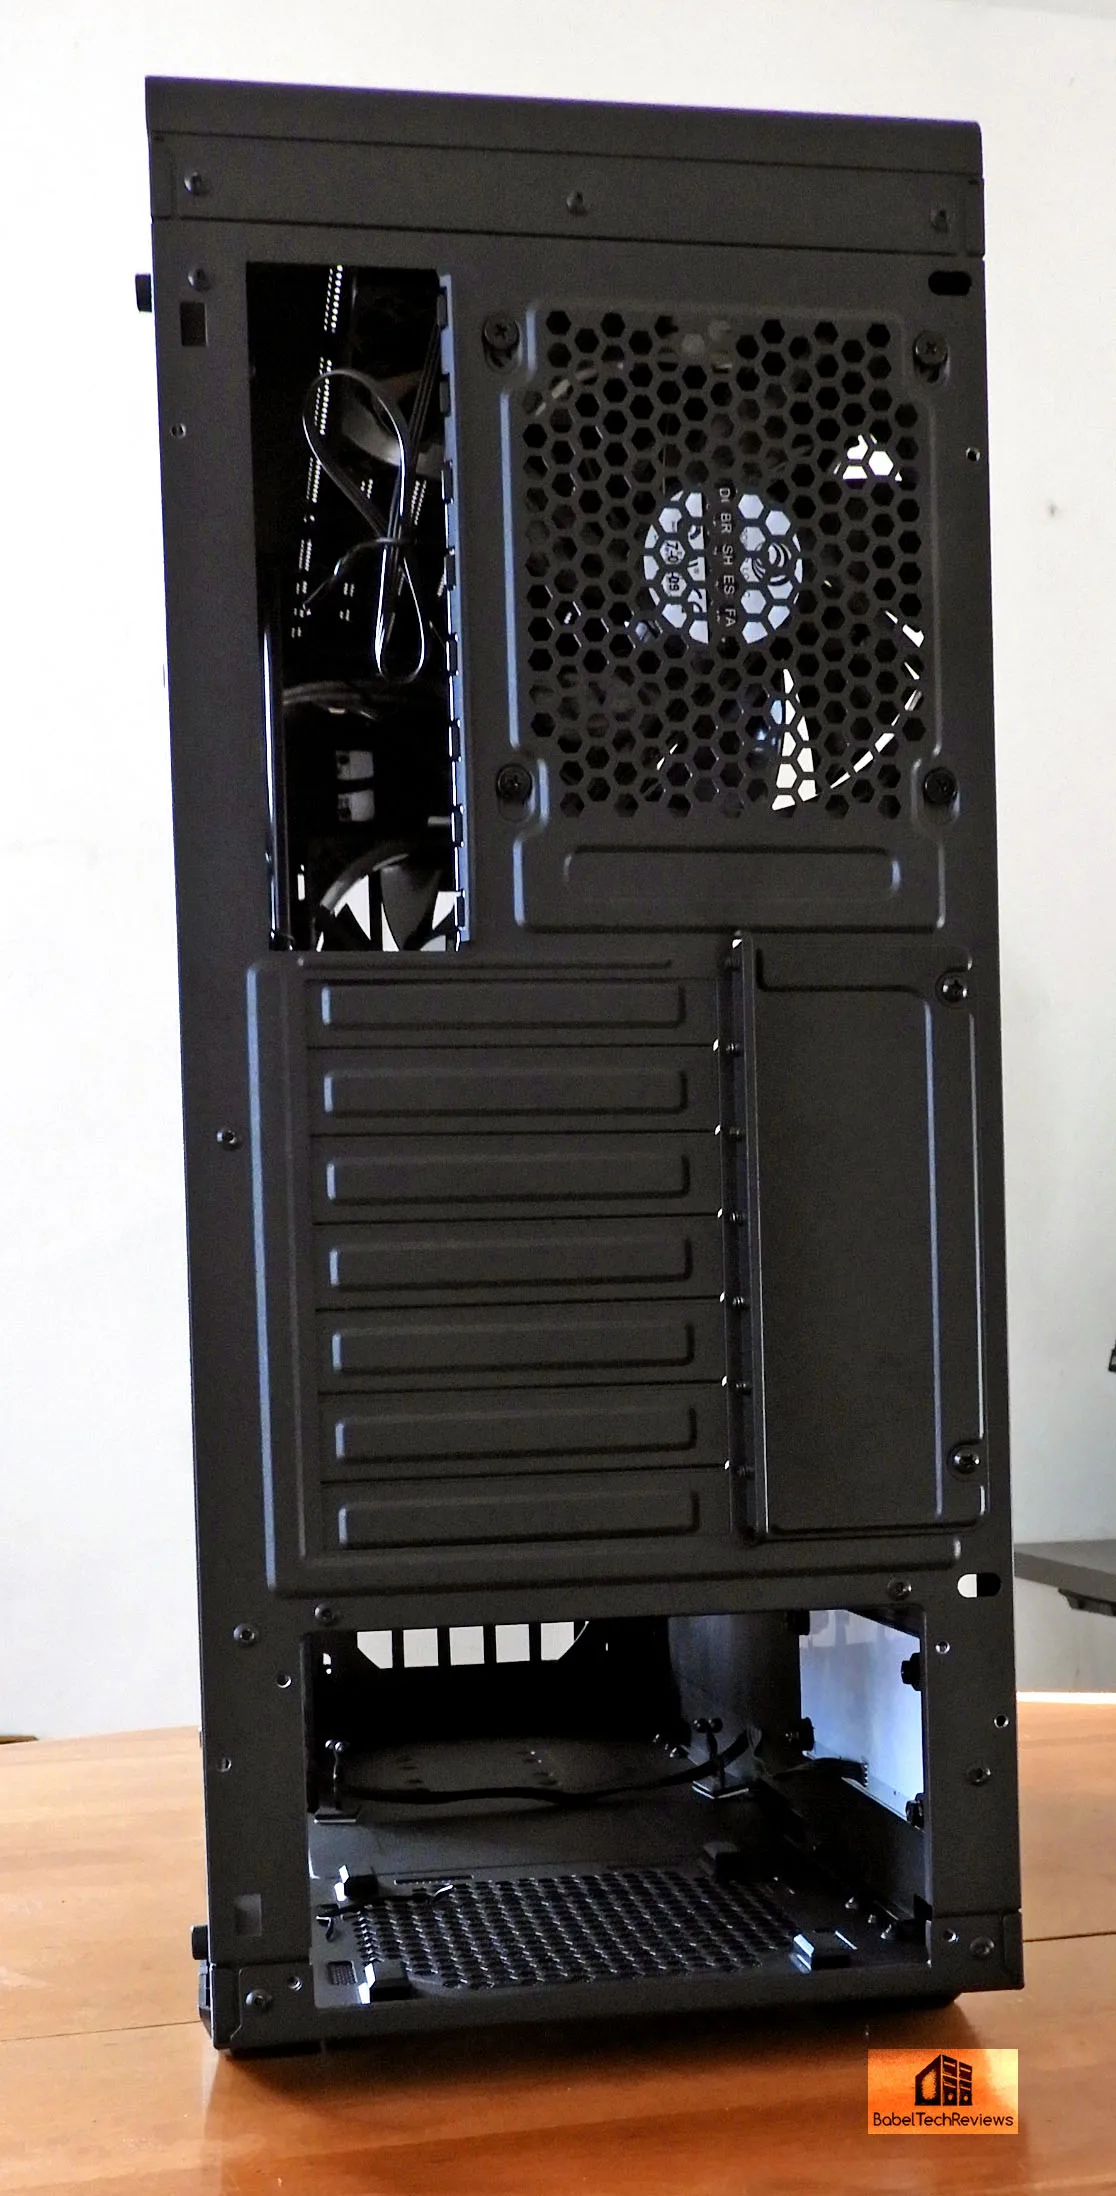
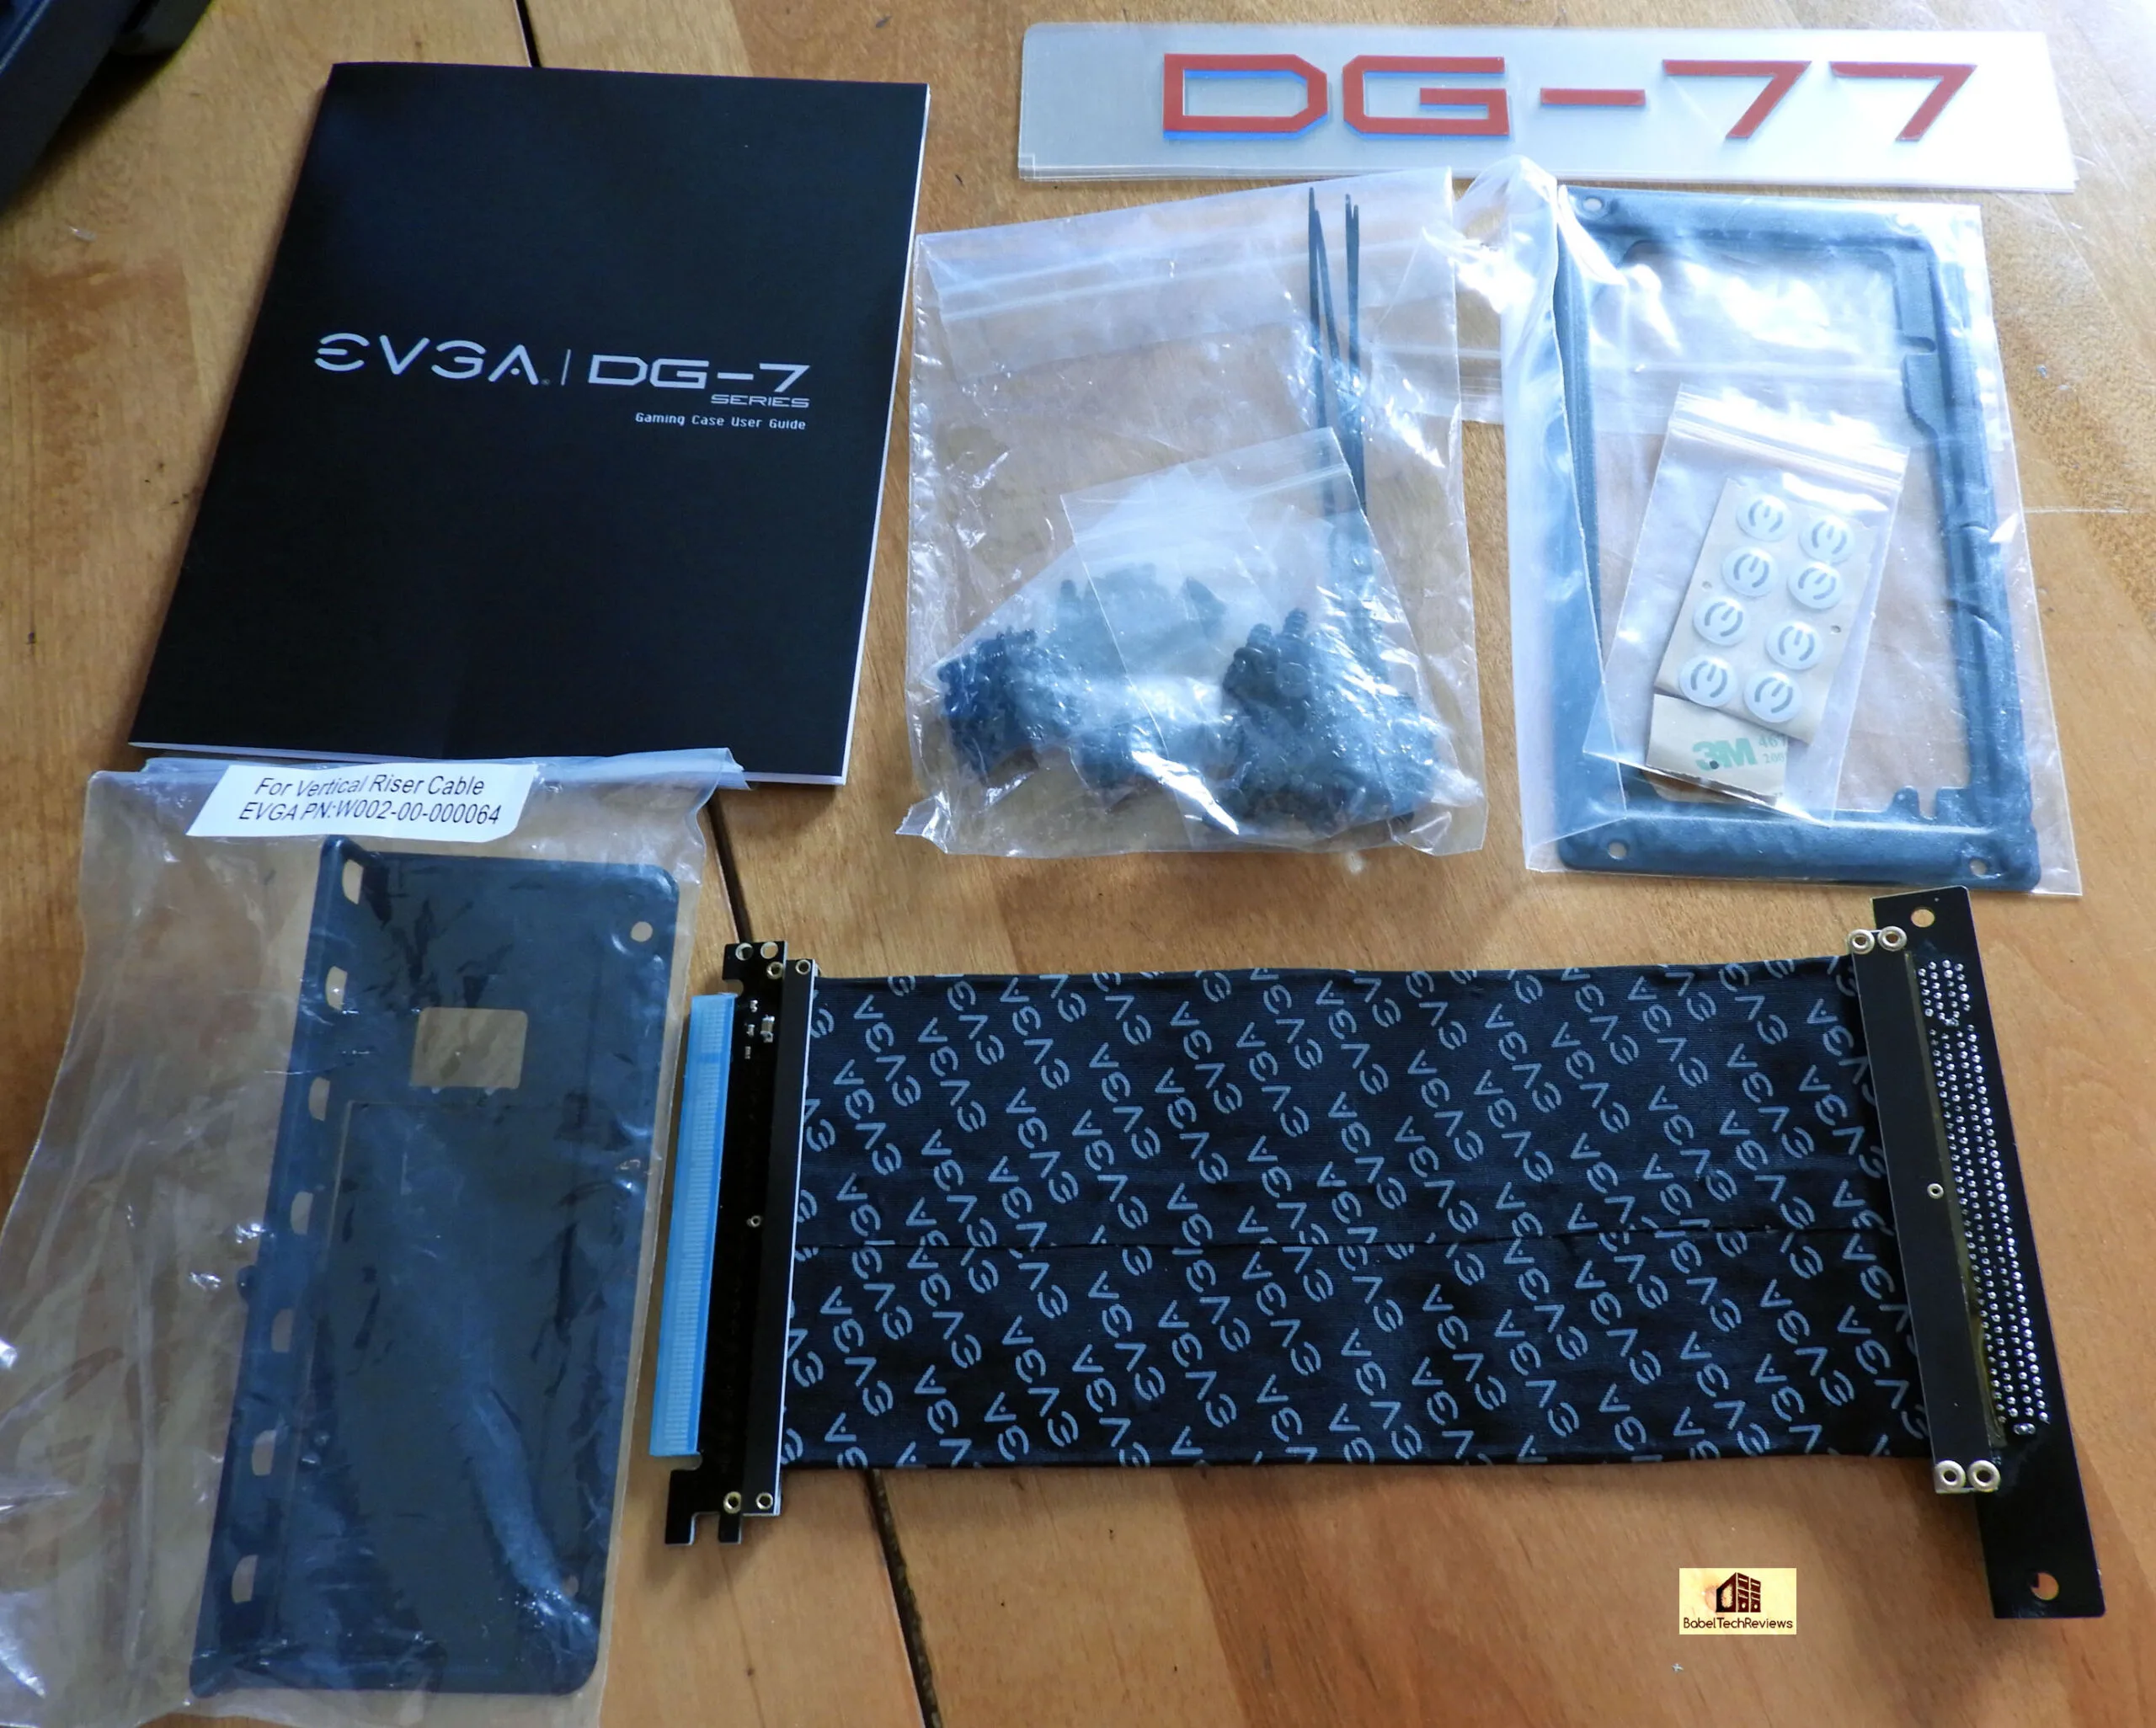
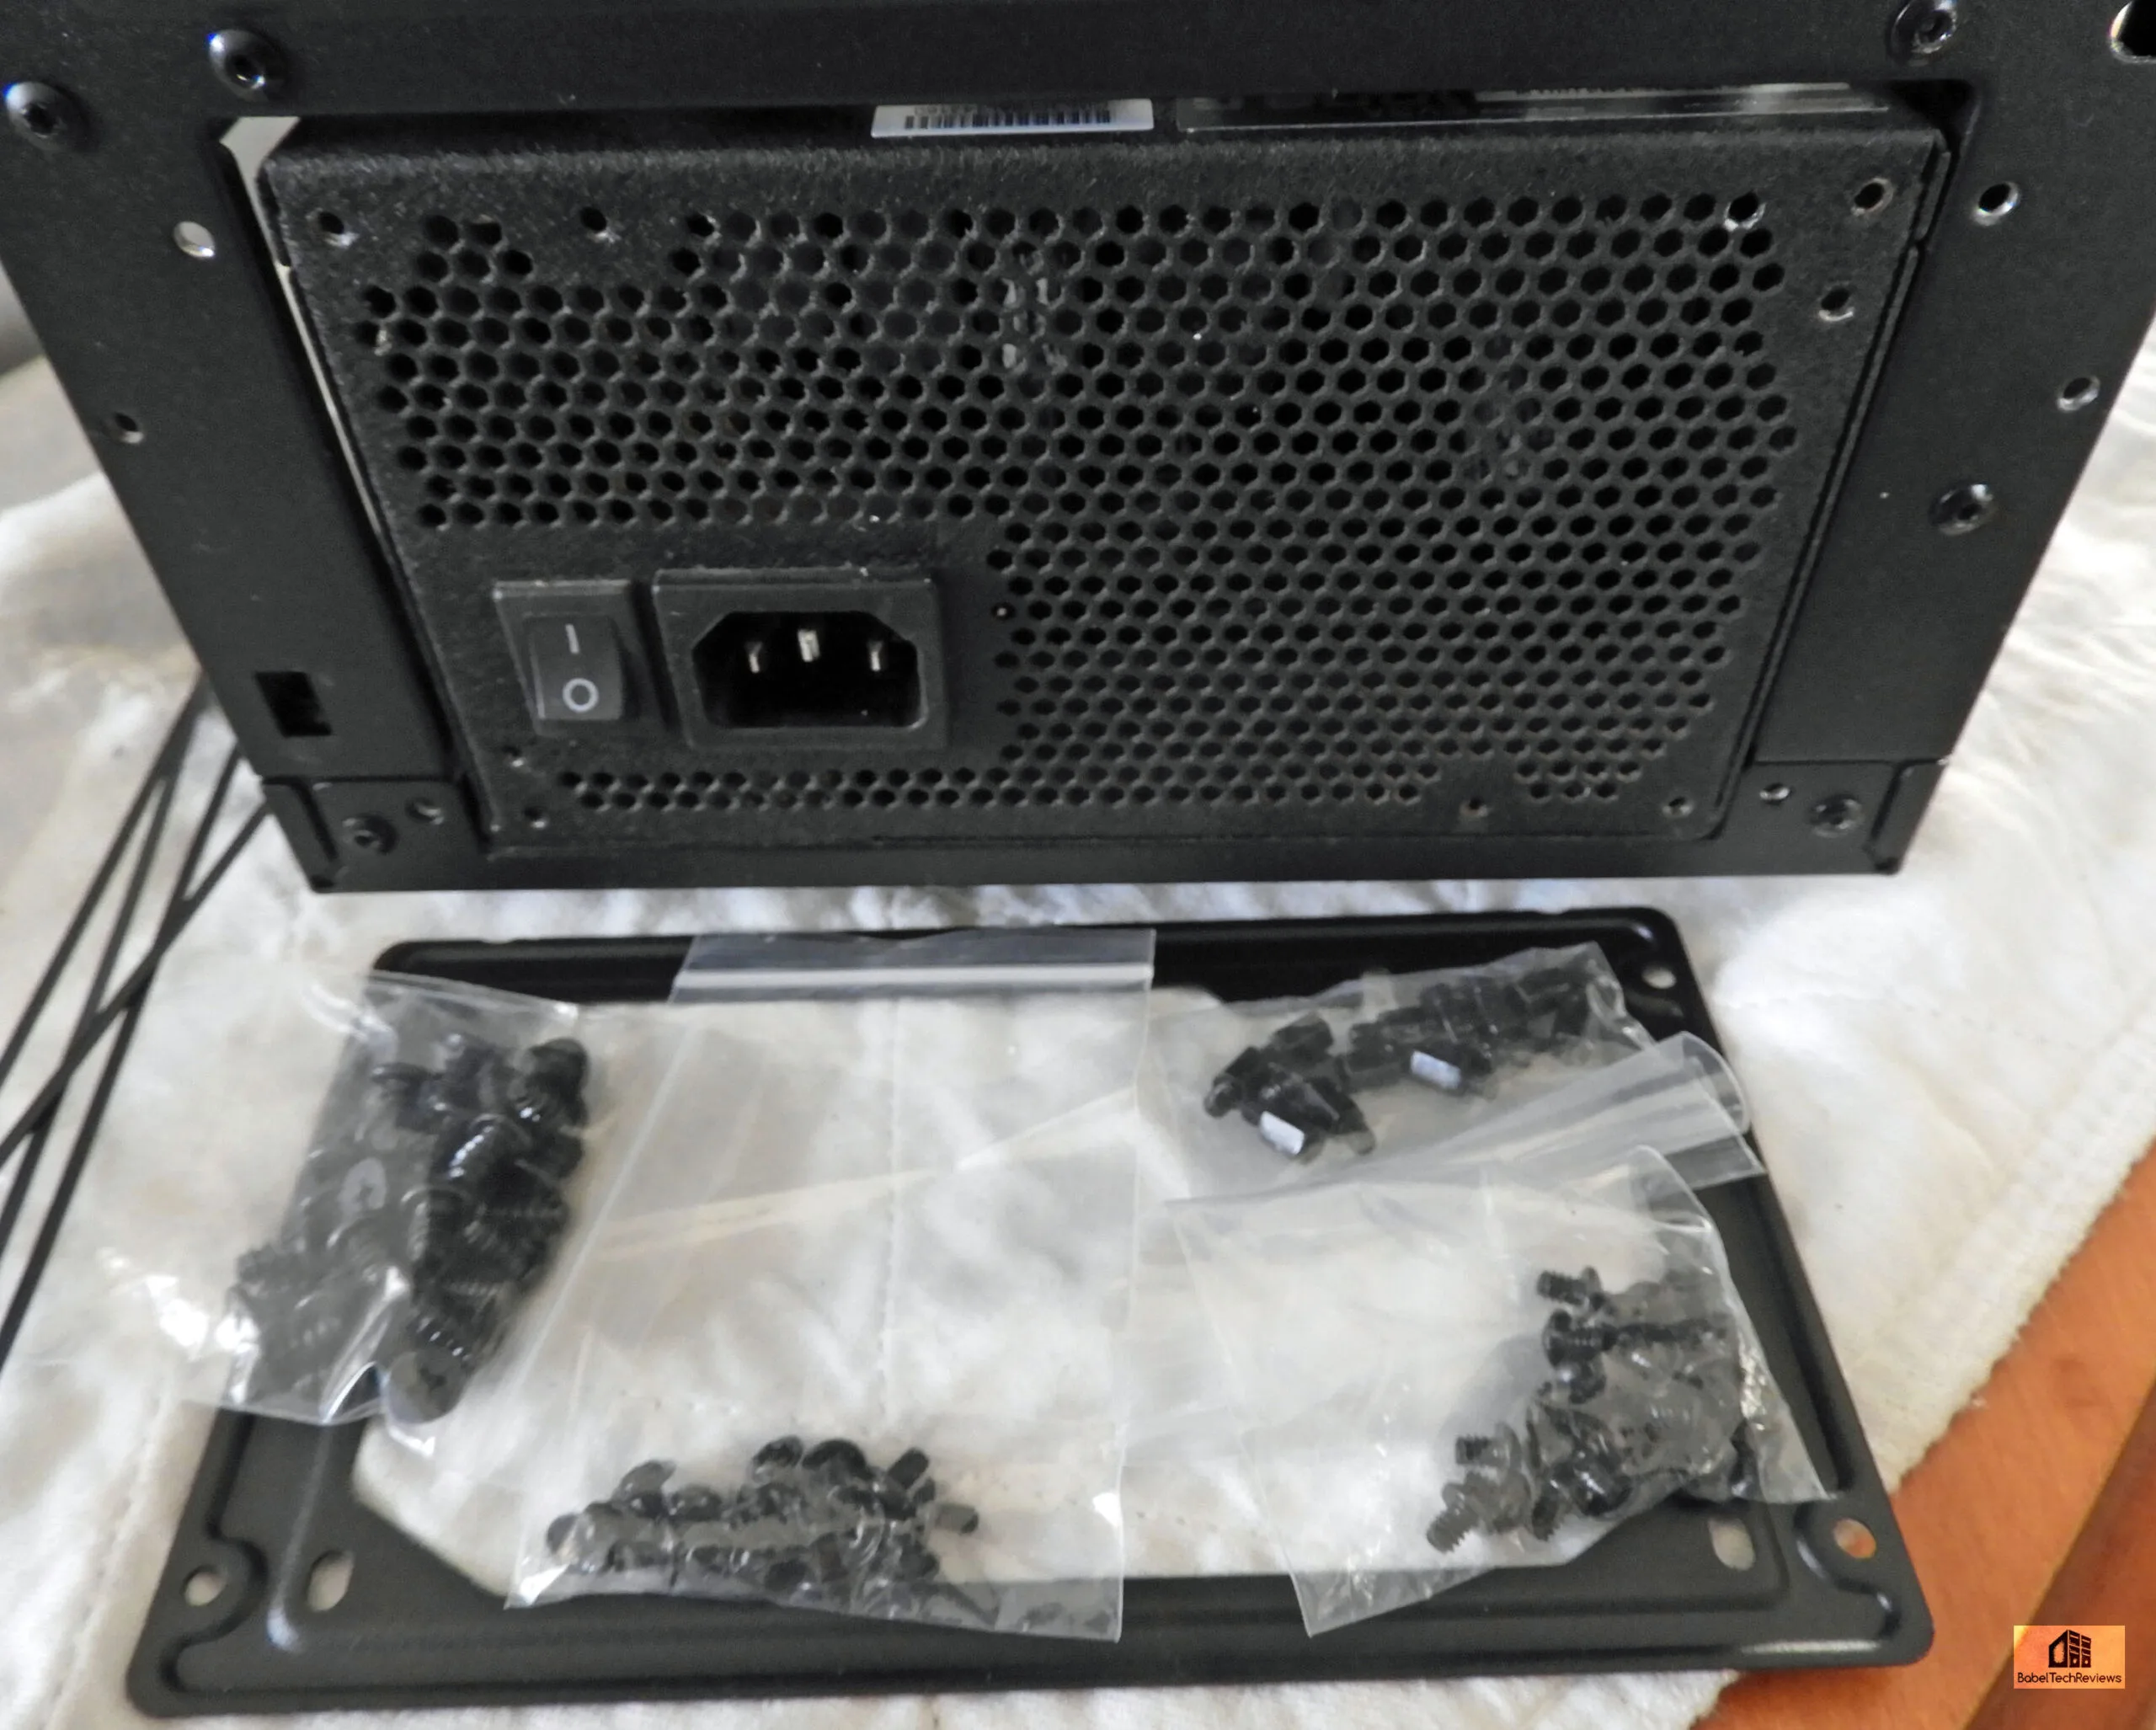
The DG-77’s accessories are packaged in multiple plastic bags. You will get plenty of the necessary screws and extra zip ties. A Philips screw driver is necessary for installation but it is not supplied. You will get an instruction manual which is helpful although we would have liked more information. One nice detail involves using the EVGA logo on the thumbscrews that hold the panels to the case with your choice of black or white.
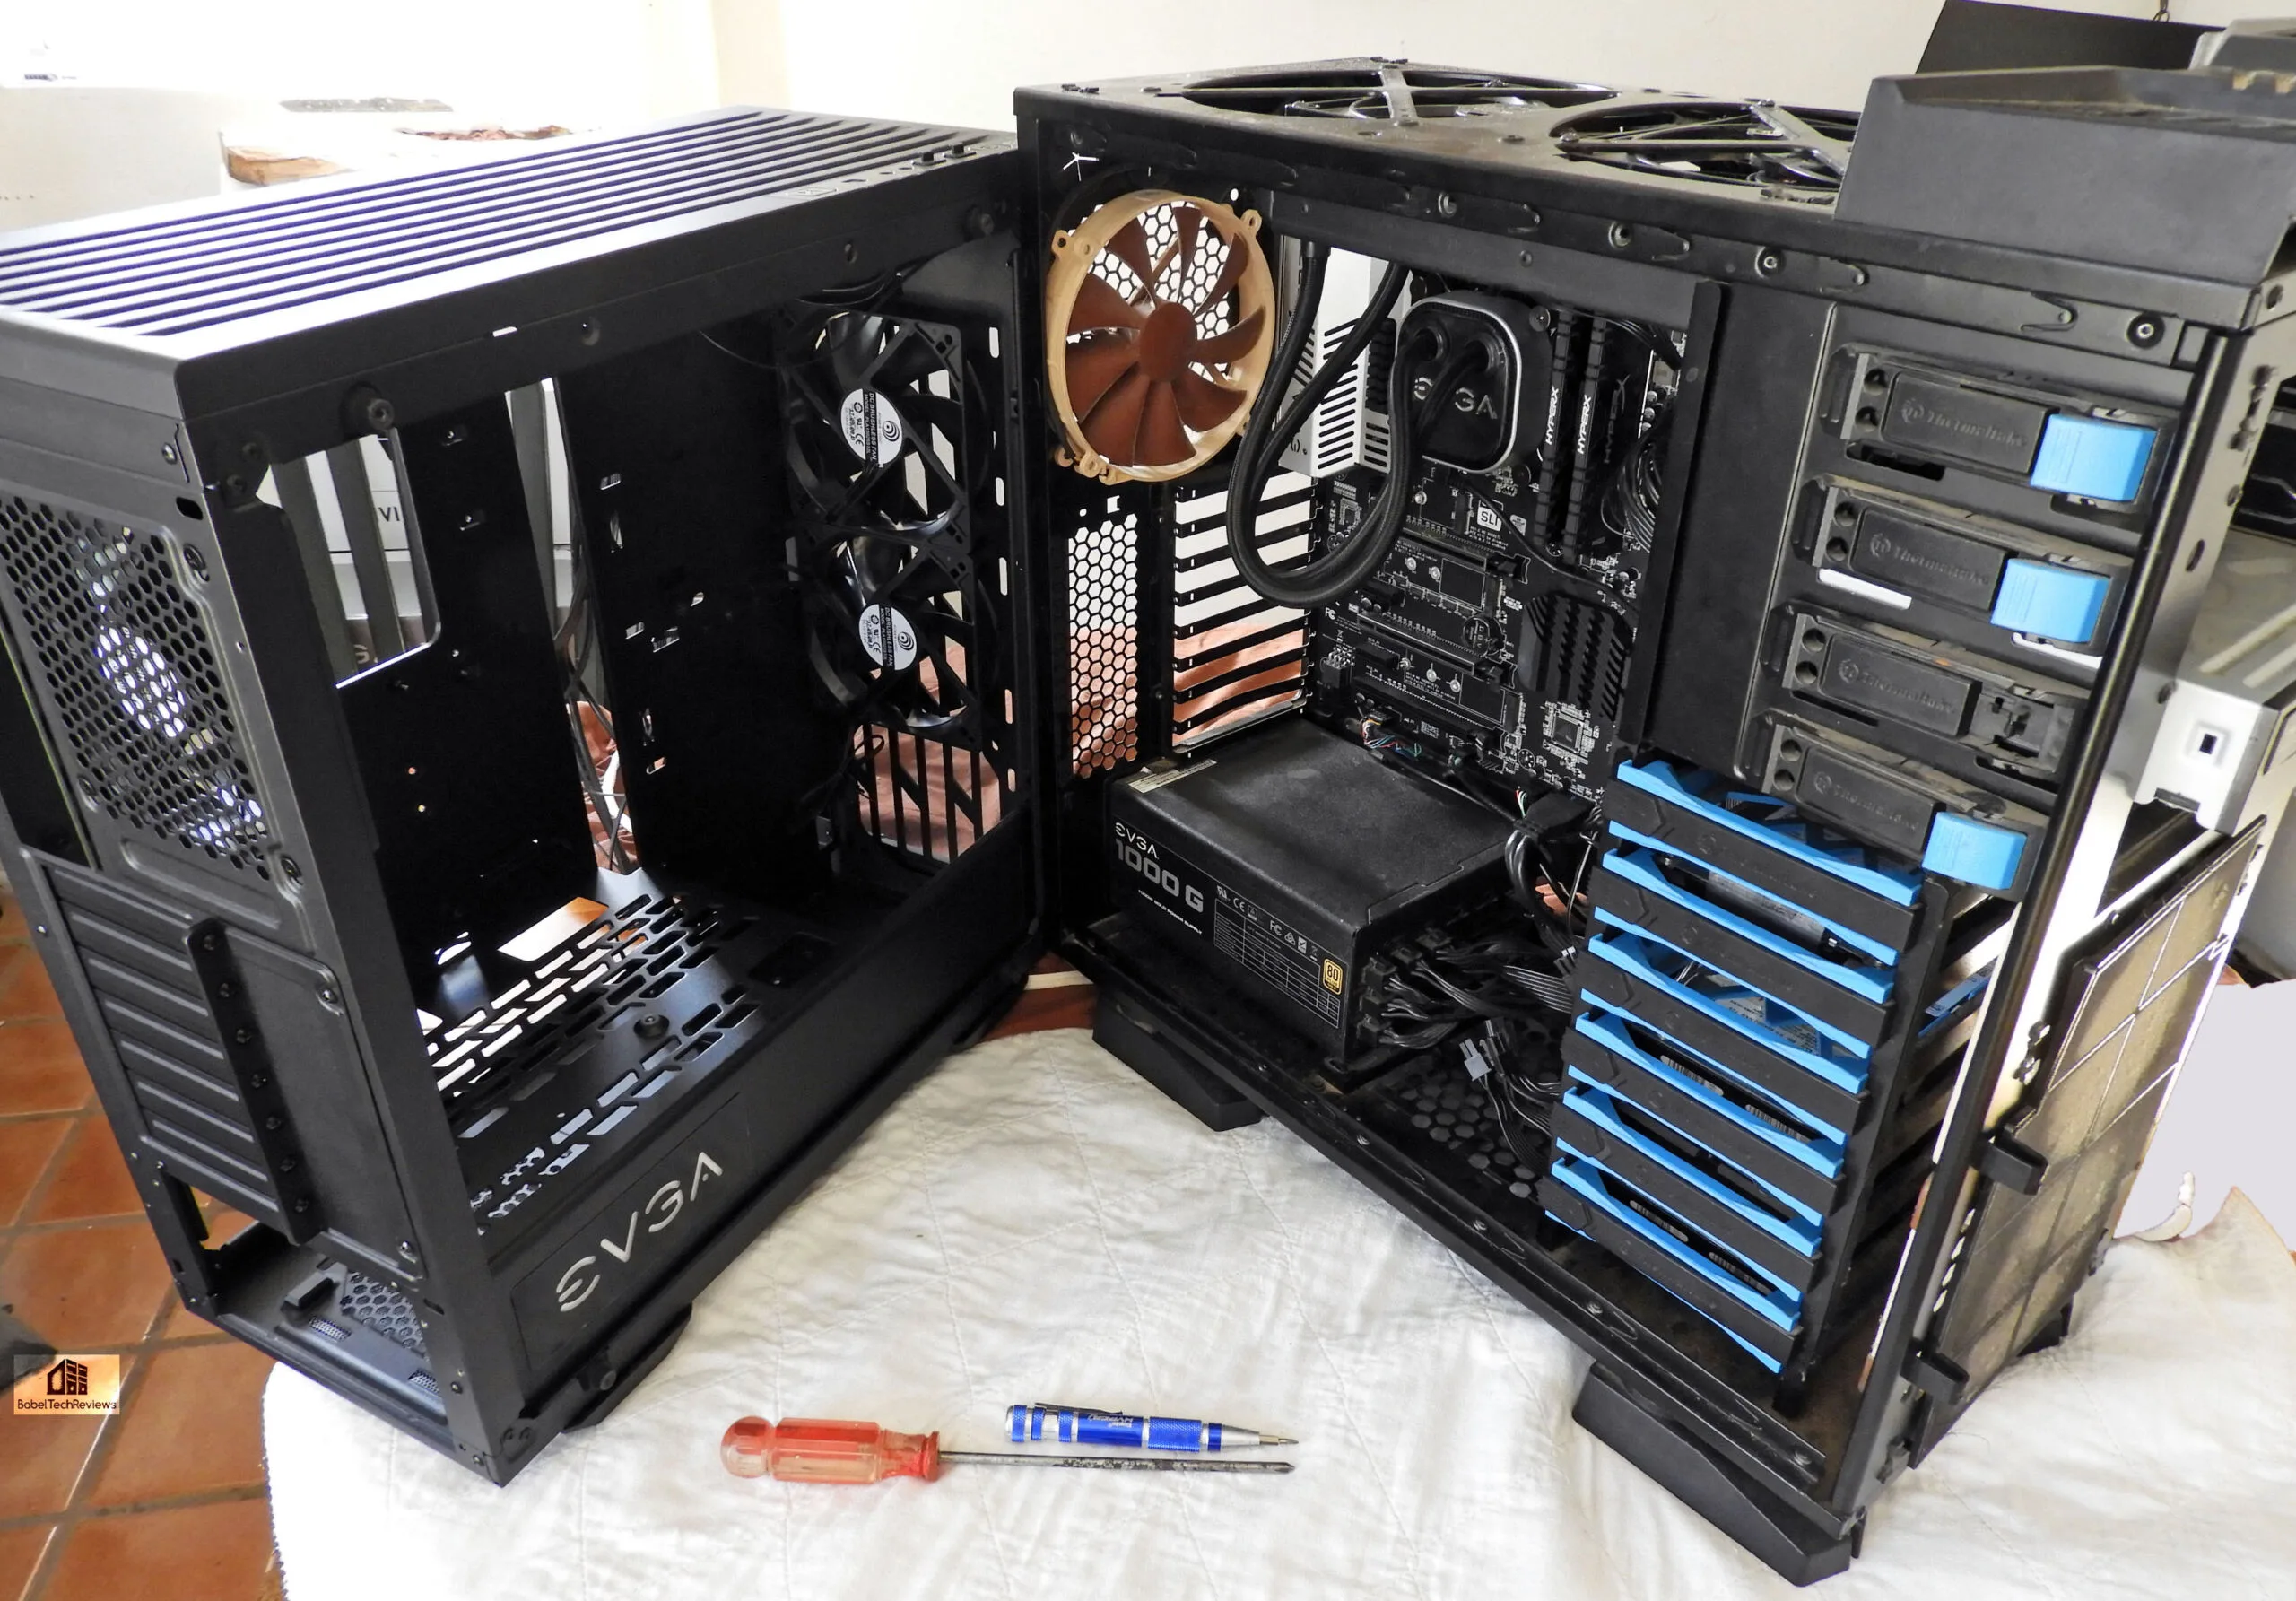
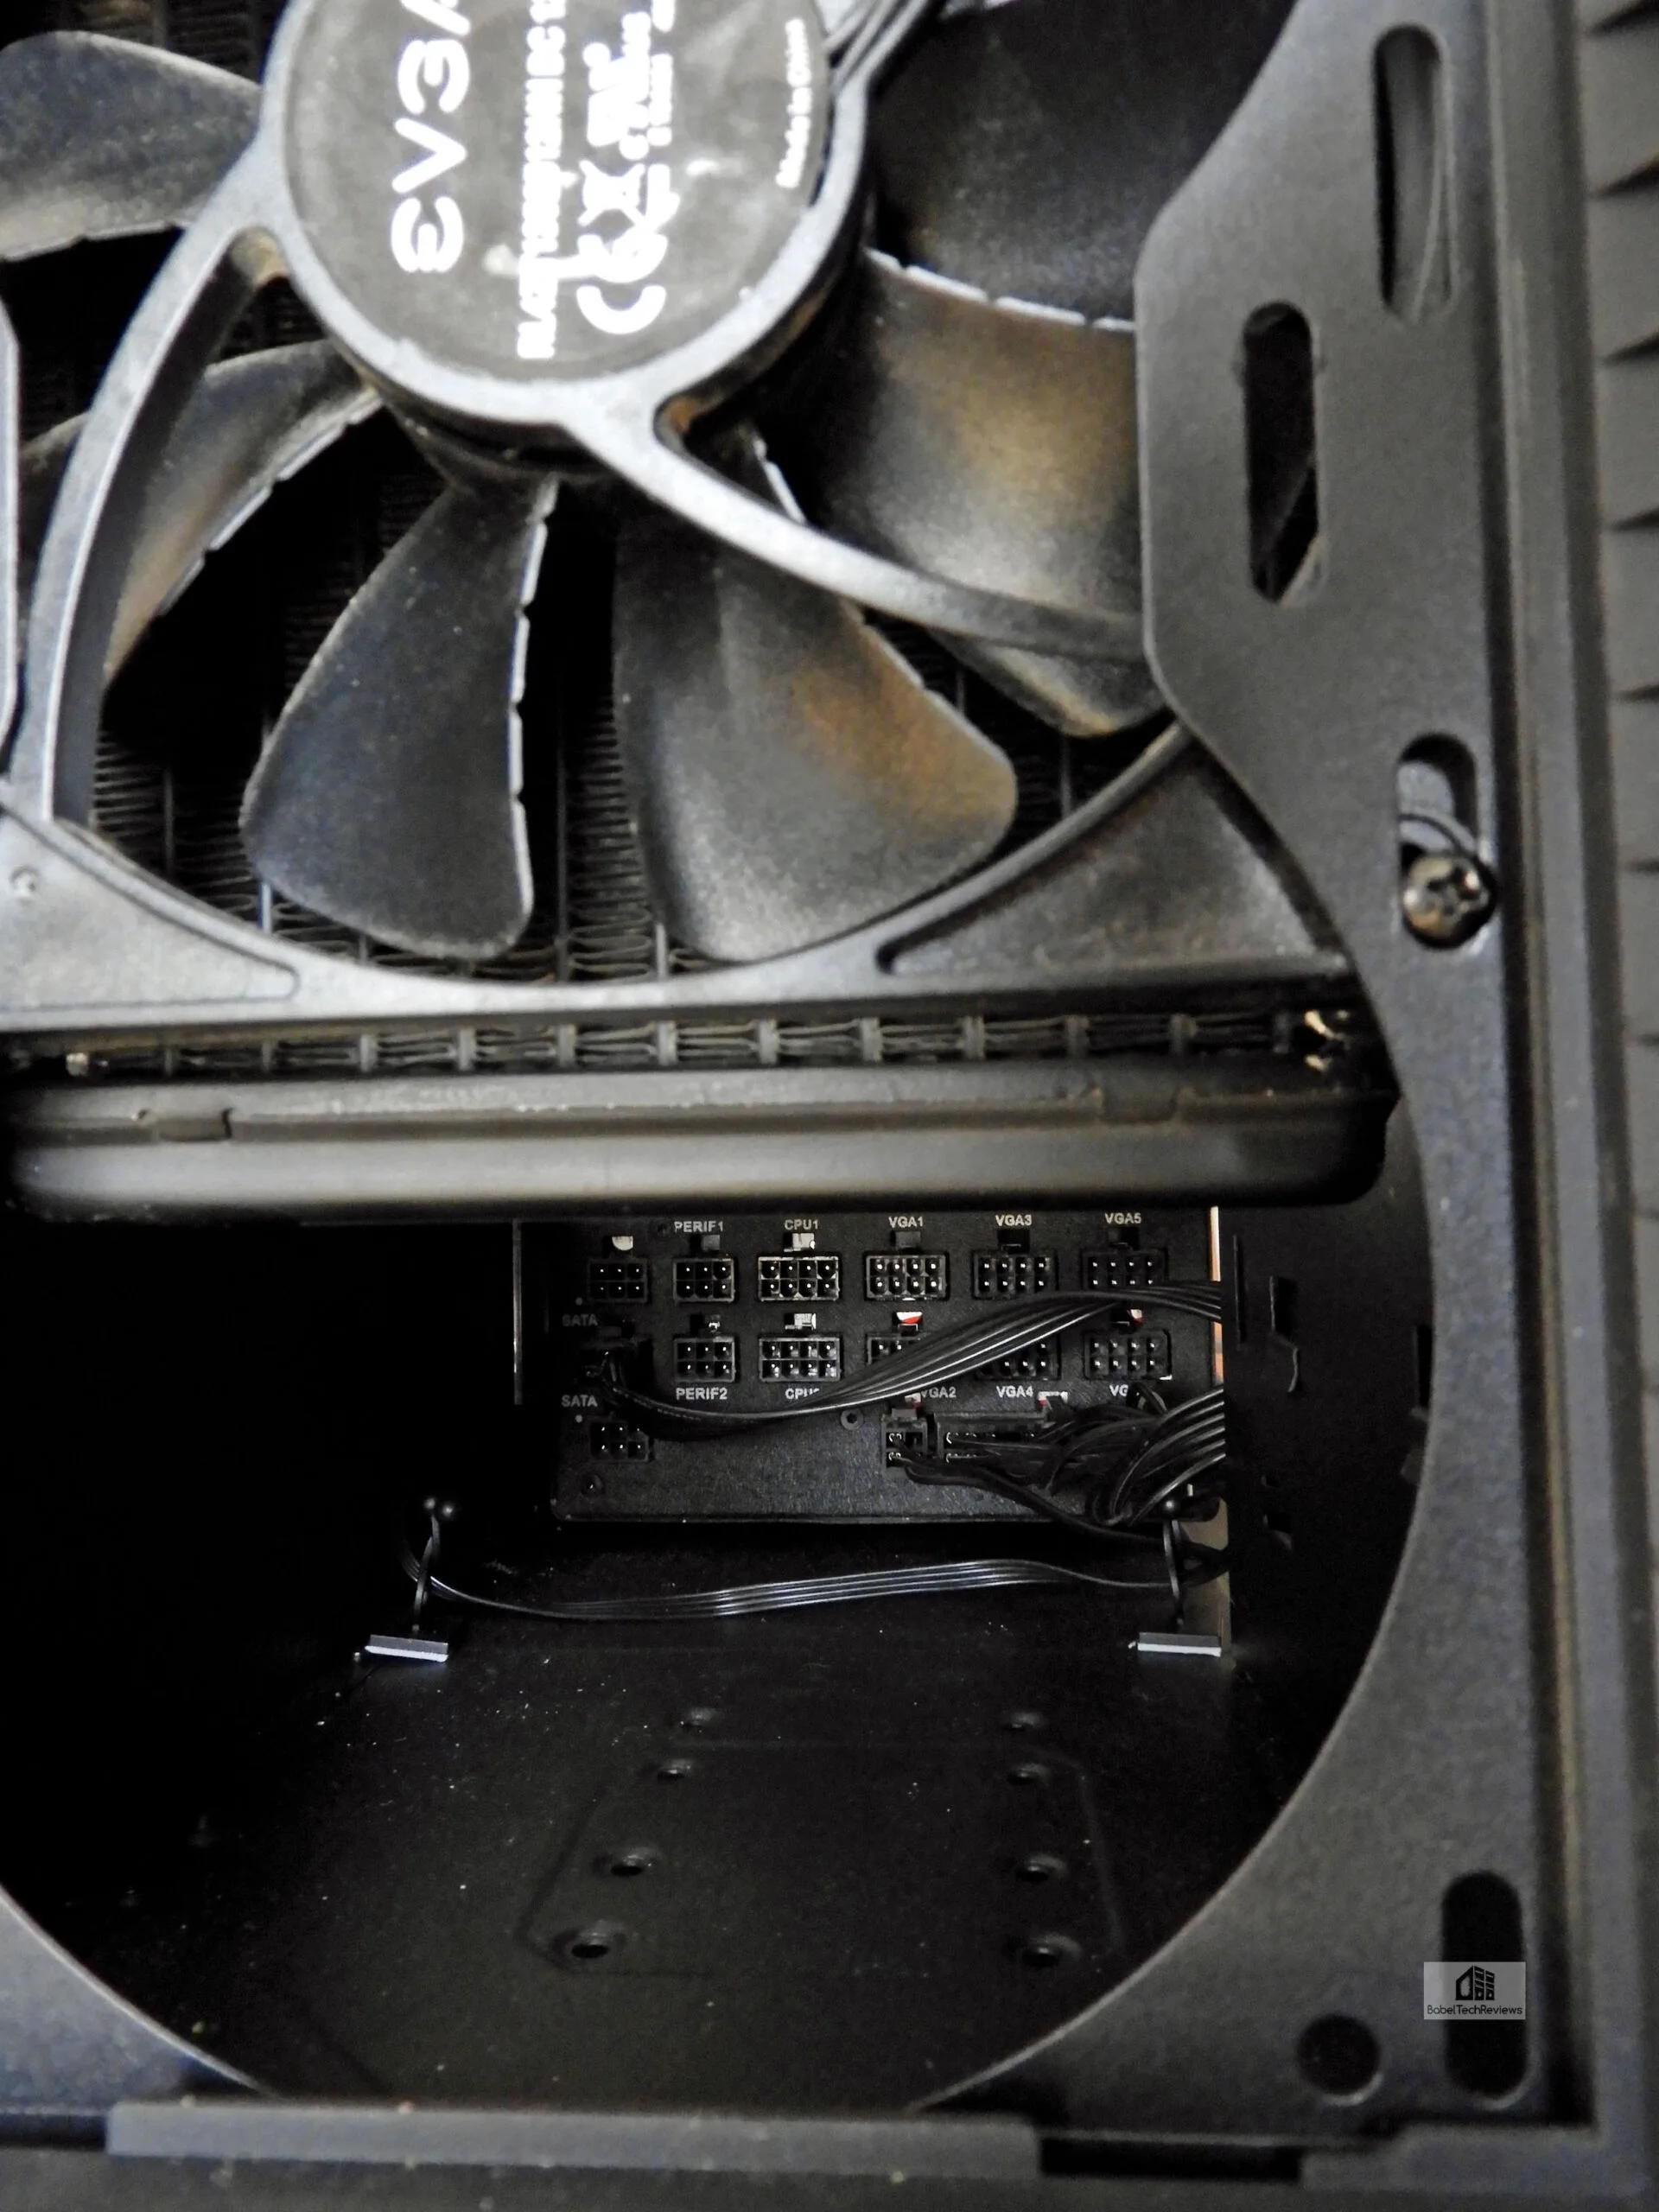
Let’s get started with the build. Usually we start with our EVGA 1000G PSU (not included with the case), and it slides into the back of the case into a rather long enclosed and well-ventilated steel cage.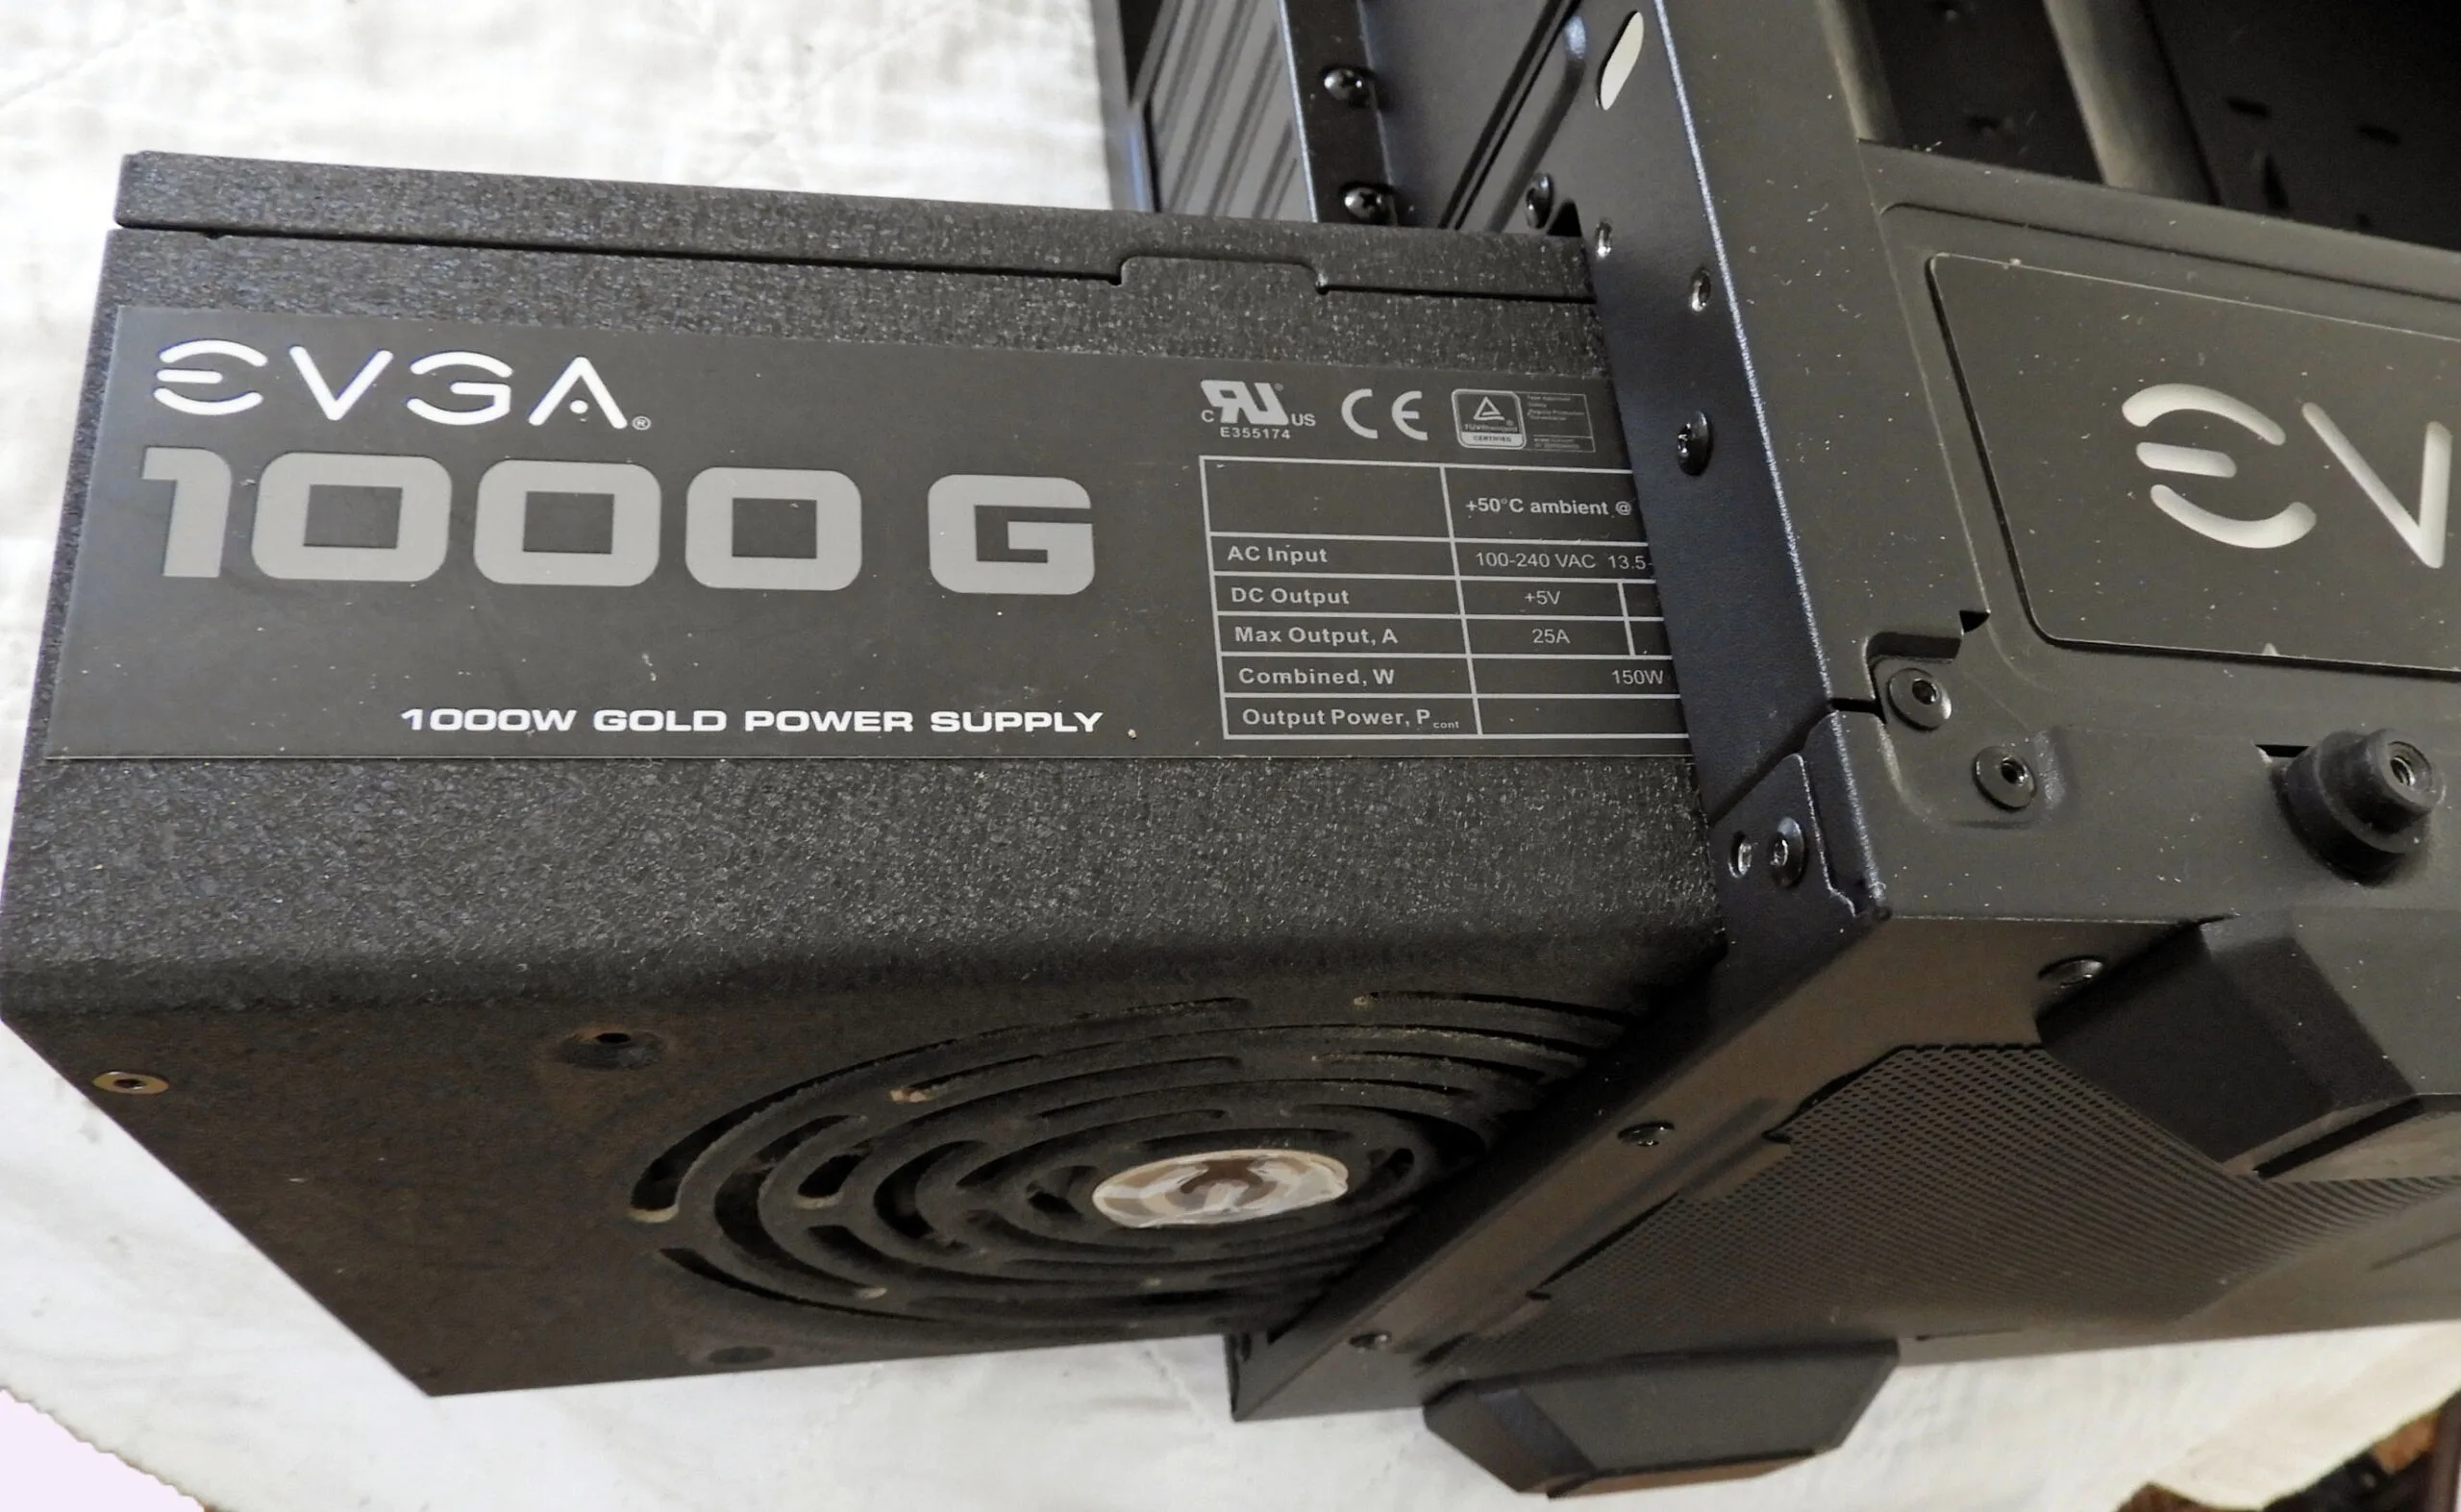
The smartest thing to do is to install the cables into the PSU before sliding it into the case, but if you don’t, you can easily reach the connectors from both the front and the side of the case.
 The PSU is held in place by screws through a frame tightened down securely to the case chassis.
Lock the frame down, and your PSU is secure.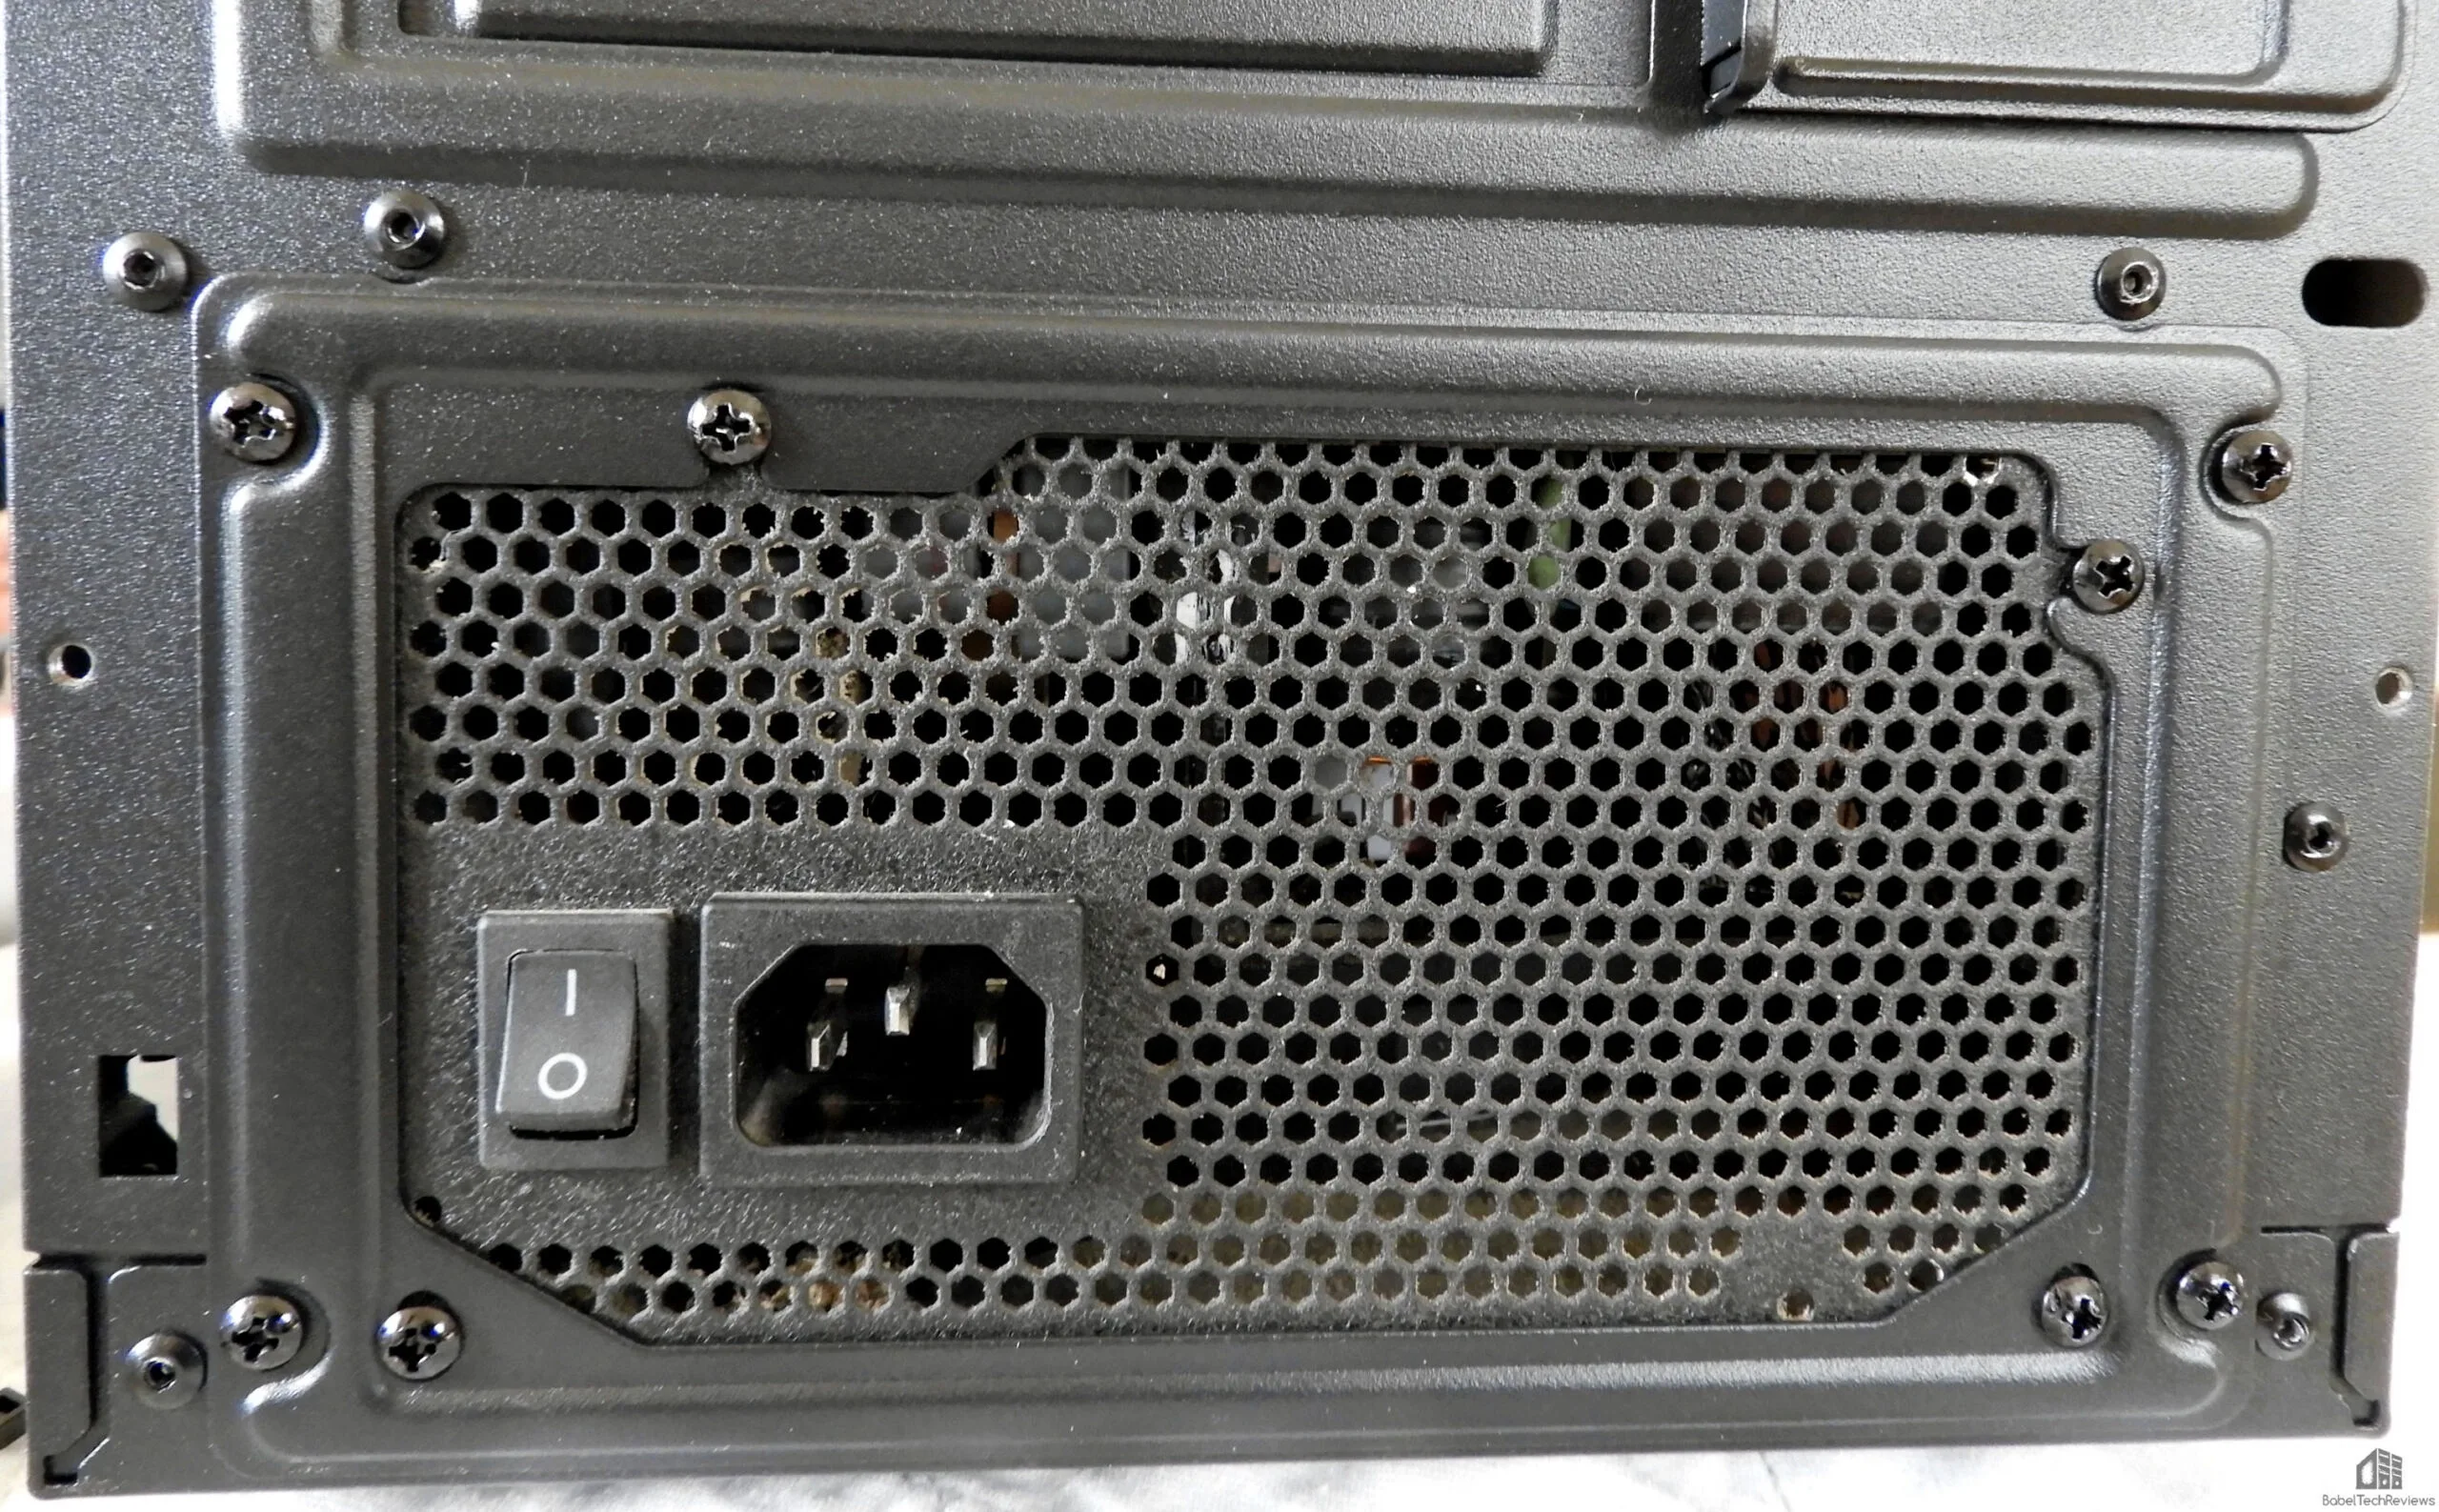
Installing the motherboard is easy and we used all of the case standoffs to match our motherboard’s mounting holes. The instructions warn that some of these standoffs are already pre-installed and they *must* match the motherboard’s holes exactly or there will be a general ground fault – it’s a great reminder to always check the case standoff relationship to the motherboard.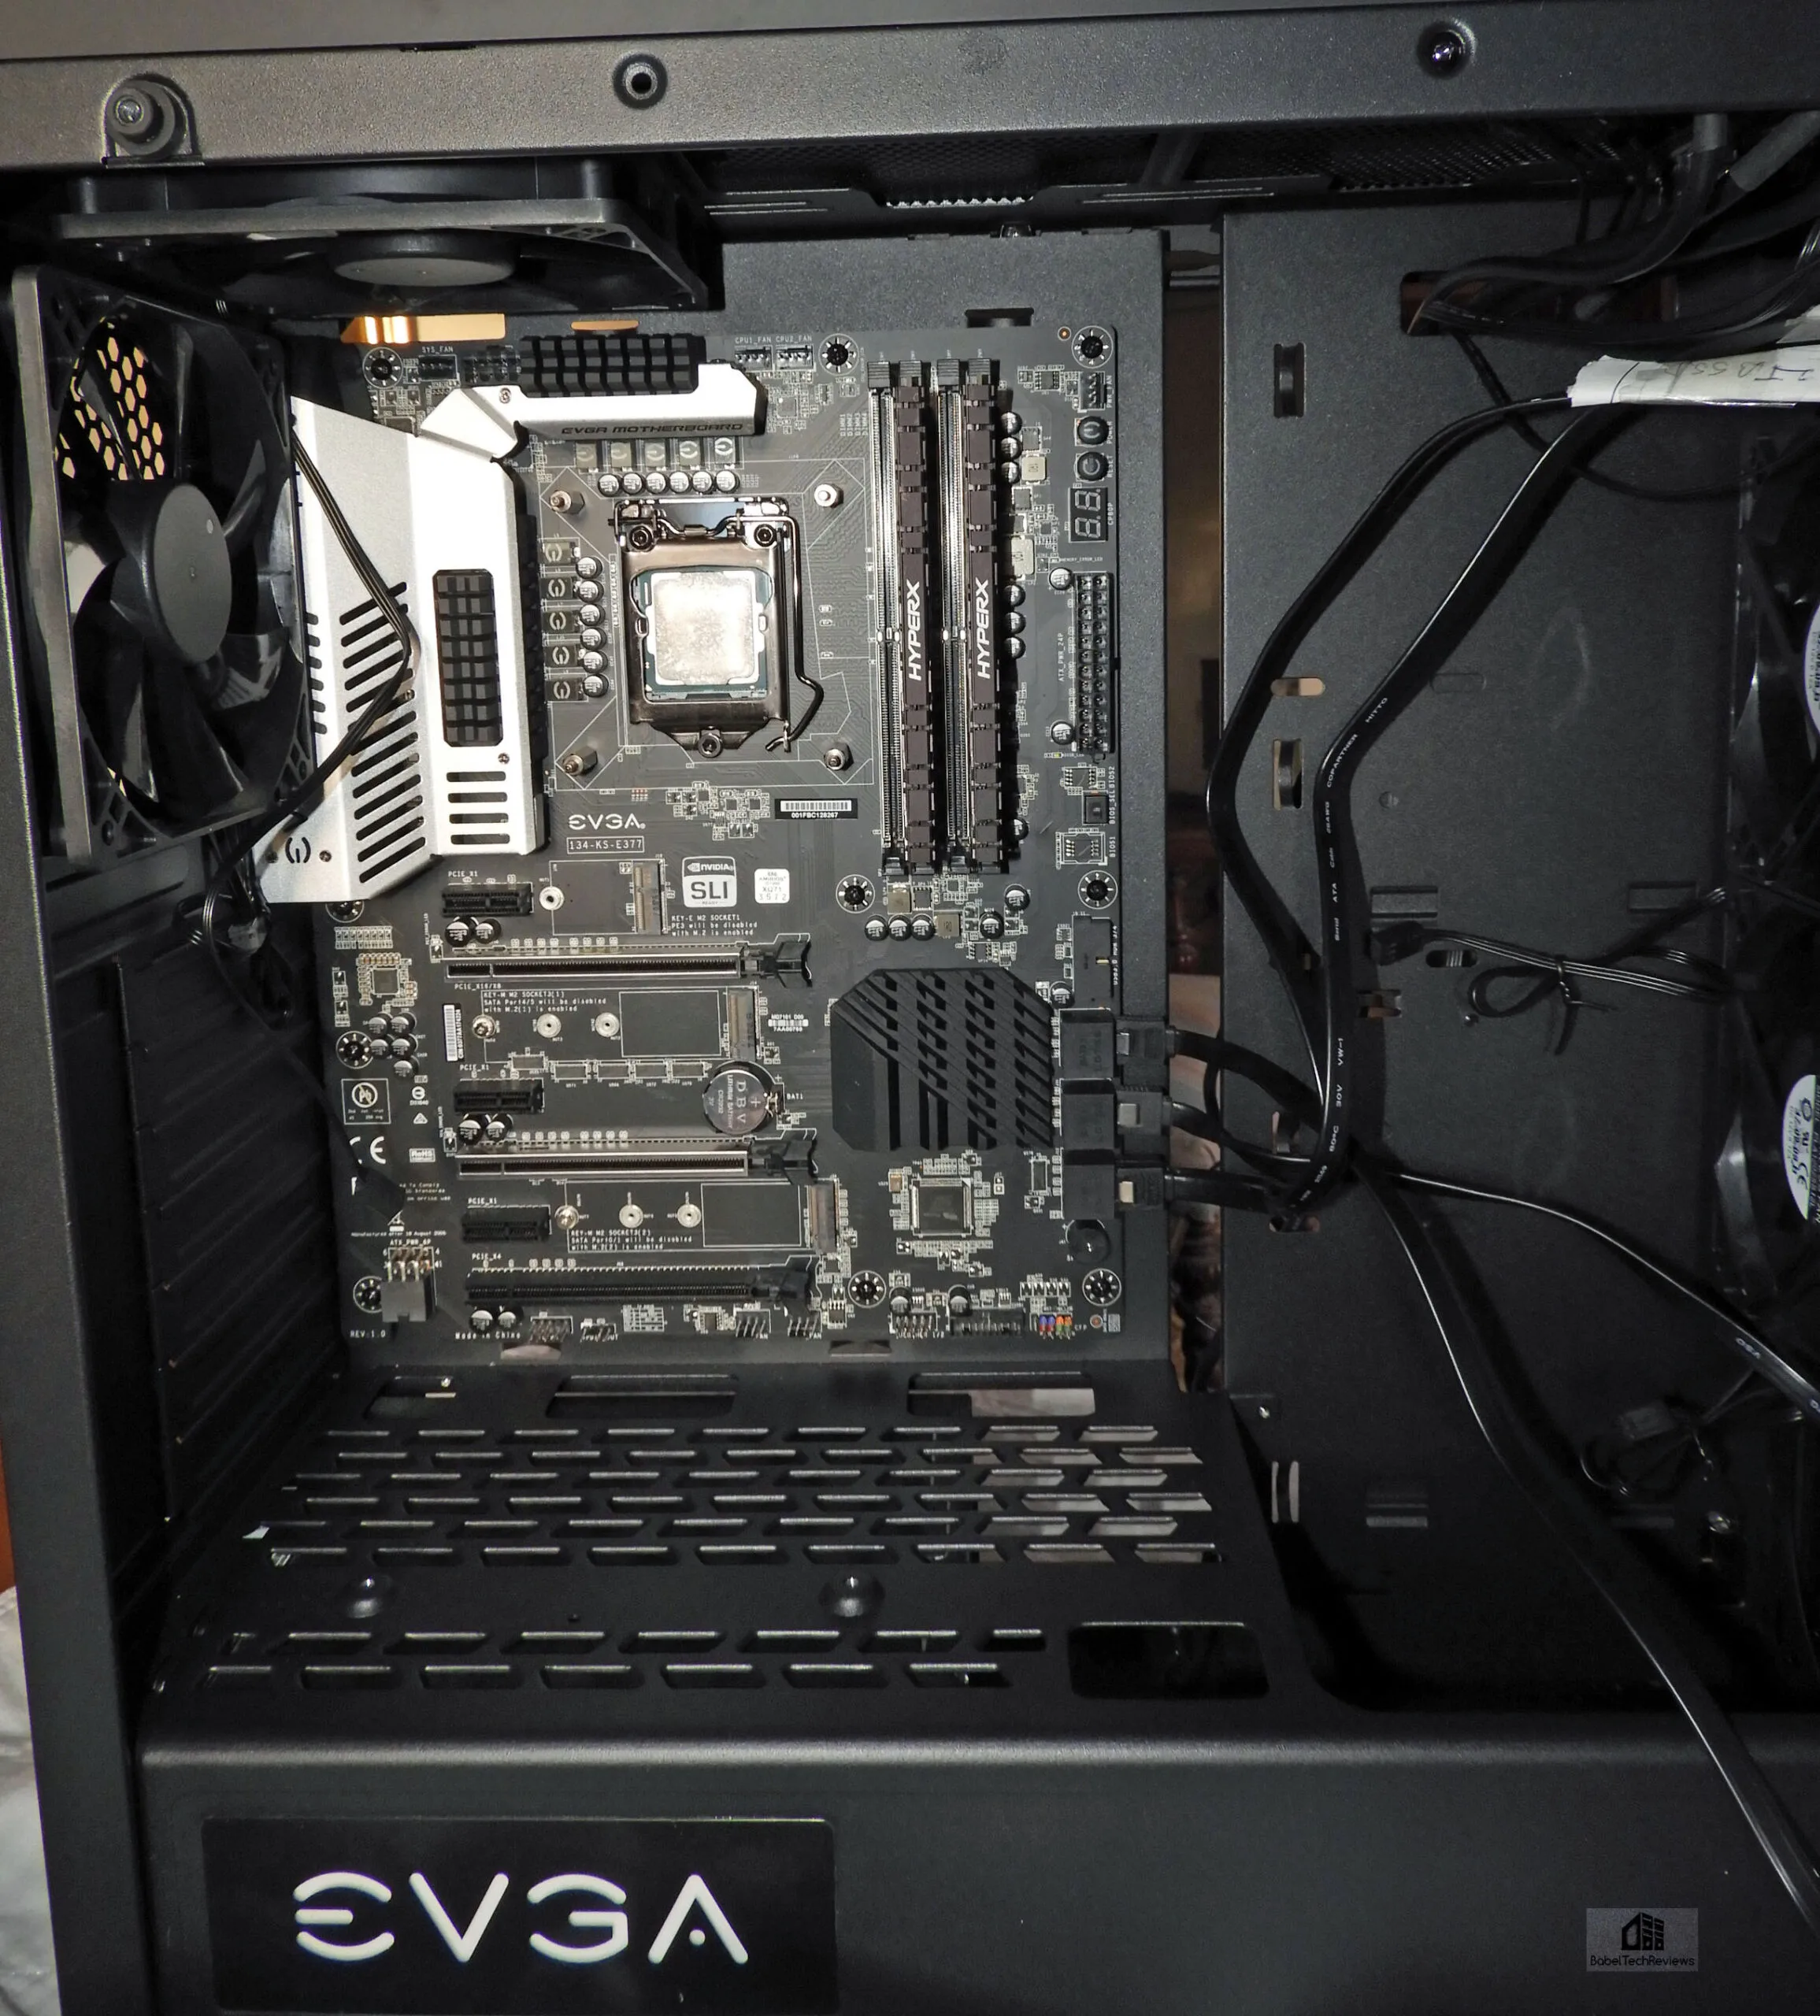
There is really only one good place for installing a 280mm CPU radiator. The case wires hang across the front of the case and interfere with a top radiator mounting installation. We also think that these exposed wires don’t look particularly good in a high-end case even if they are semi-hidden out of the way at the top. We would like to see them rerouted so they are completely hidden, and we would have preferred a top-mounted CPU radiator over front-mounted. However, at the front of the case, there is even room for a 360mm radiator which will please more extreme watercooling enthusiasts.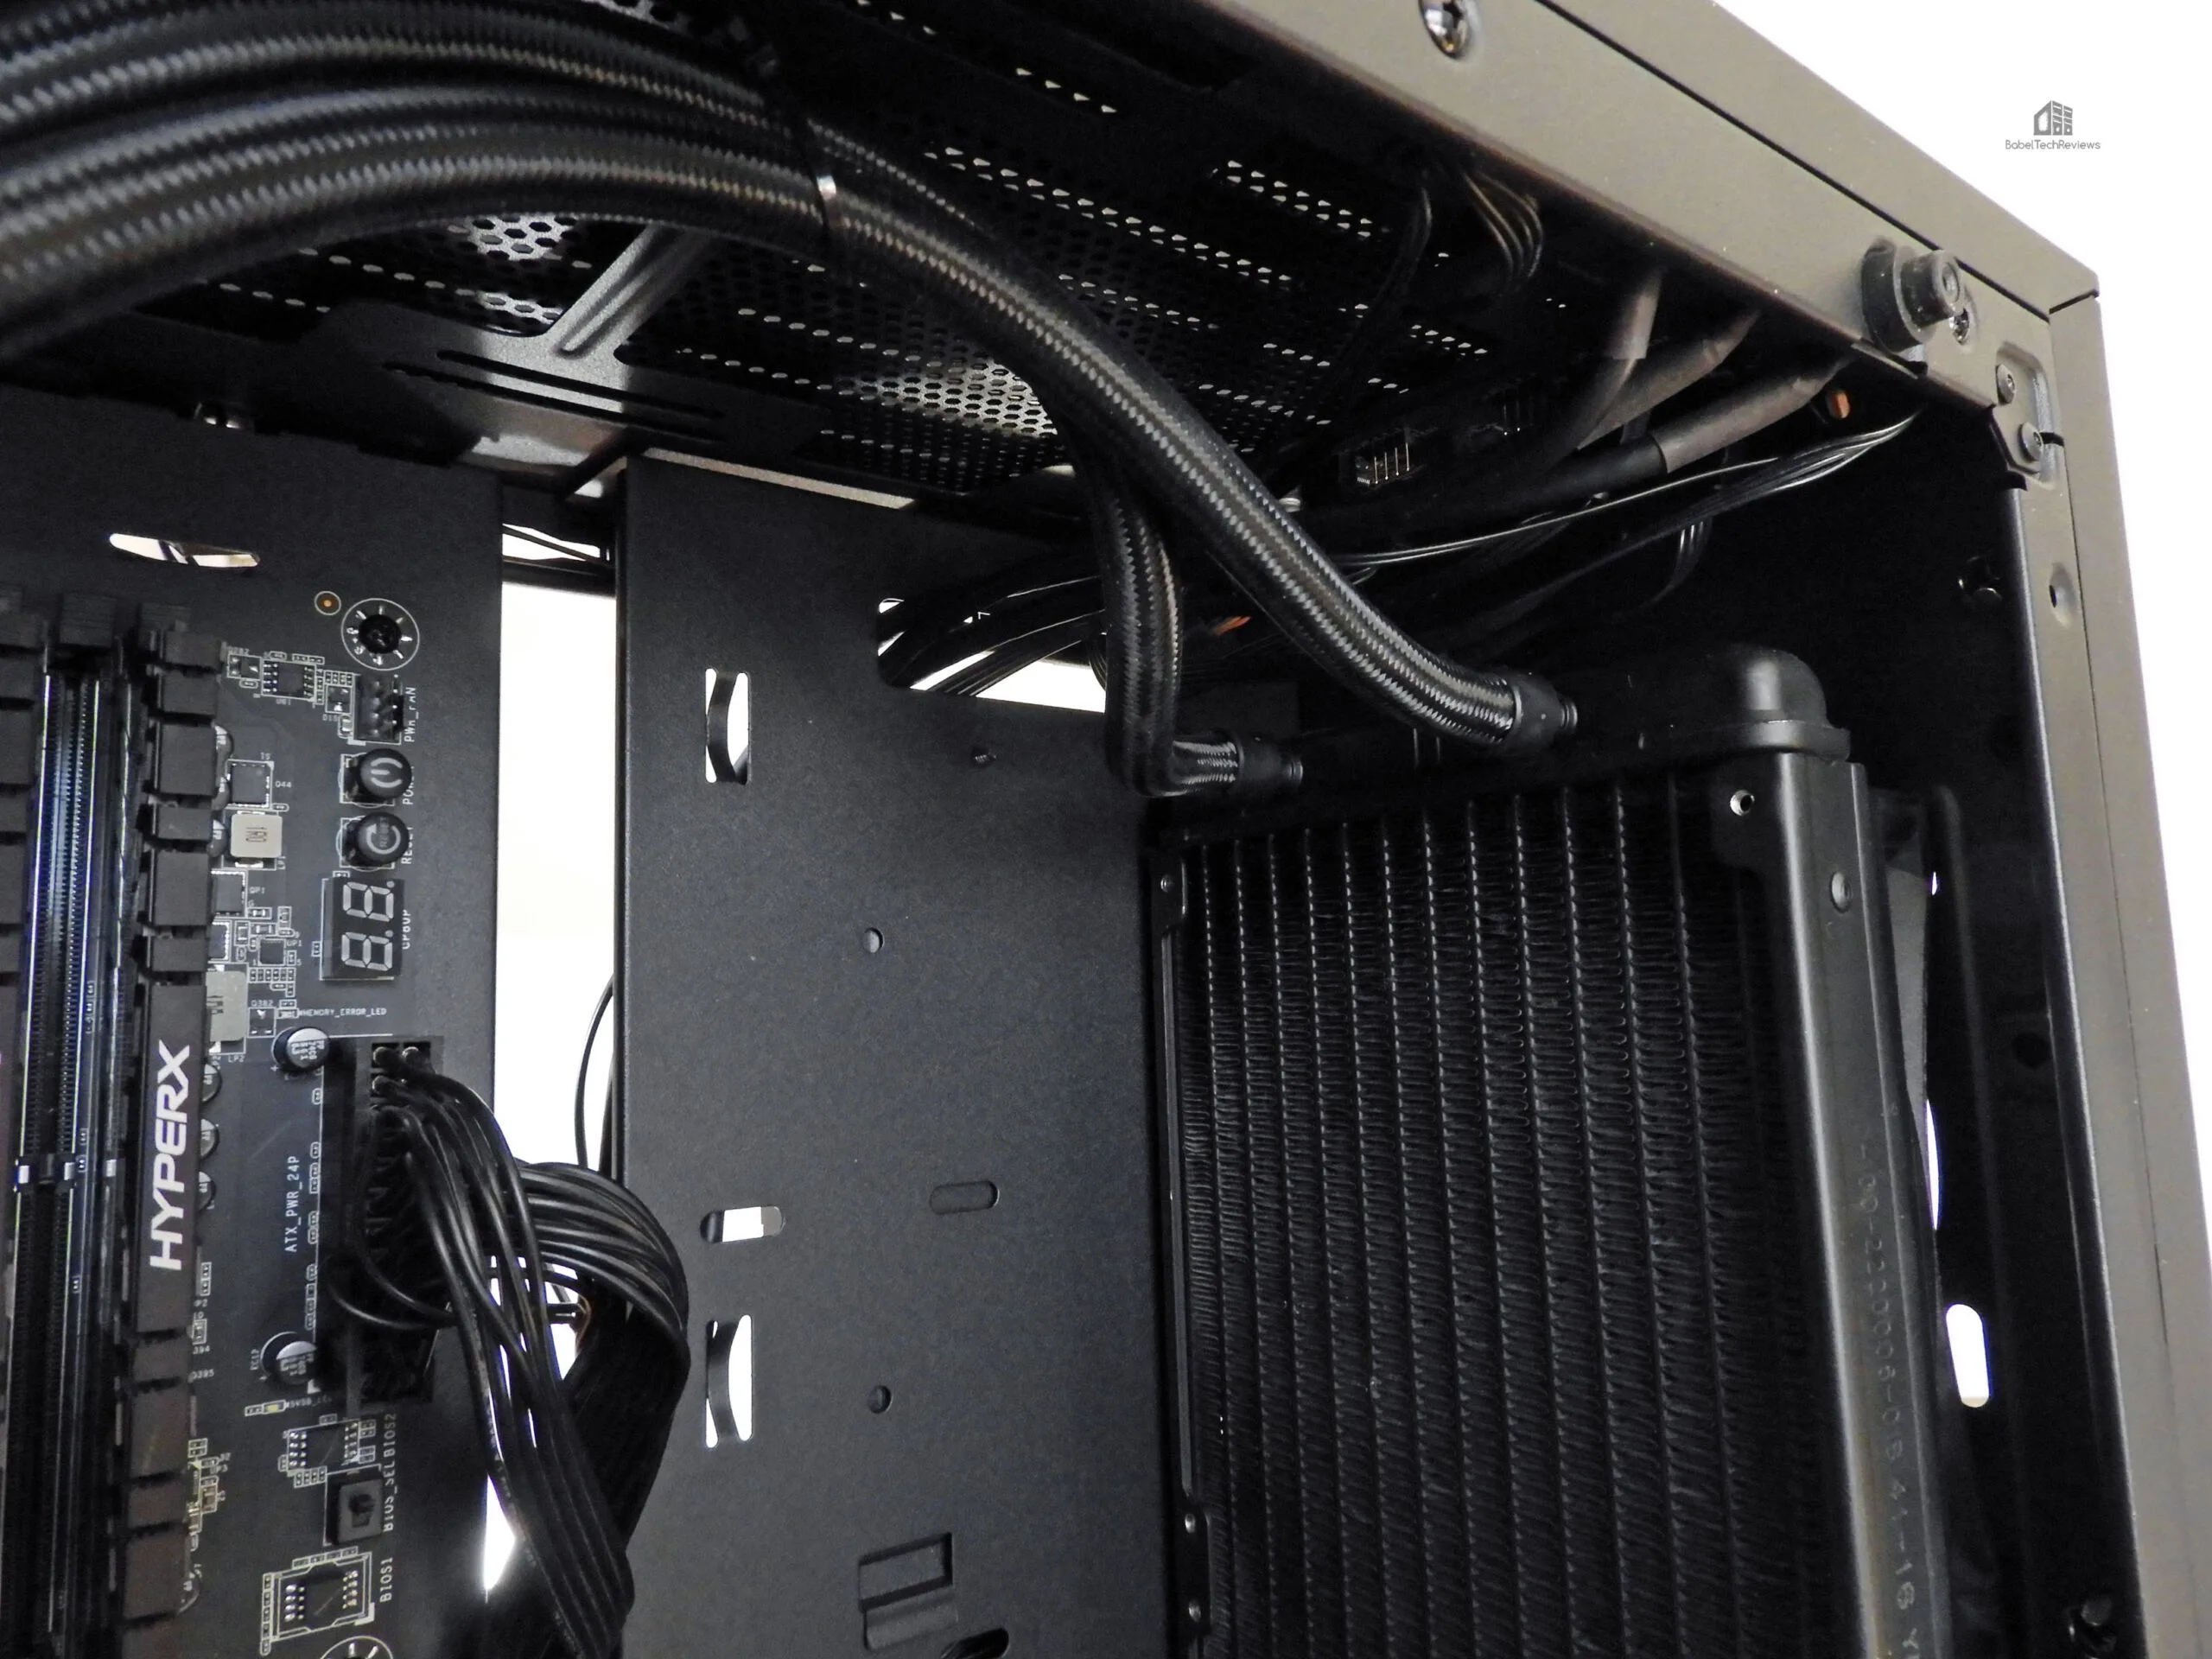
Once we installed the front glass plate, we found that the CPU temperatures rose a bit too much for our liking so we removed the top of the case and installed a second top fan for a total of 3 exhaust fans.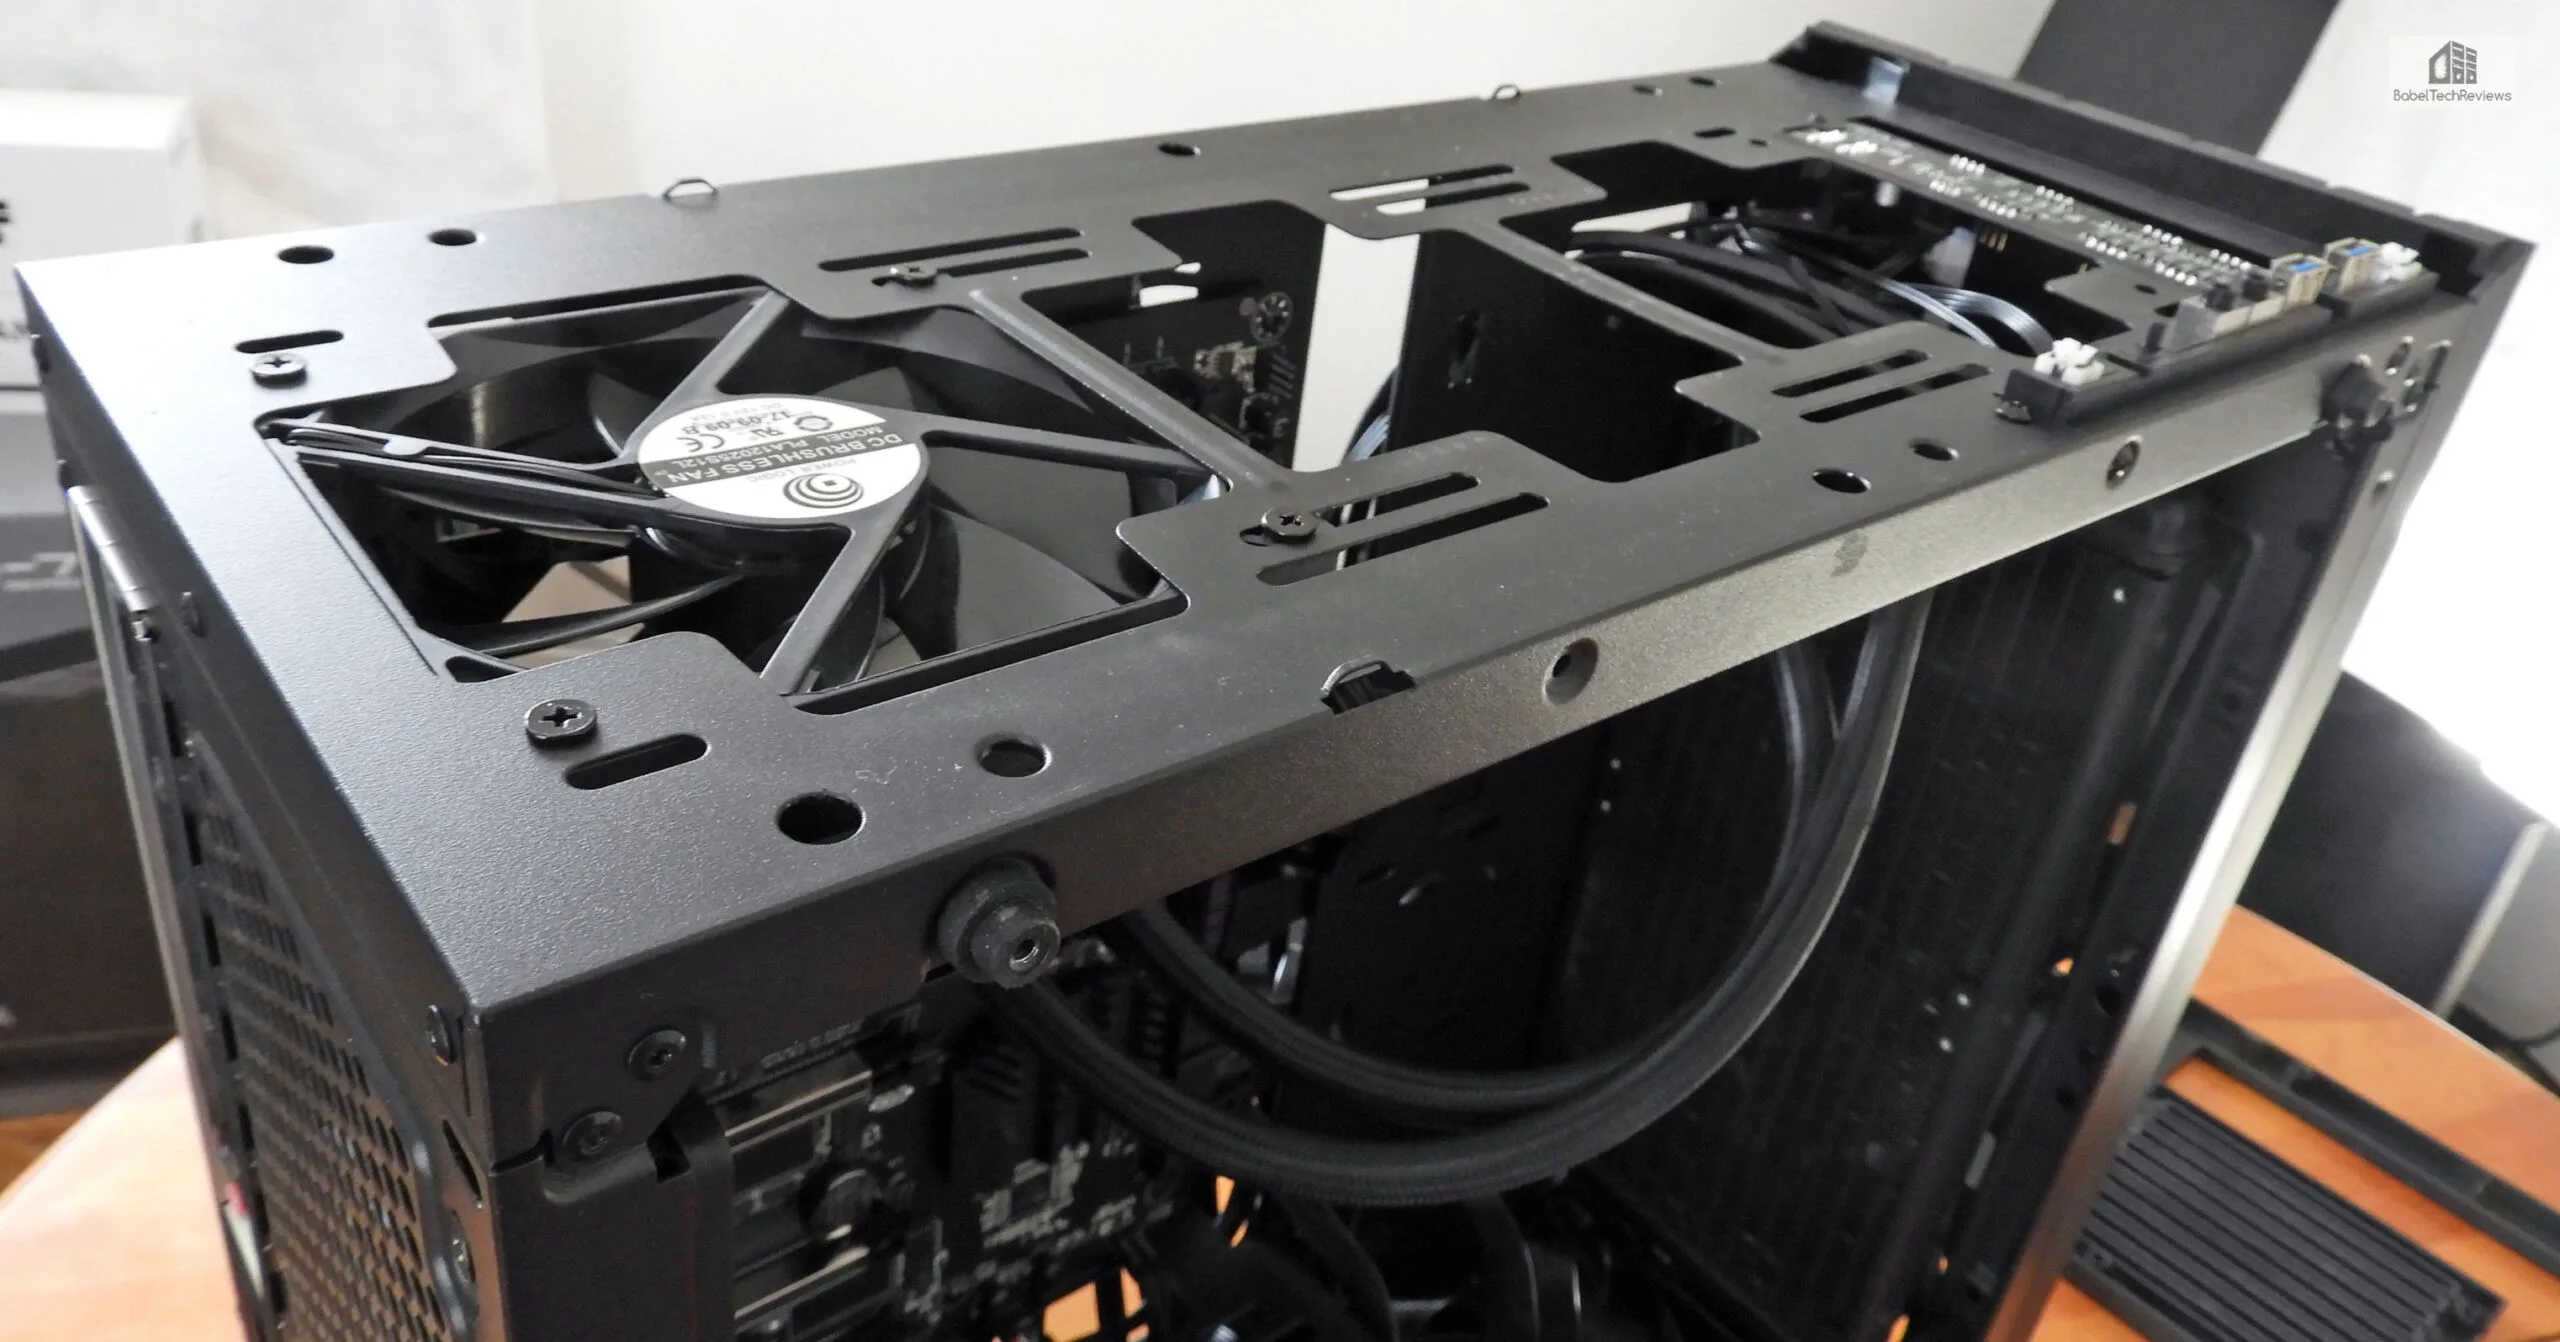
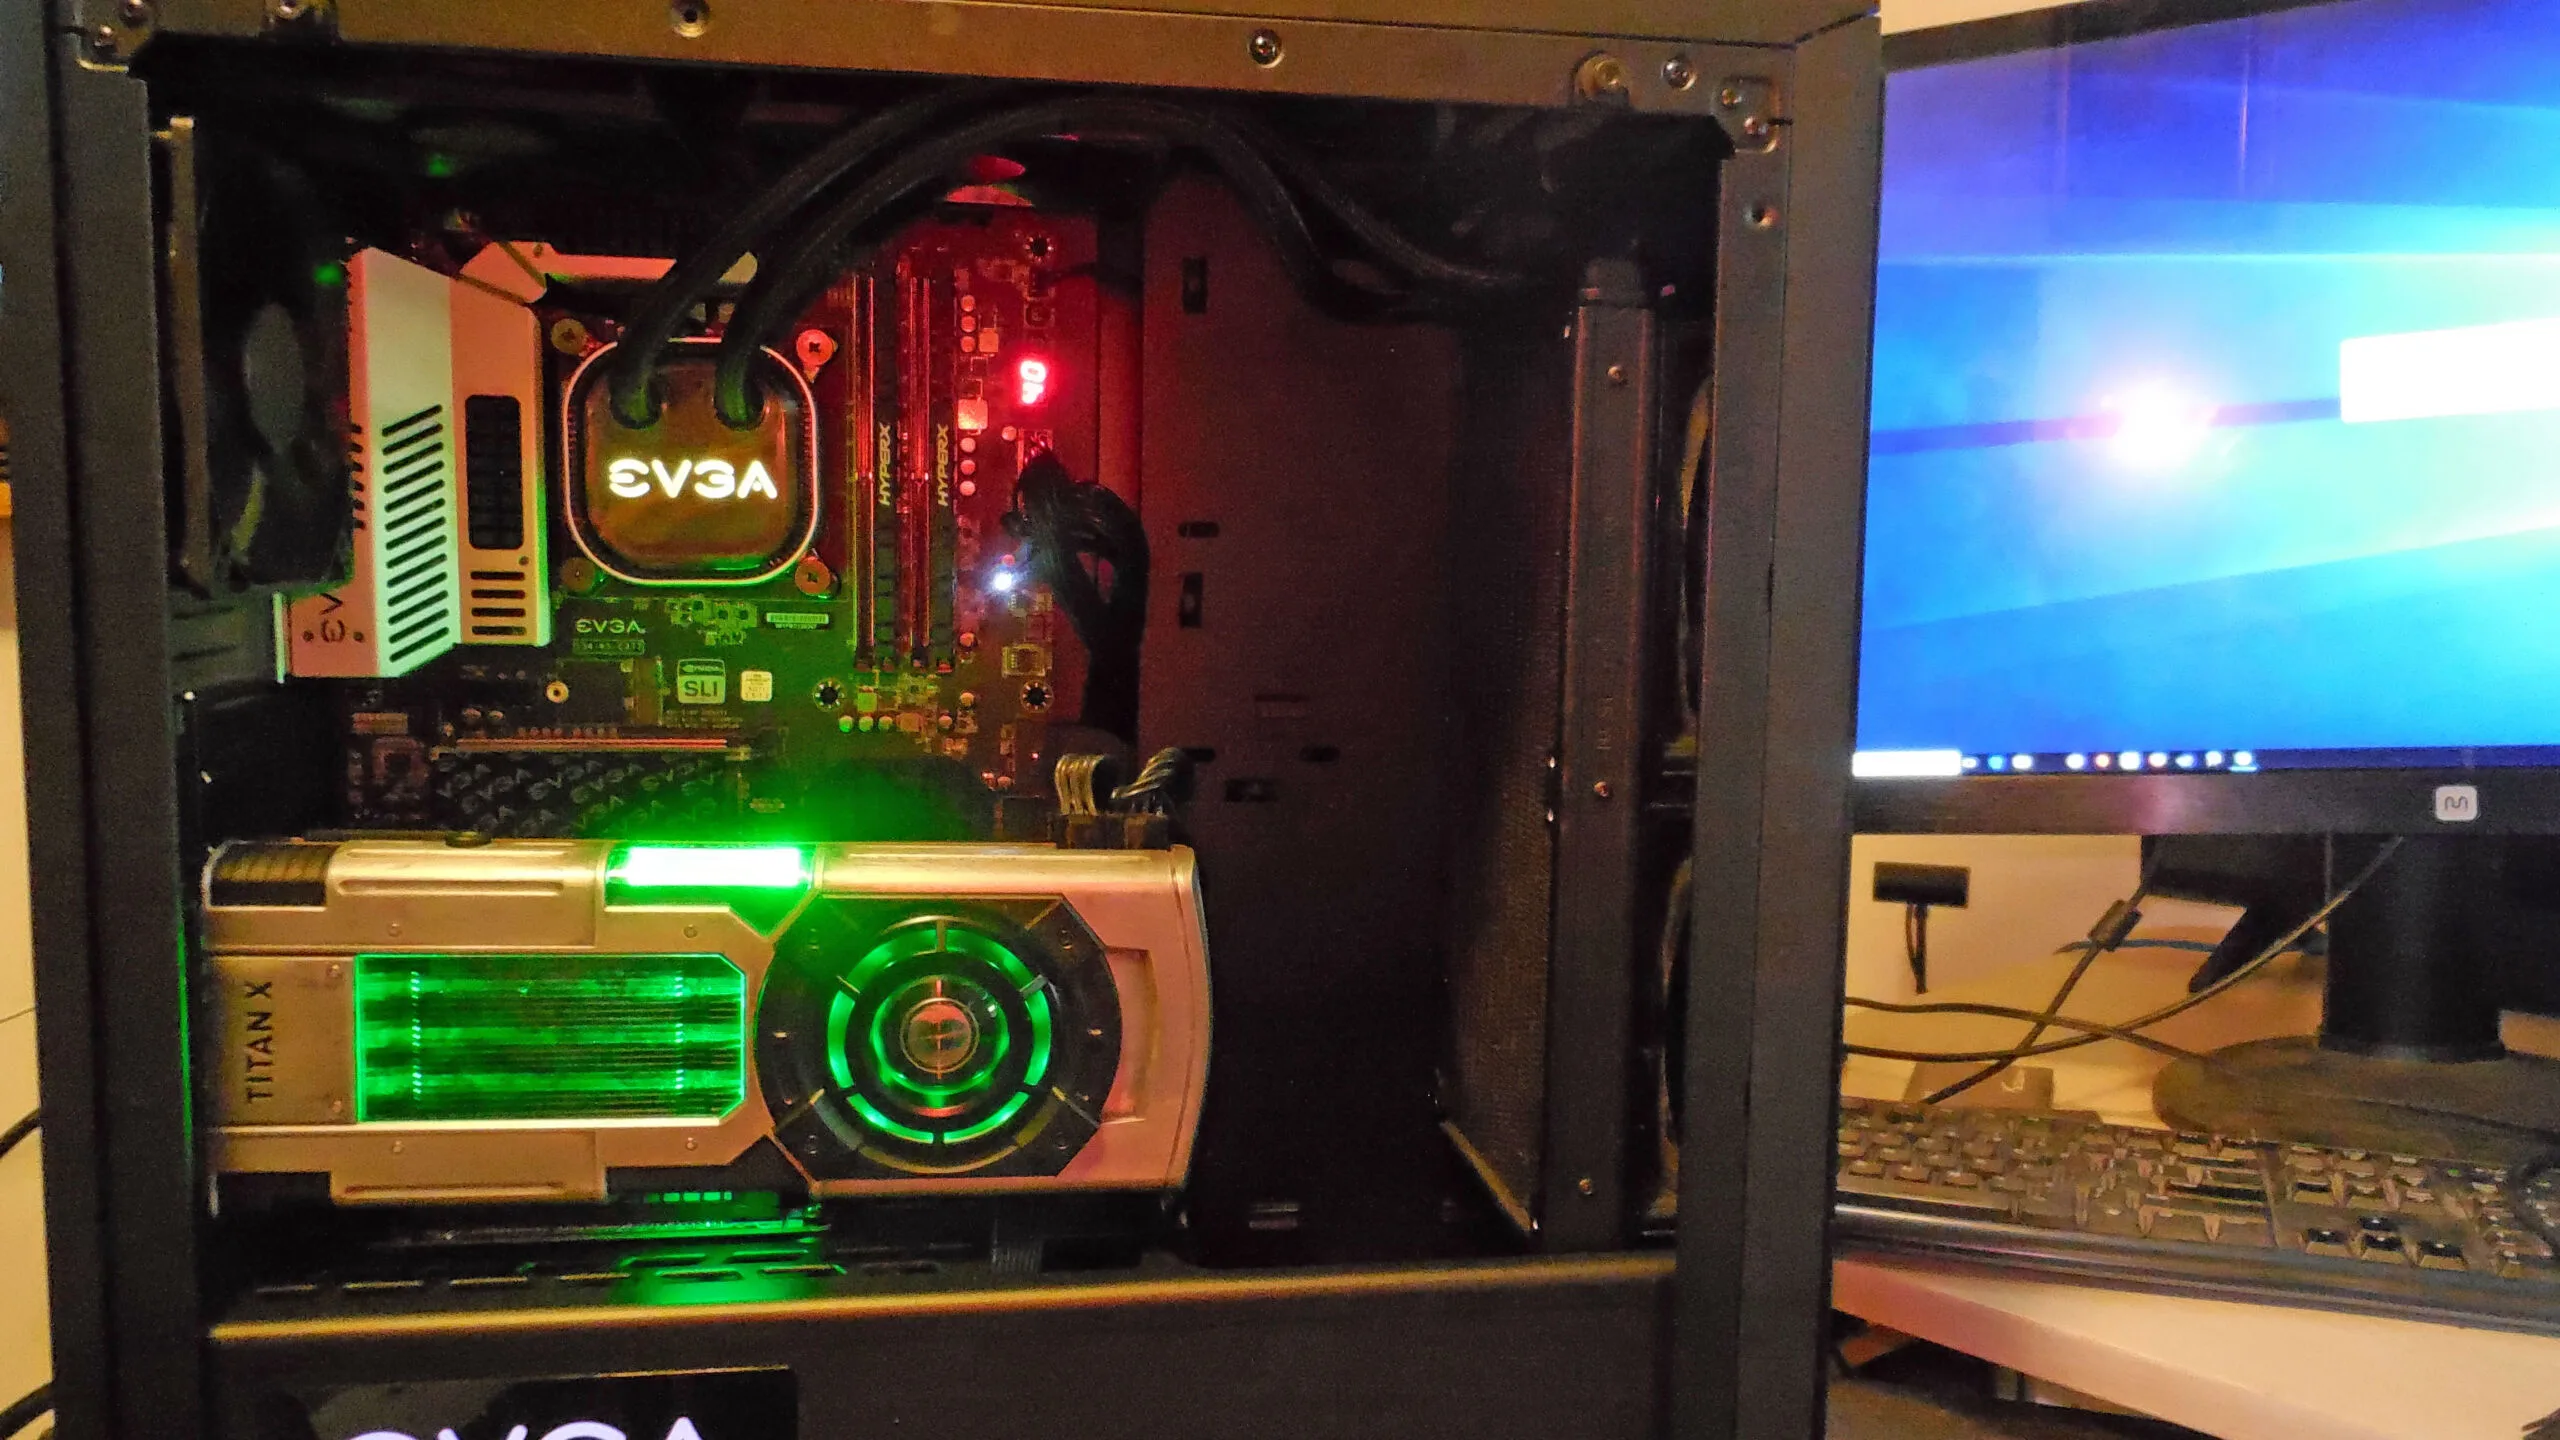
It is easy to install a second fan at the top of the case, but not a third fan because of the case wiring that probably could have been routed better. 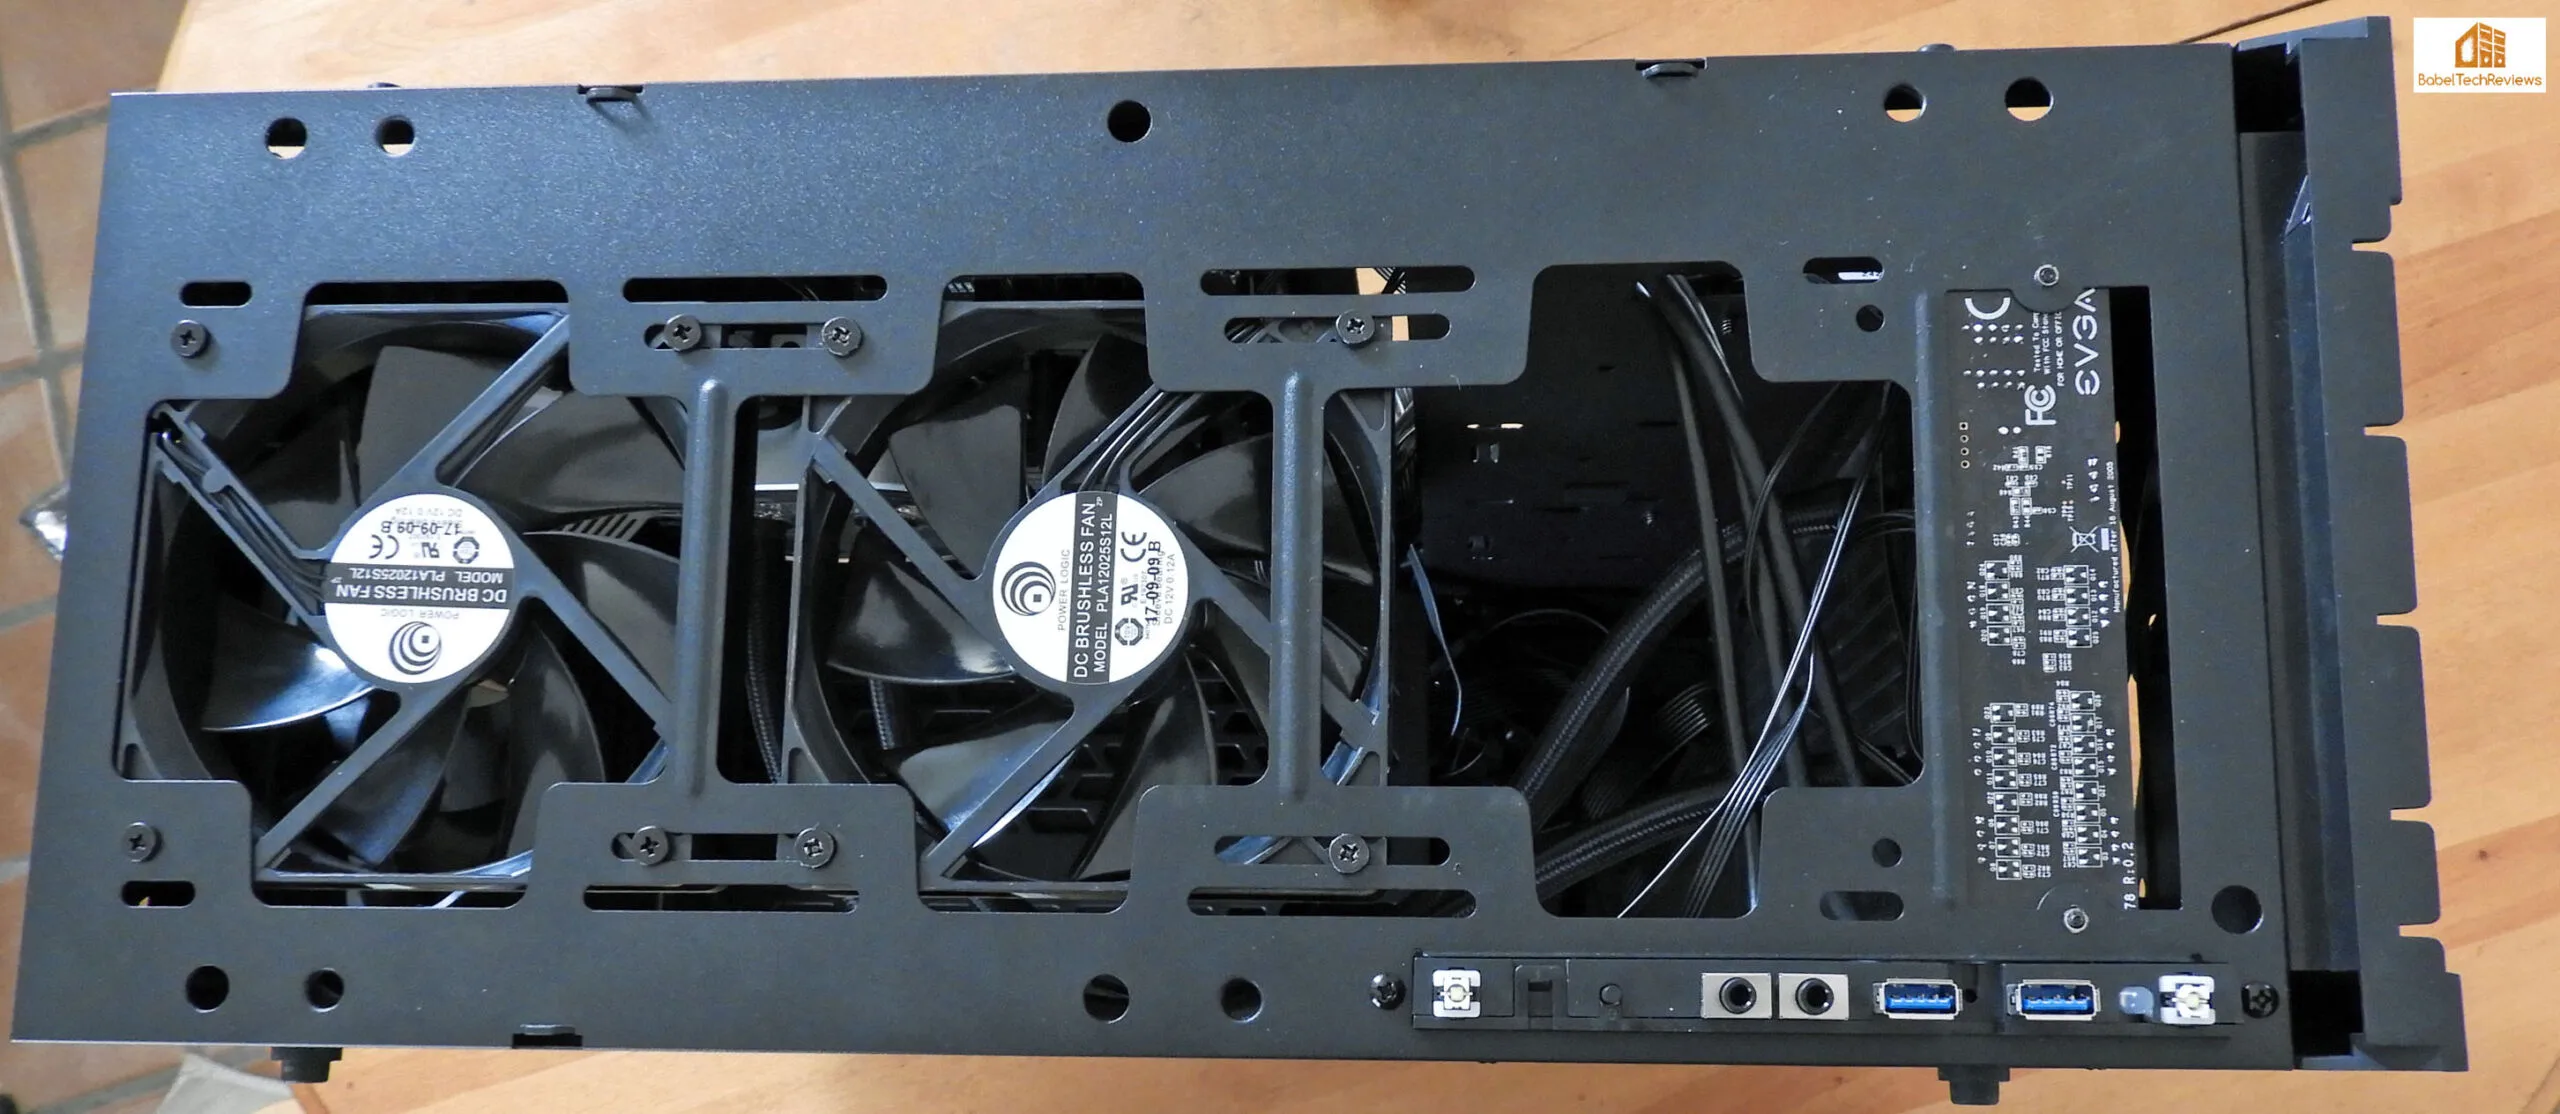 Next we are going to install our TITAN Xp vertically, and we remove the back cover as the card is blower-style which exhausts the hot GPU air out the back of the card and most of it will go out of the case.
 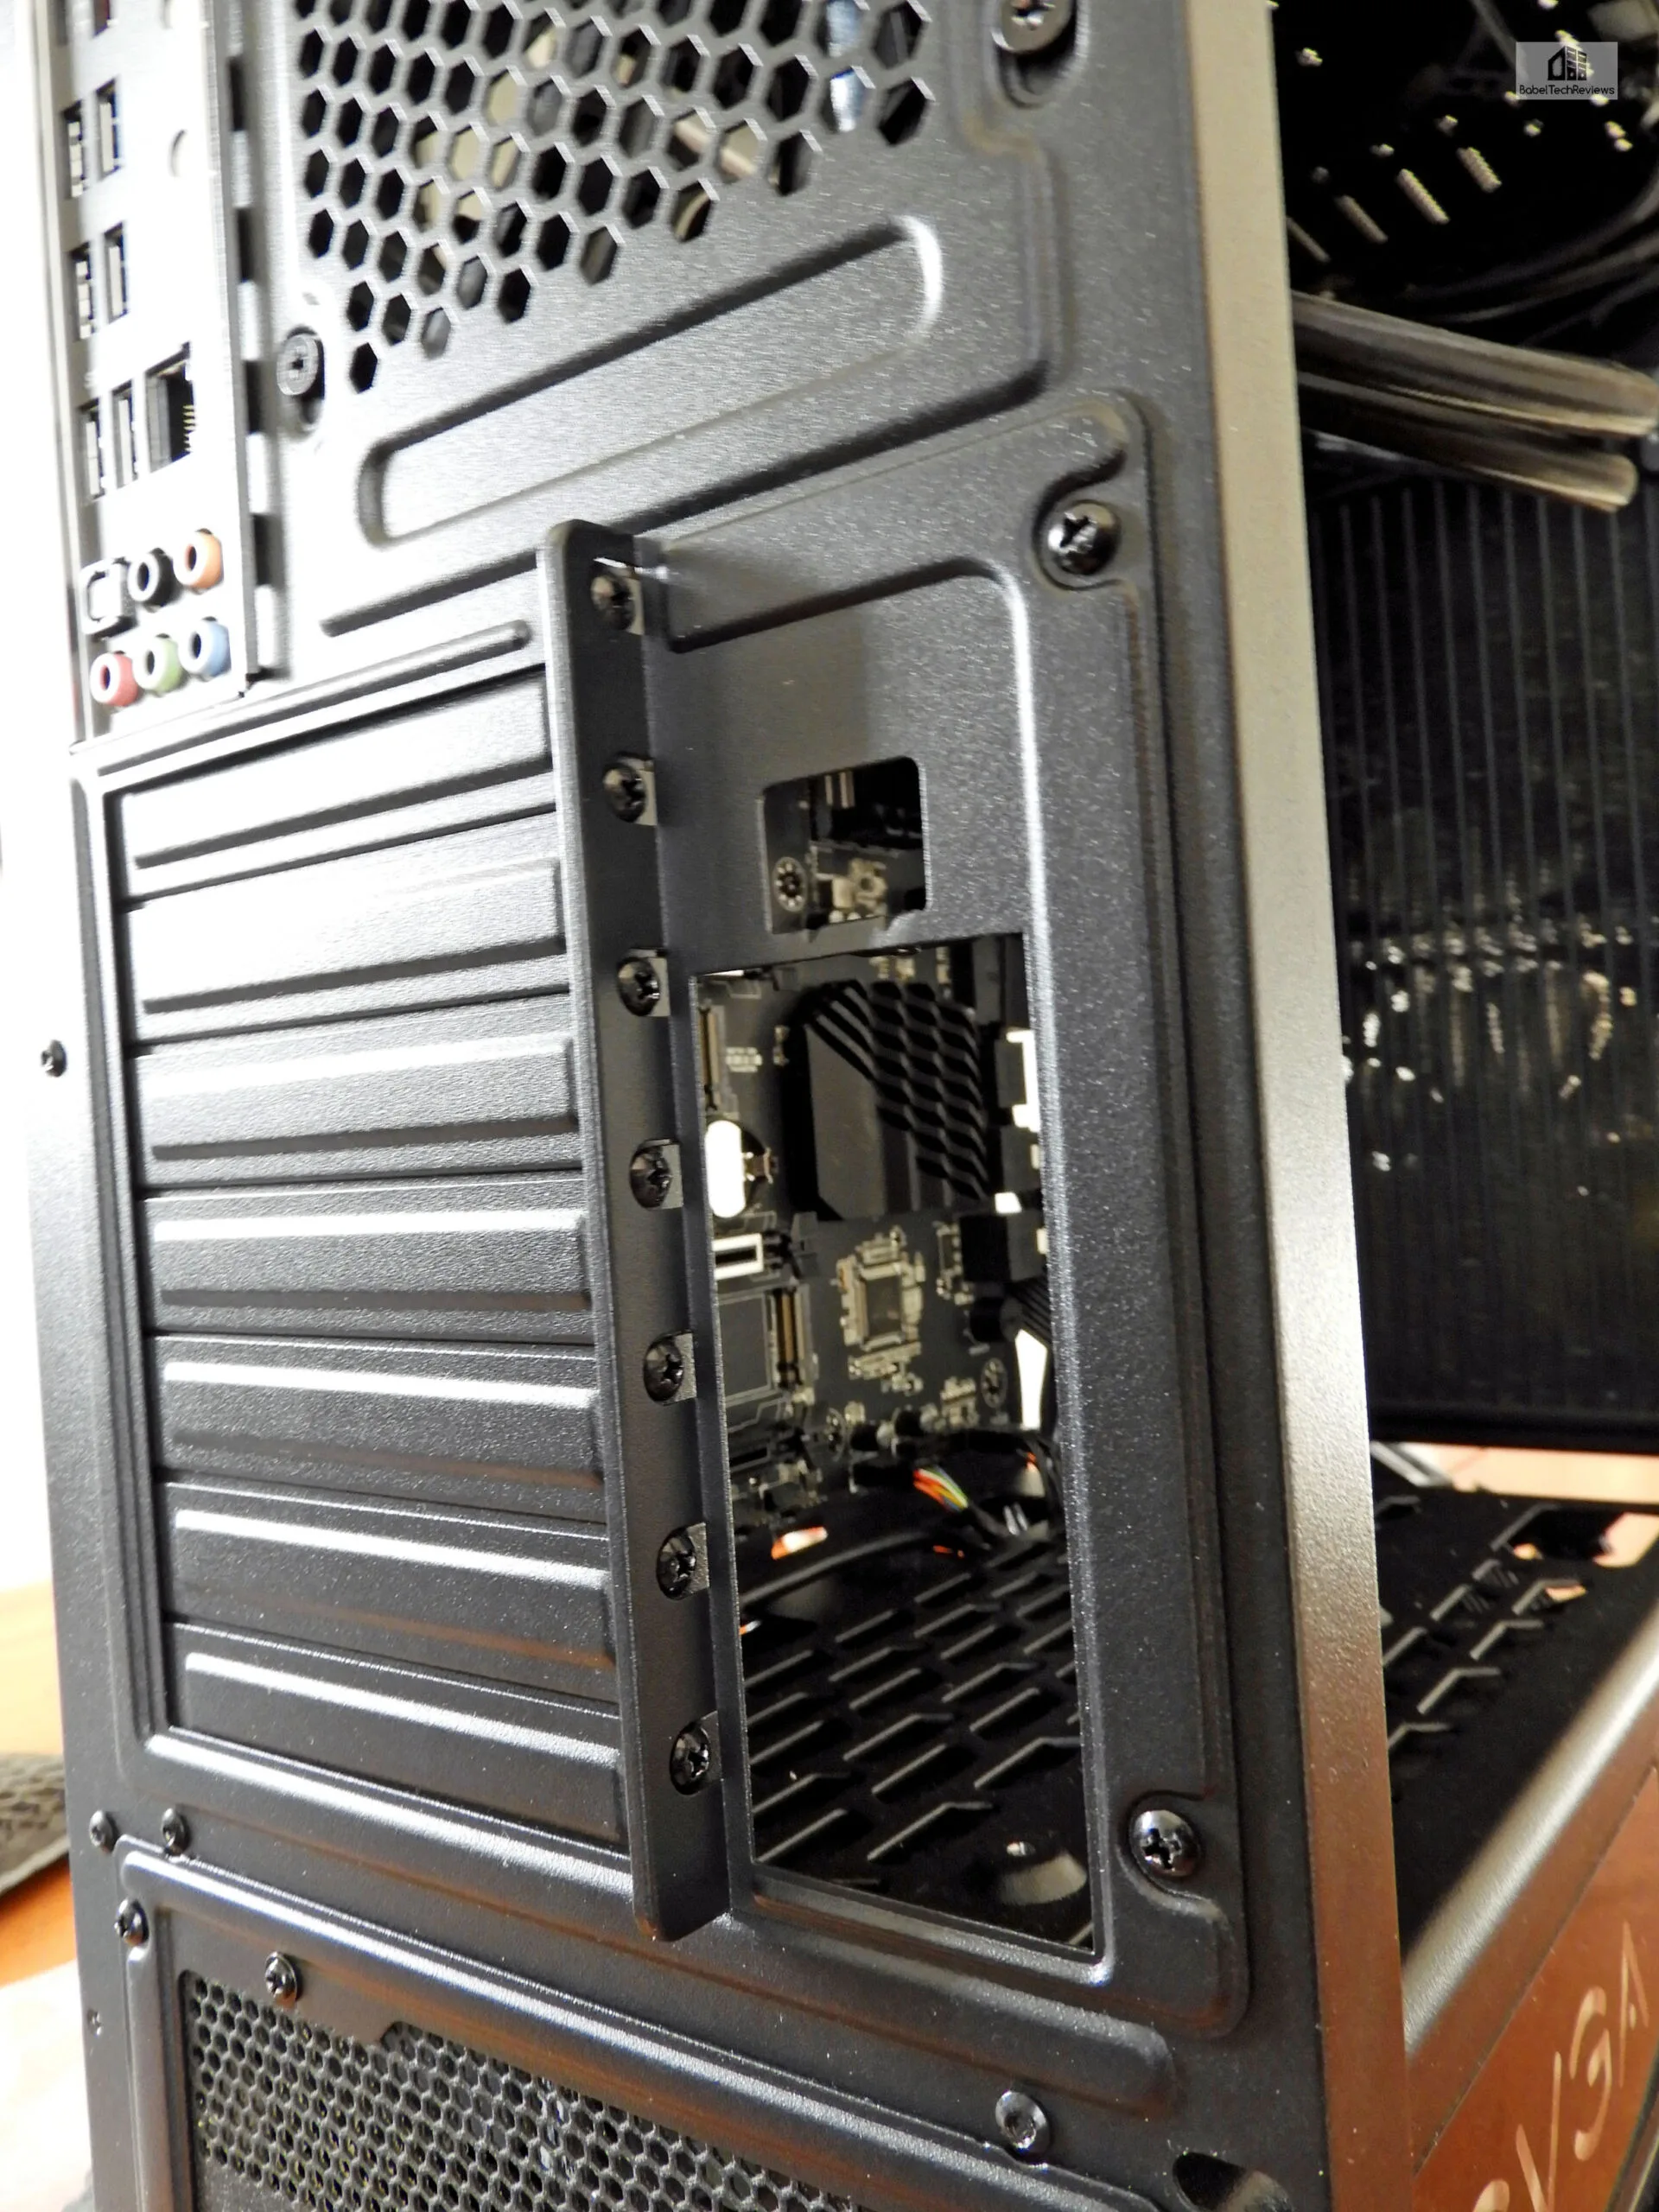 We use the PCIe ribbon extension to set up the card vertically. It’s about six inches long and we did not chart any extra latency with it over using the regular PCIe slot; our frametime results were inconclusive. Also, unless you can find an extremely long SLI ribbon bridge, you will not be able to SLI your vertically mounted card with one installed in a regular PCIe slot.
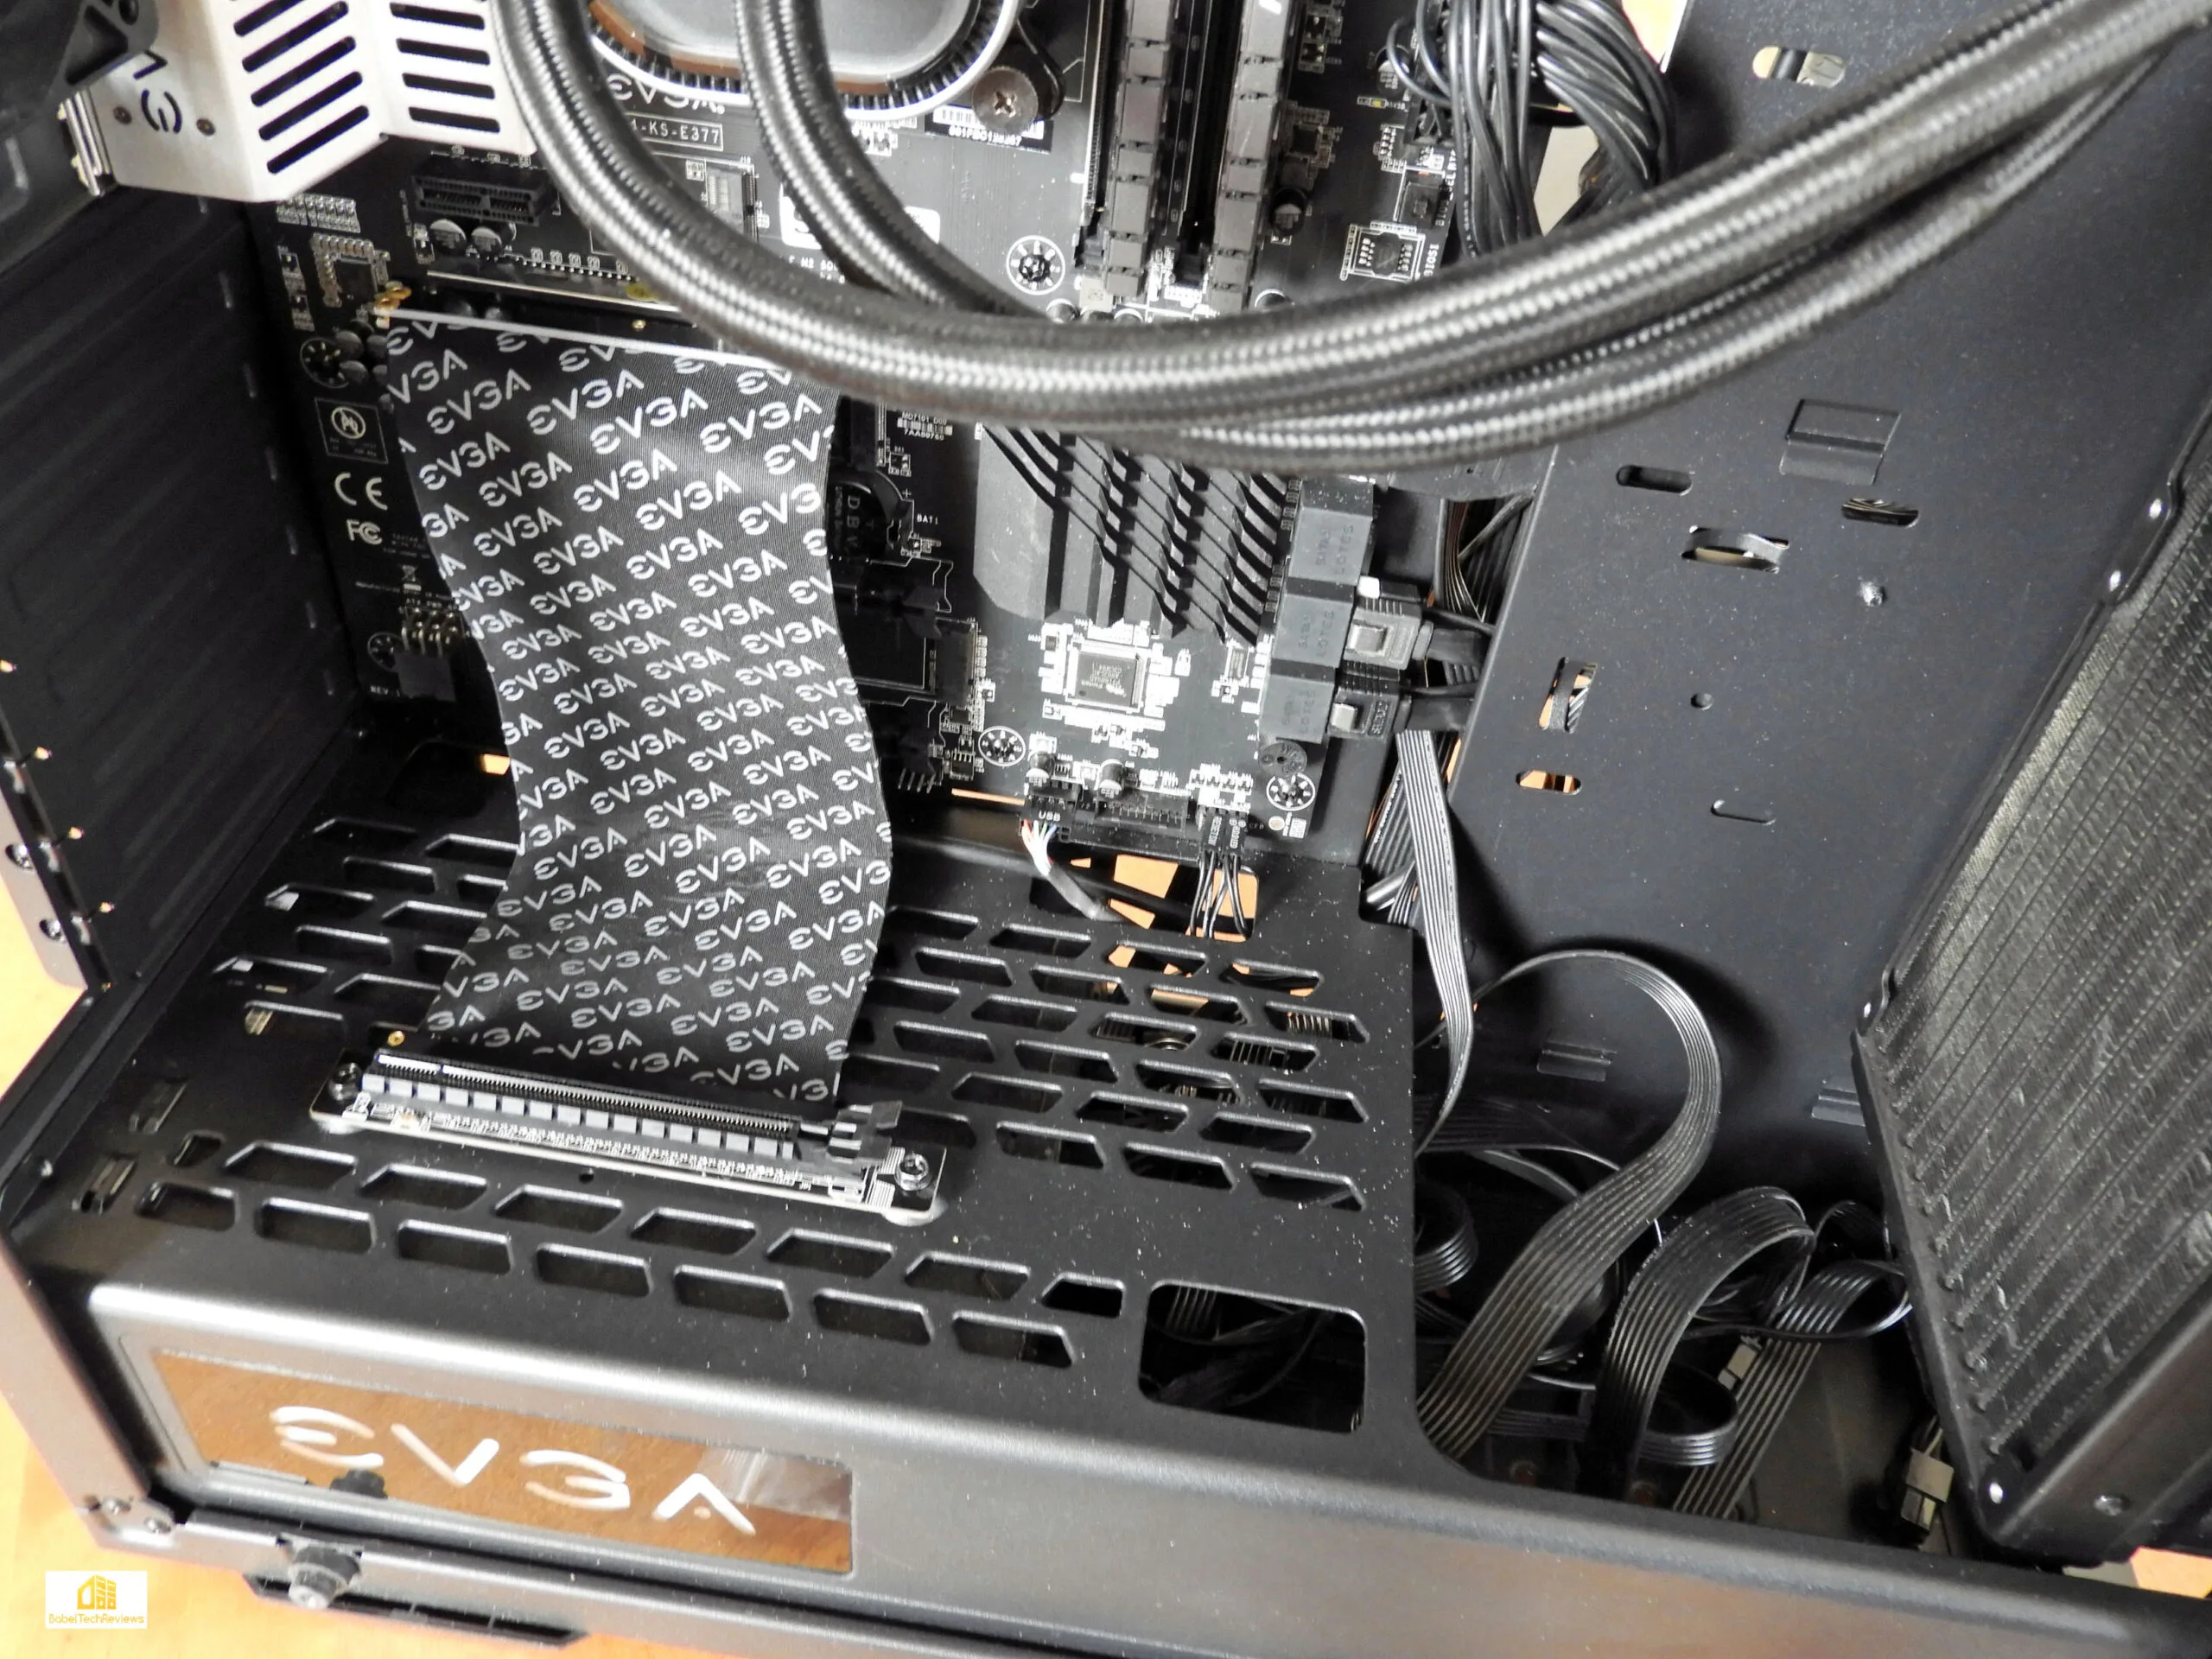
Next we install our TITAN XP and then install the PCIe power cables. 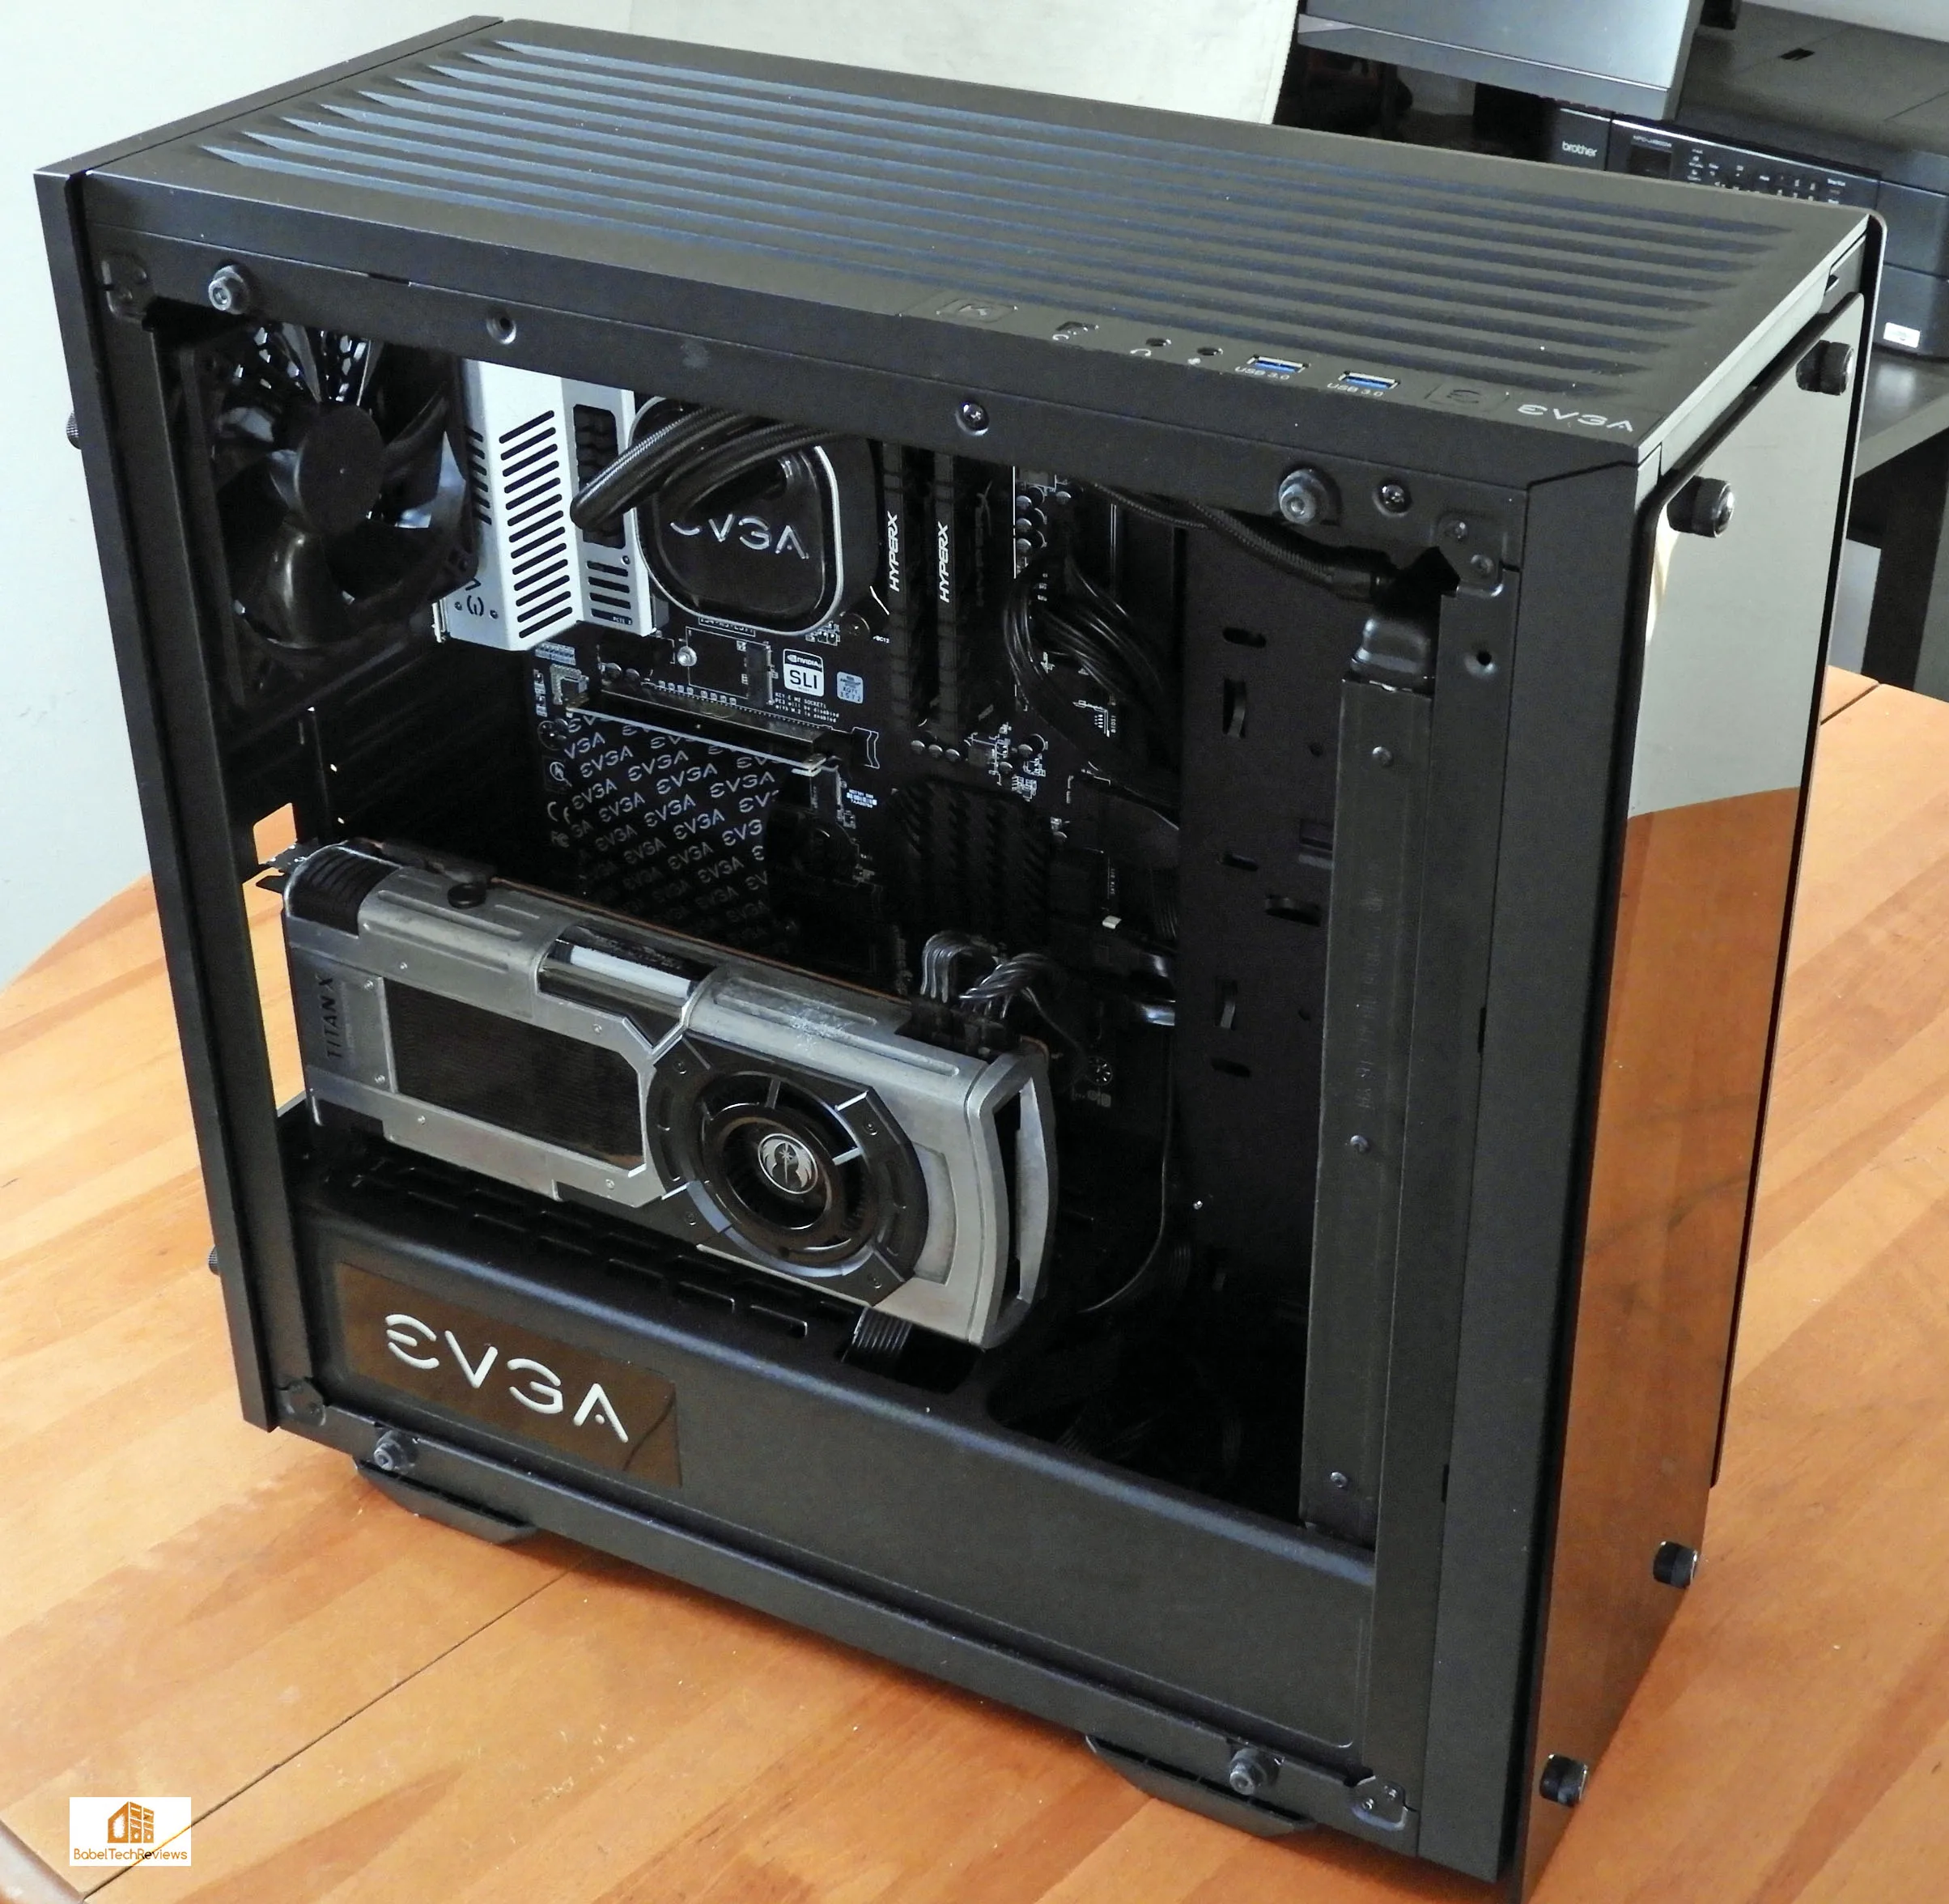
The PCIe cables hide nicely behind the card or you can use EVGA’s PCIe Powerlink connector for an even cleaner custom look.
Here we have installed our 2 full-sized 2TB SSHDs which are used for extra storage along with our HyperX 240GB SSD for Windows, and a 1.92TB enterprise class Micron SSD for our primary game storage on the backside. We feel that the DG-77 cable management can be very clean because of the logical way that the case is laid out.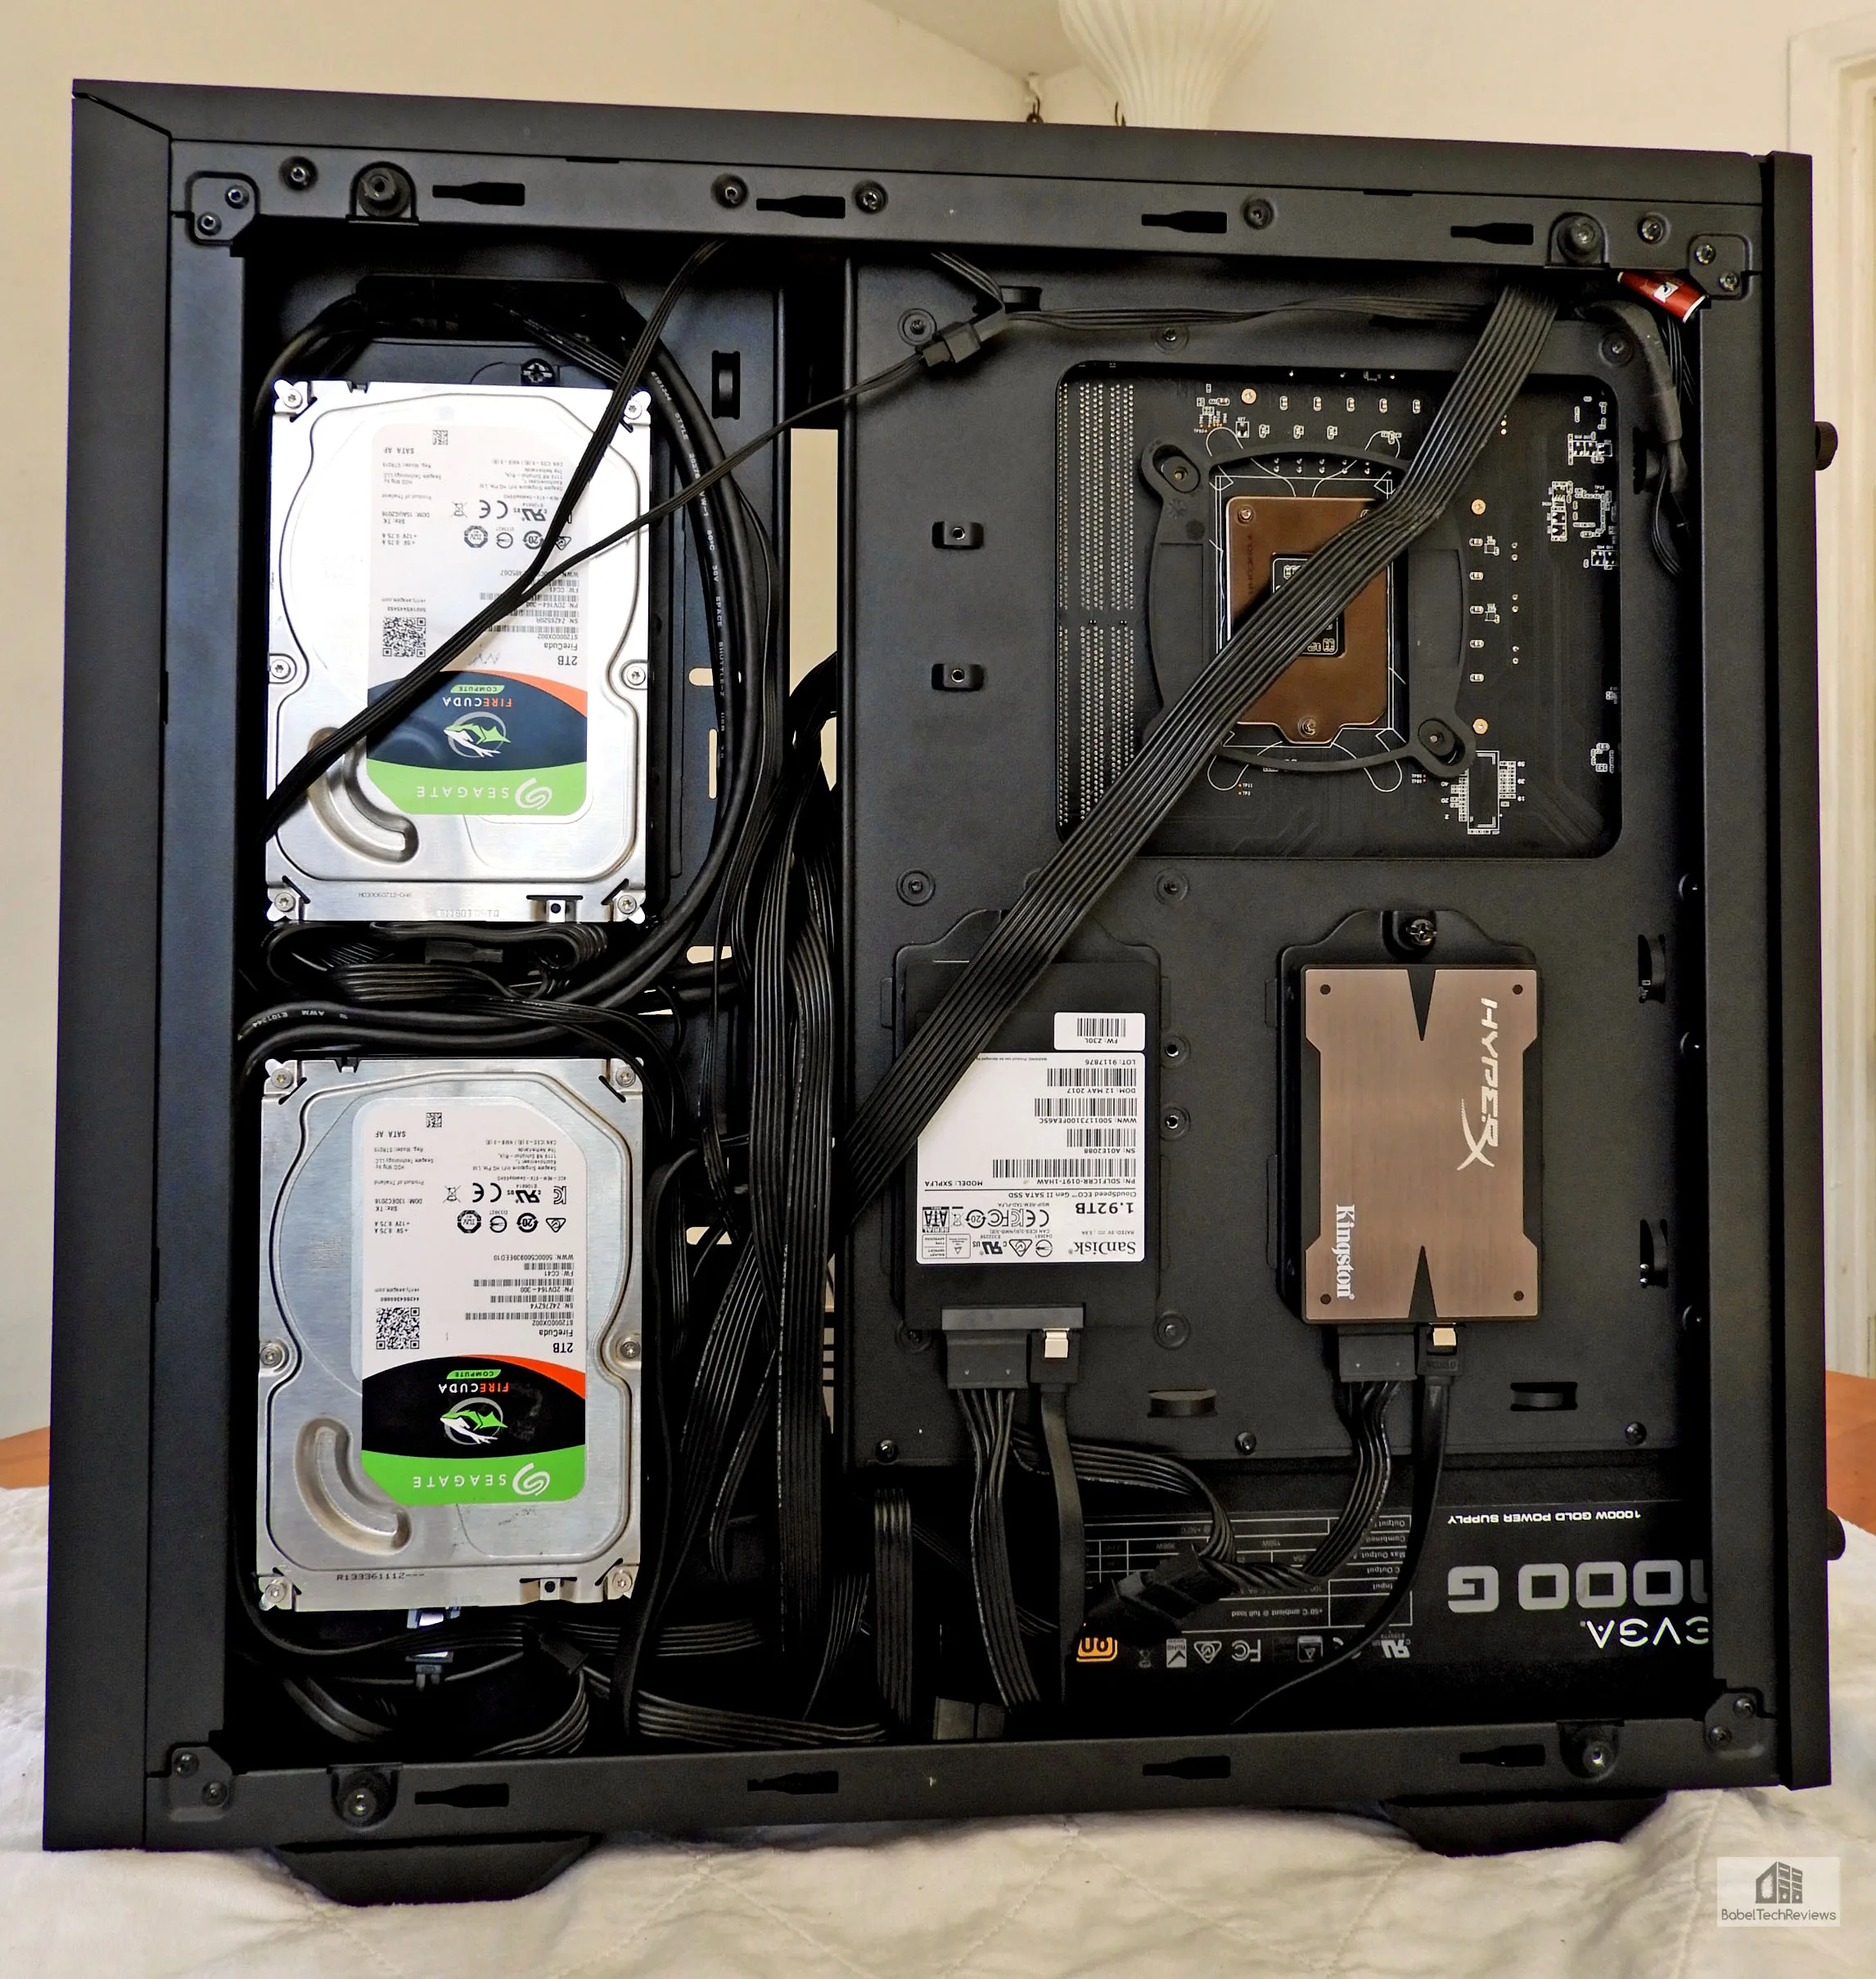
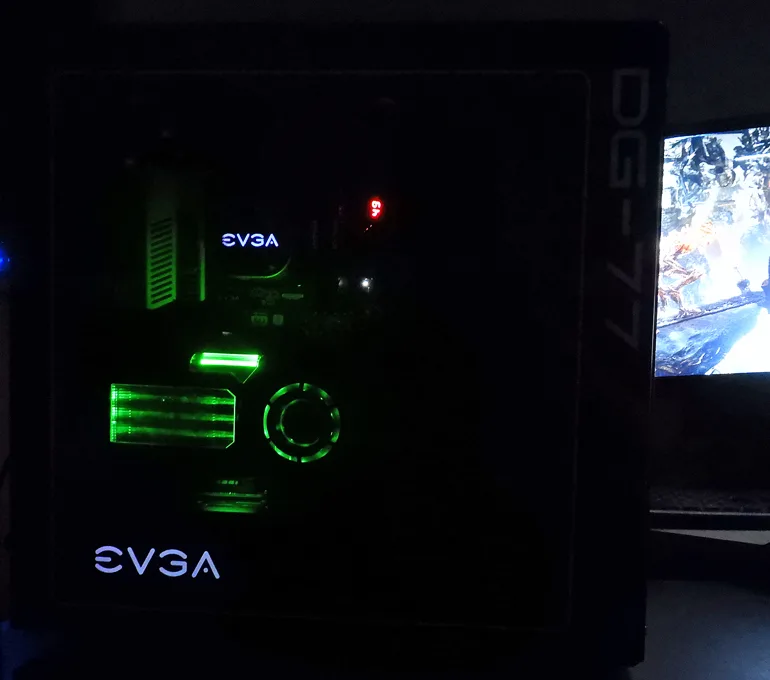
The DG-77 looks great with the PC running and with the side panel off.

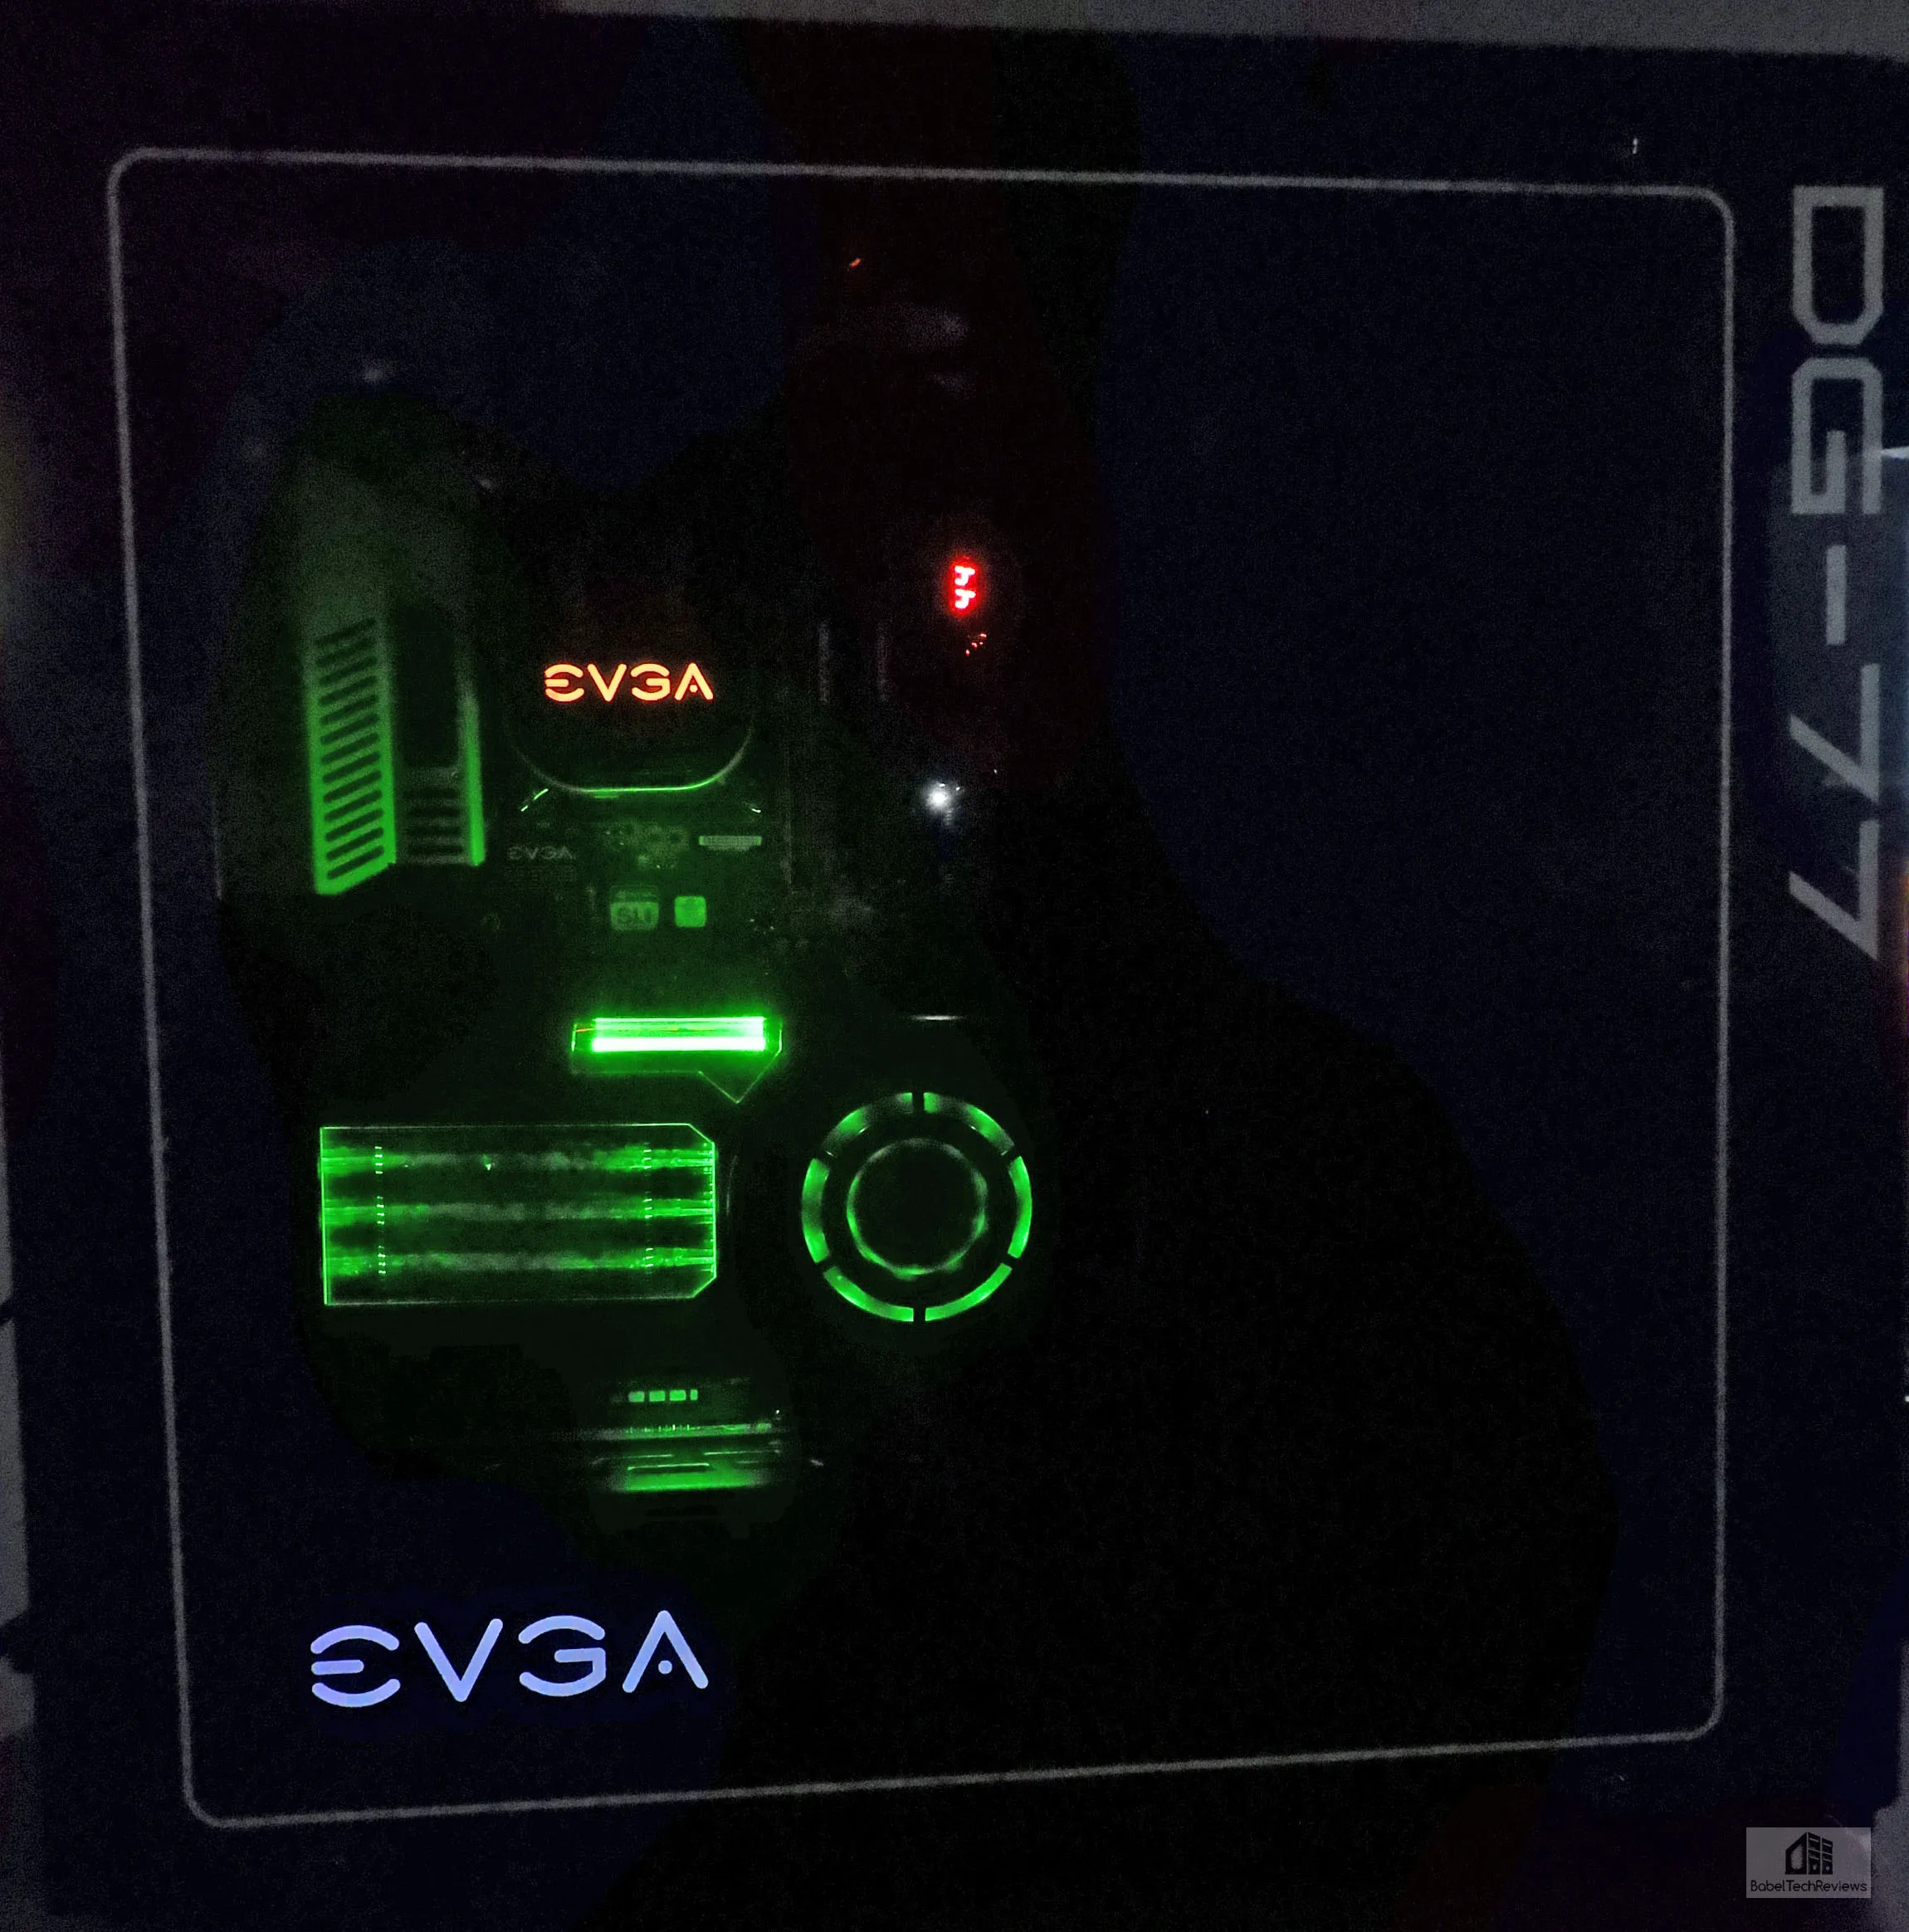
The DG-77 also looks awesome with the glass panel on in complete darkness.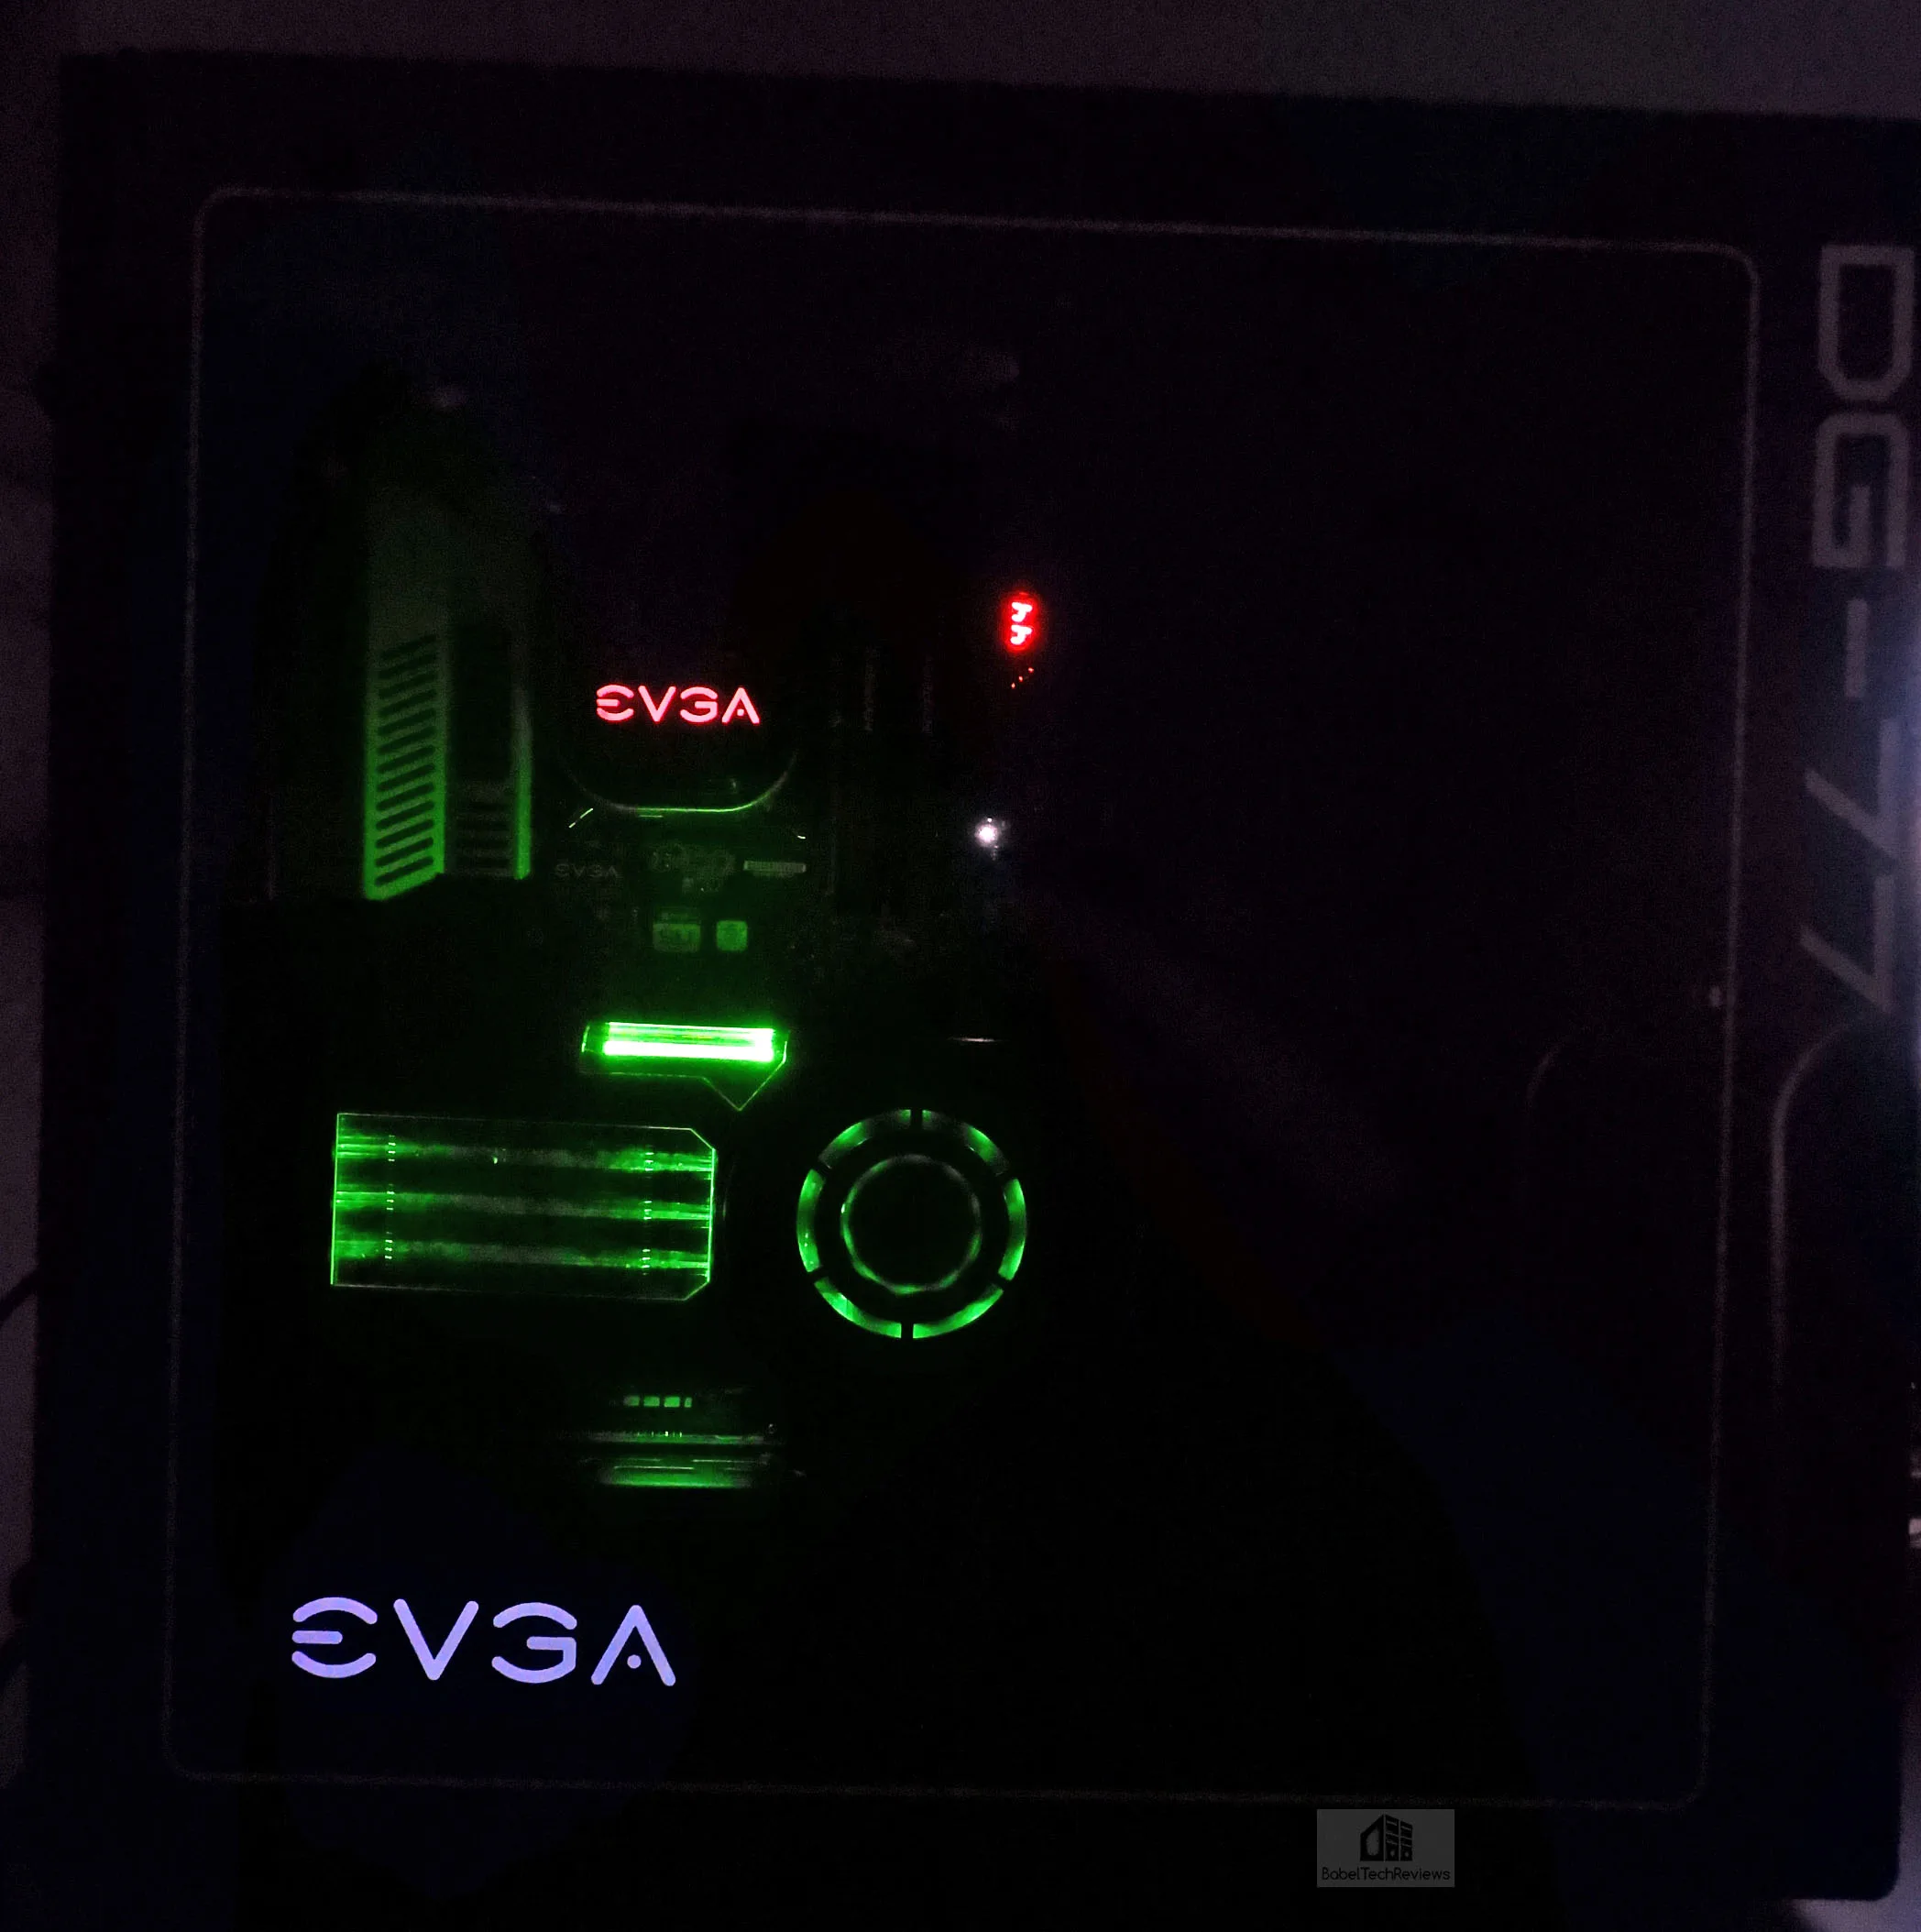 Unfortunately, when tried to take pictures of the DG-77 with the lights on, we met with little success. Since everything reflects, and although you can see the hardware through the glass side panel in person, a camera can’t capture it without distracting reflections except in a really dark room.
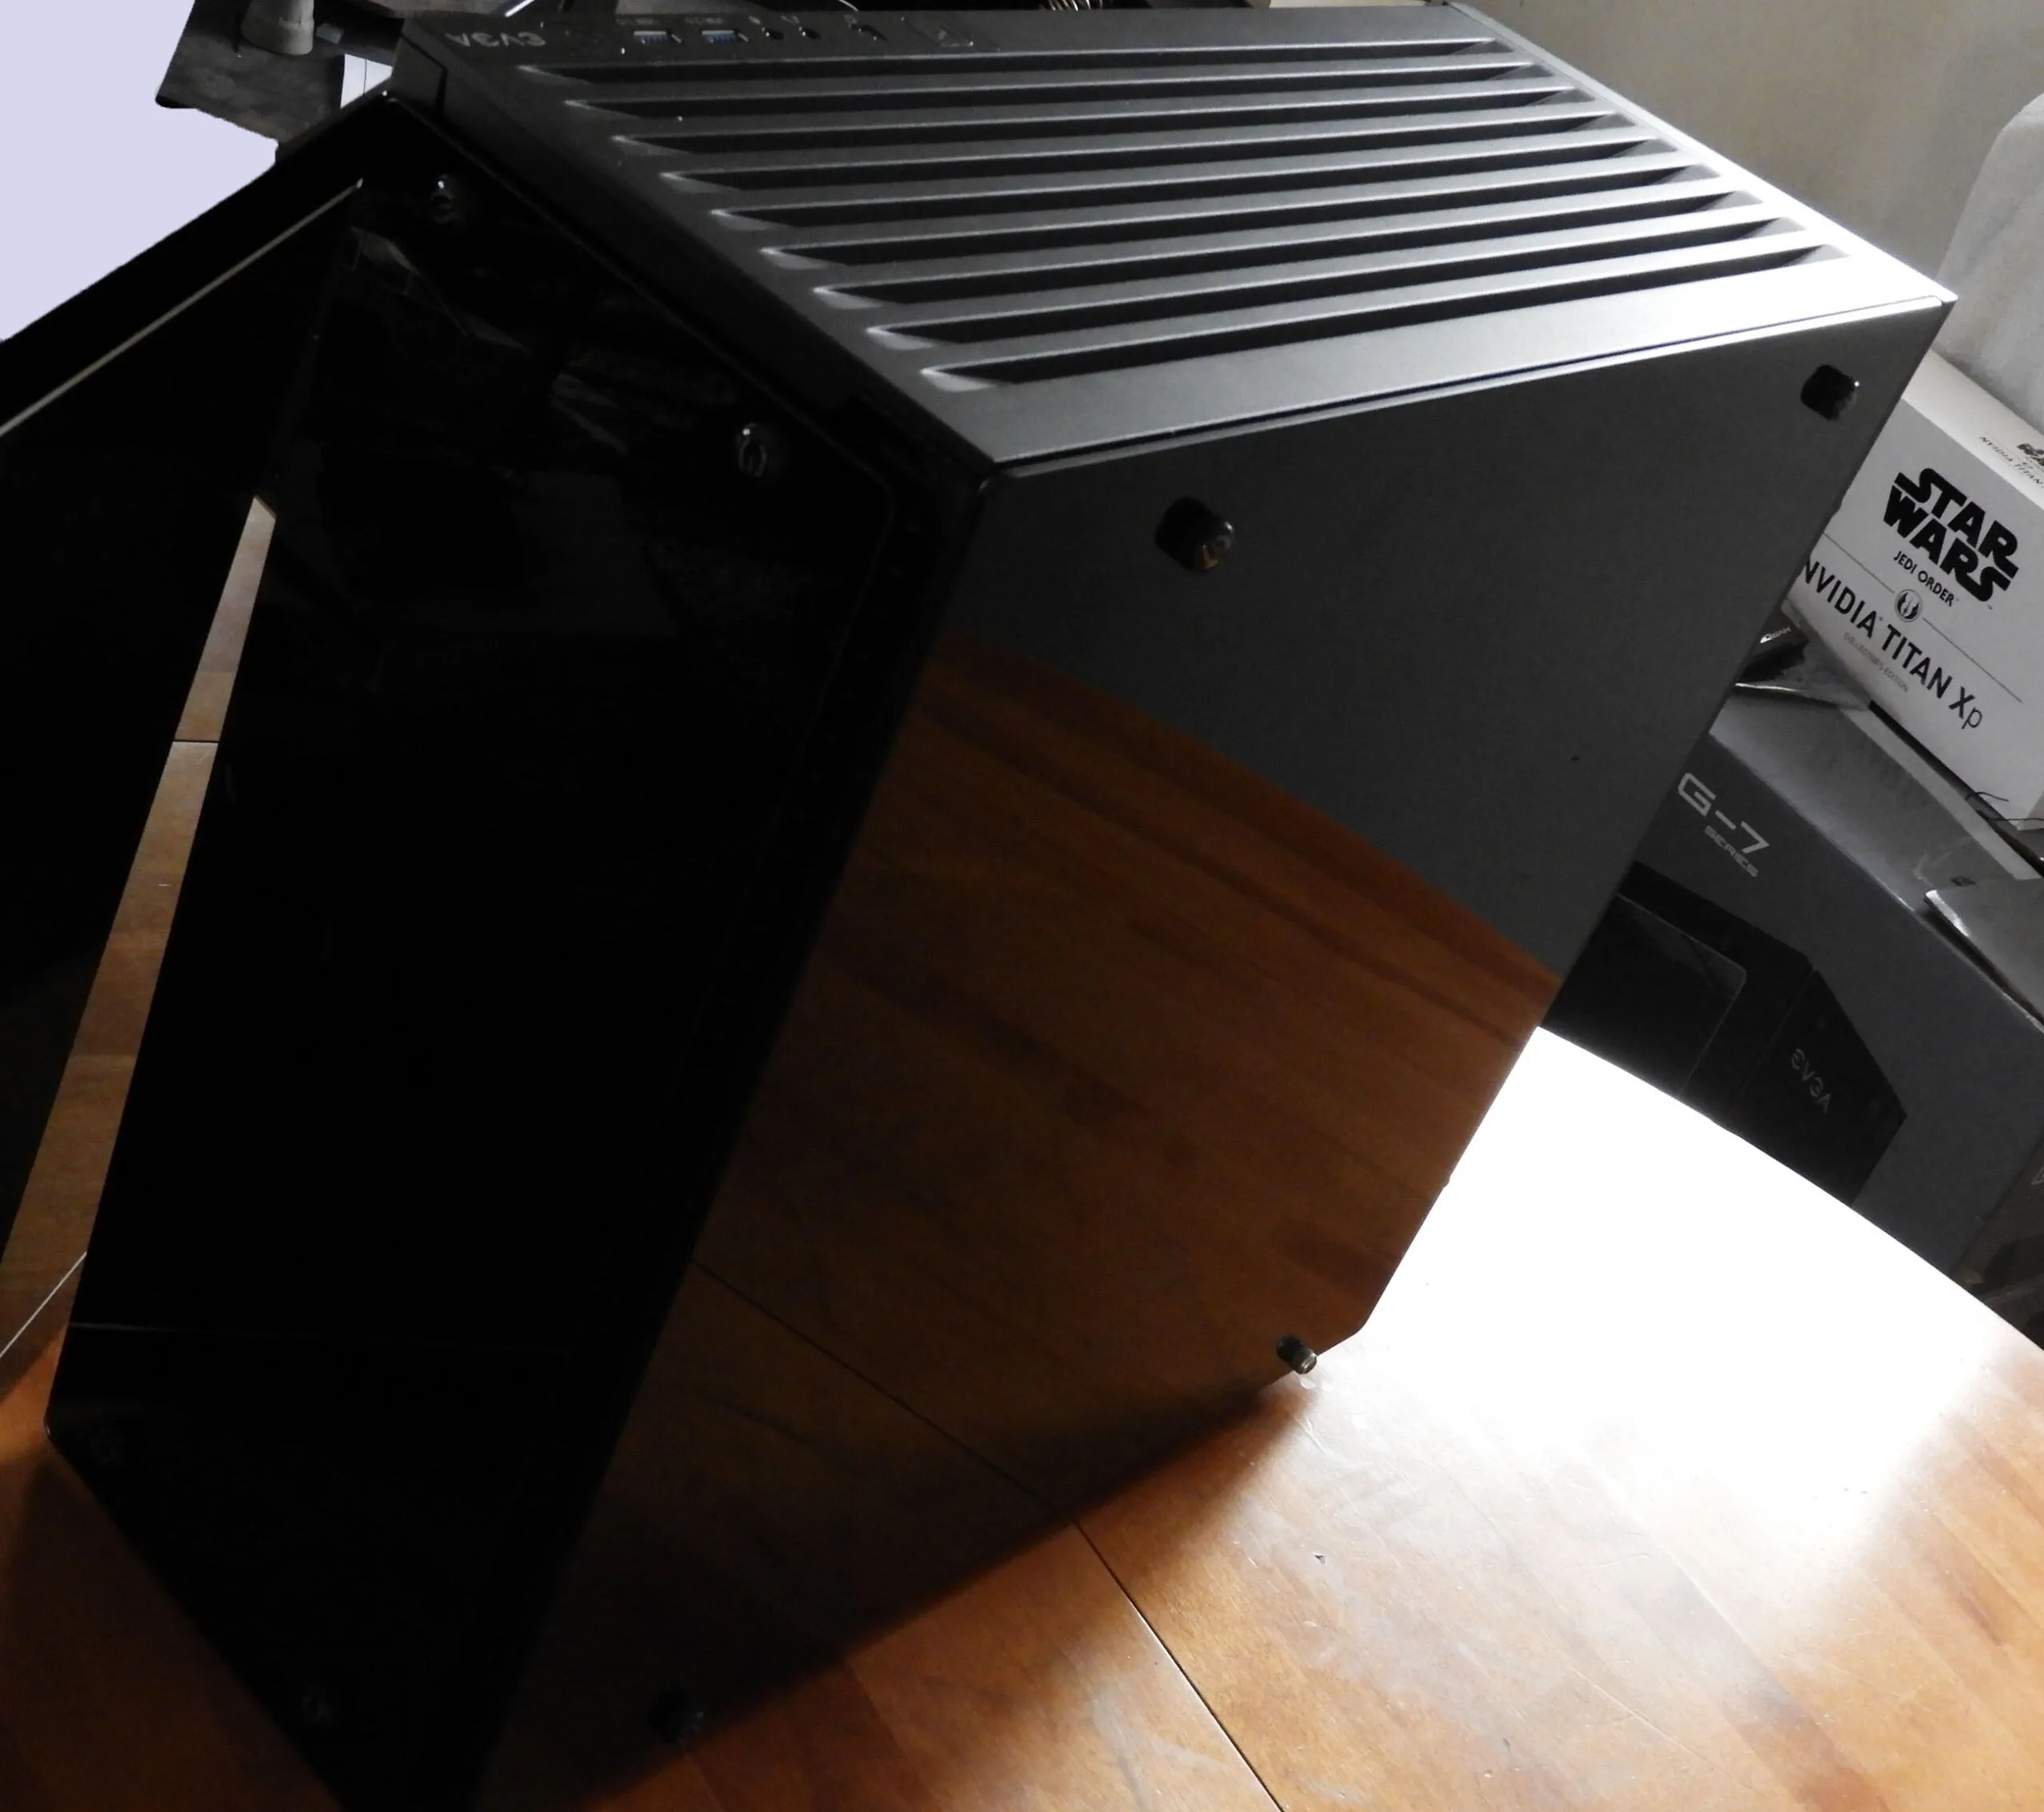
The DG-77 looks absolutely awesome as a work of industrial art as expressed in a superb combination of light, reflections, metal, glass, and plastic.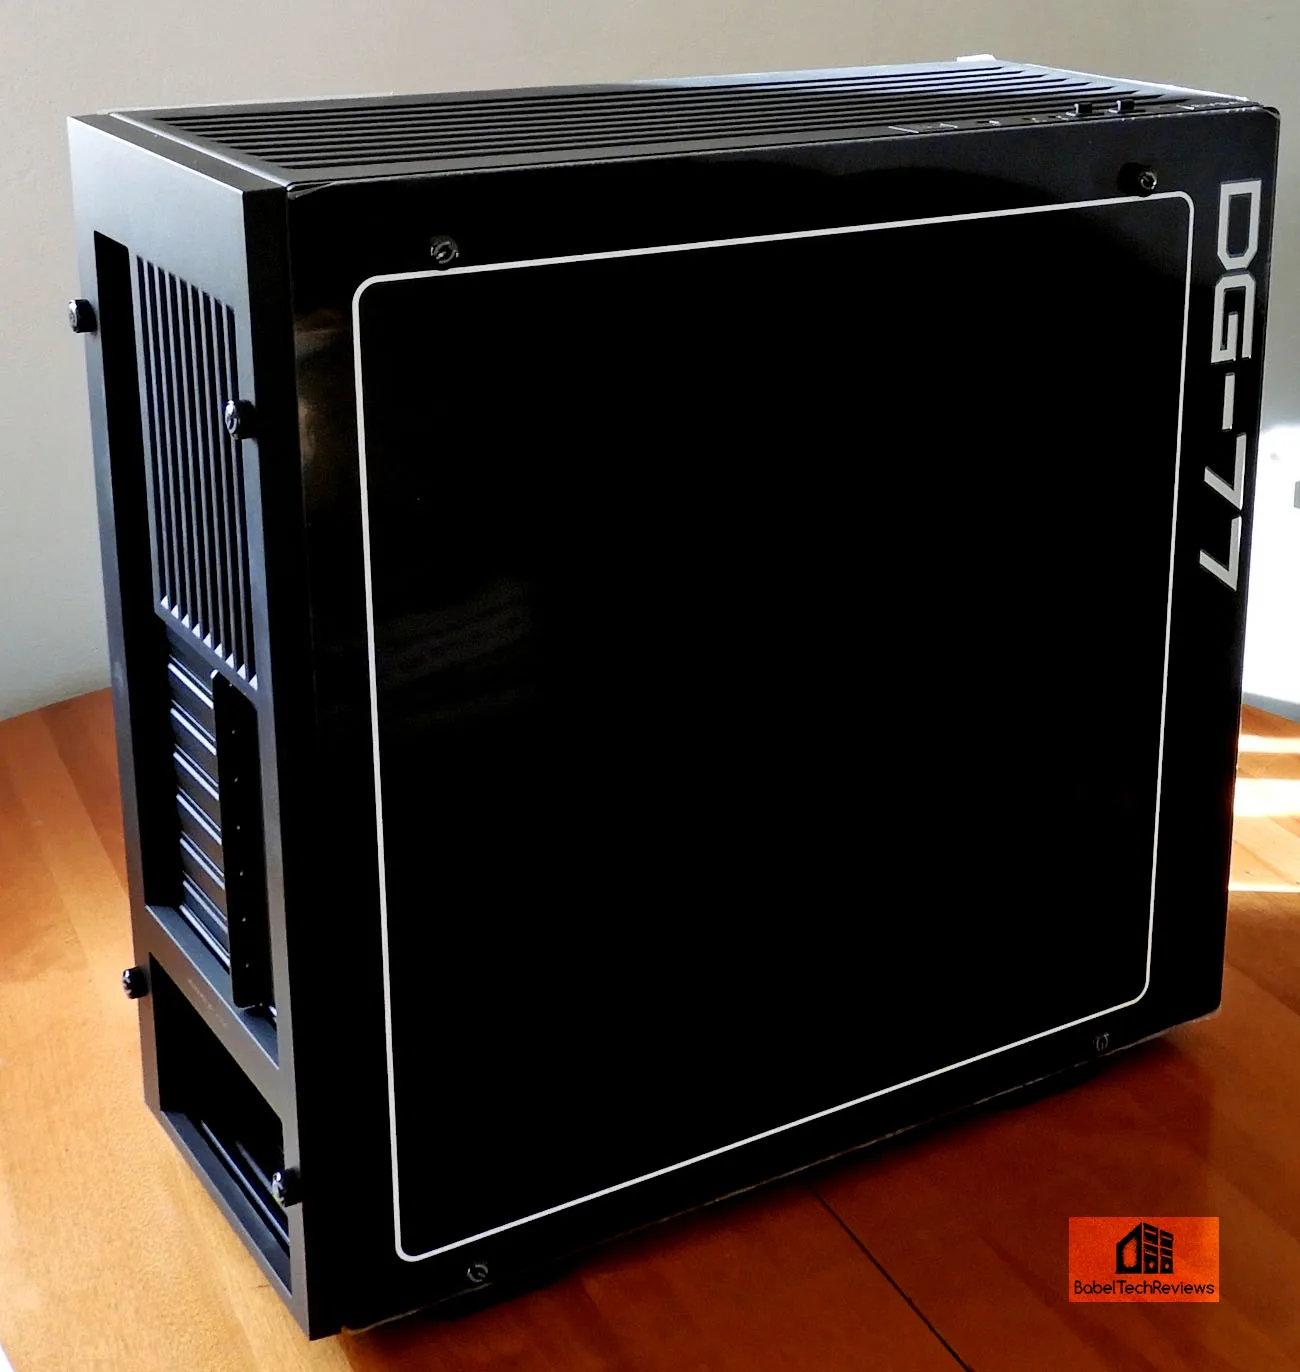
Now that we have the DG-77 built, let’s look at our system specs before we test it and check temperatures.
System Hardware
- Intel Core i7-8700K (HyperThreading and Turbo boost is on – at stock settings. Coffee Lake DX11 CPU graphics.
- EVGA Z370 FTW motherboard (Intel Z370 chipset, latest BIOS, PCIe 3.0/3.1 specification, CrossFire/SLI 8x+8x), supplied by EVGA
- HyperX 16GB DDR4 (2x8GB, dual channel at 3333MHz), supplied by HyperX/Kingston
- TITAN Xp 12GB, Star Wars Collector’s Edition, stock clocks, supplied by NVIDIA
- 240GB HyperX SSD, supplied by Kingston, for the OS
- 2 x 2TB Seagate 7200 rpm SSHDs for storage
- 1.92TB Micron Enterprise SSD for storage
- EVGA 1000G 1000W power supply unit
- EVGA CLC 280mm CPU water cooler, supplied by EVGA
- Onboard Realtek Audio
- Genius SP-D150 speakers, supplied by Genius
- EVGA DG-77 Mid-tower case, black edition, supplied by EVGA
- Thermaltake Overseer RX-1, full tower case supplied by Thermaltake
- Monoprice Crystal Pro 4K PC monitor
- LG 43″ HDR enabled 4K TV
Temperatures

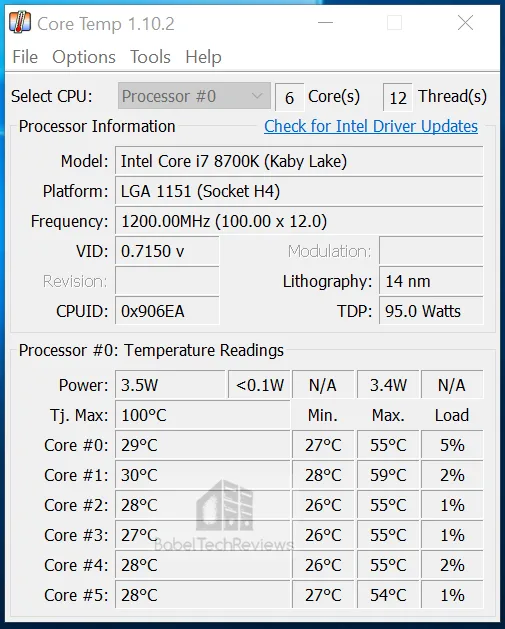
We first checked CPU temperatures using only the front case filter with the front glass panel off after running a series of benchmarks designed to load the CPU and the GPU. Temperatures were quite good using 2 fans exhausting from the top of the case, and one at the back. Most of the TITAN Xp’s hot exhaust air comes out the back although the case vent is not sealed as it probably should have been. Some of the hot GPU air is drawn back into the case by the 3 exhaust fans versus the two intake fans on the CPU cooler’s radiator.
Originally, we experienced warmer temperatures once we used our CPU Cooler radiator to replace the pre-installed 2 stock EVGA case fans at the front since it appeared that insufficient air was being drawn in through the front intake as previously, and our addition of a second exhaust case fan at the top of the case now created a stronger airflow.
Here are our maximum CPU temperatures under benchmarking load with the glass plate off using the 3 exhaust fans and the 2 CPU radiator intake fans.
![]()
We next installed the glass panel and noted that our CPU temperatures have risen by as much as 6 C after running the same benchmarks. Of course, it would be easy to simply remove the glass plate, but we looked for another solution.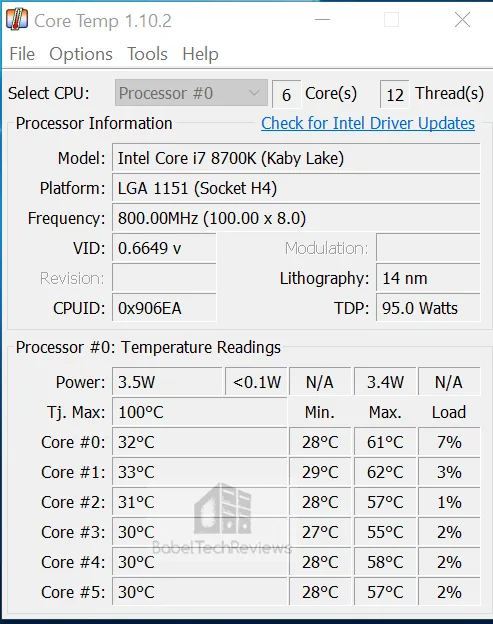
Normally the thumbscrews are tightened down all of the way, snugly securing the glass place against the case’s mounting rubber leaving only a small area open to incoming air through the channeled vents. This time, we used rubber spacers which were enough to move and hold the glass plate slightly away from the front of the case – at the extreme extension of the thumbscrews that EVGA provides as in the image below.
This slight alteration reduced our temperatures enough for us to keep the front glass plate on for normal day-to-day gaming and for benchmarking.
Using spacers behind the glass plate worked to improve the air flow in our case with a 280mm CLC radiator installed instead of the two stock fans that EVGA provided without affecting the “looks” of the case. And using one of the leftover front fans at the top of the case provided enough airflow through the front panel for satisfactory results when benching with the glass plate on. Mission accomplished.
Final Verdict
After building our system and living with the EVGA DG-77, we like it primarily for its good looks and innovative design. Using glass, metal, and plastic, the DG-77 is a beautiful industrial work of art in our opinion, and we also appreciate it for its ability to keep our components cool. We appreciate the case’s solid build and the painless ease of building it while being able to manage and hide cables efficiently.
Best of all, we like the ability to vertically mount a video card. In addition, the two external USB 3.0 ports are very useful in transferring data from the top of the case, and K-Boost works to instantly overclock your CPU and (EVGA) videocard at the touch of a button. As benchmarkers who change out video cards and other hardware regularly, the DG-77 is spacious for a mid-tower and it is as easy to change our hardware as previously when using our other very large full tower that took up a lot more space.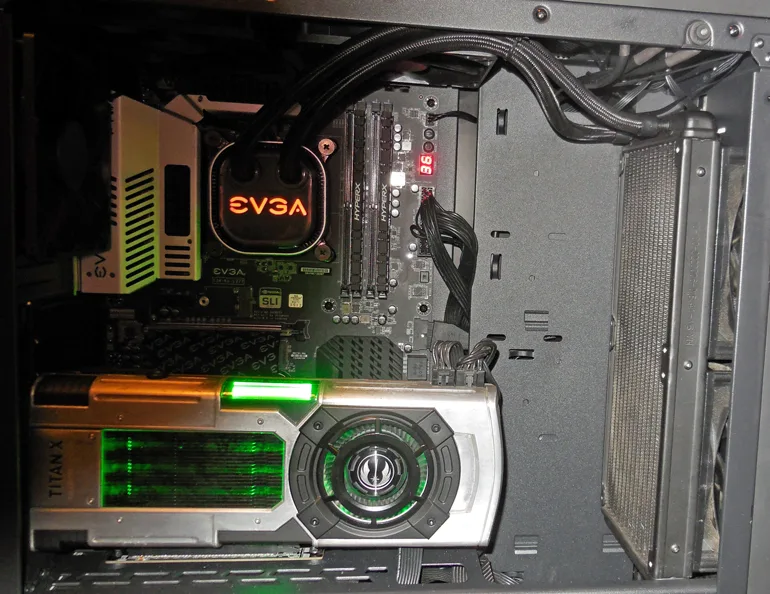
Let’s sum up the DG-77’s many positives verses a few negatives:
Positives:
- Incredibly good looks. The DG-77 is an ideal show-pony for a gamer that needs a large roomy mid-tower. It can be ostentatious or subdued.
- A veritable RGP light show that can be customized to suit your mood
- Good cooling performance with included fans to manage an overclocked CPU and two GPUs.
- Well-managed spacious interior.
- Excellent cable management system with intelligently placed cutouts for easy CPU or CPU cooler removal and installation
- Easy customization for adding additional cooling fans or for watercooling when you want to be more extreme
- User-friendly build with no sharp edges
- The tempered glass panels look awesome and they display your hardware beautifully
- Vertical video card mounting!
- Dust filters are included for every place that counts, and the DG-77 is designed to keep dust out
- Three year warranty and EVGA’s awesome support including 24/7 telephone service that gets you directly to a qualified tech support agent.
Negatives:
- There are no rubber grommets for the pass-through cutouts although there are no sharp edges.
- The glass panel reduces airflow when using a 280mm CLU radiator to replace the front two fans
- The wiring on top should have been hidden and rerouted for more options in mounting and for better-looking case cable management
The negatives are comparatively minor and generally they may be easily remedied. We can’t really count lack of an internal optical drive or the lack of a HDD cage as negatives in our opinion. Our conclusion is that the DG-77 is a great-looking customizable enthusiast case that allows as much flexibility for creativity as most gamers require.
The EVGA DG-77 is a high-quality and competitively-priced roomy mid-tower case for gamers who want great looks, style, and excellent cooling options including water, without breaking their bank. Usually, quality cases are rarely replaced, and the DG-77 is a case that any gamer can be proud of for years to come.
![]() The EVGA DG-77 deserves the BTR’s “Editor’s Choice” award. This is the case that we have picked for BTR’s flagship system and it will be featured in all of our future reviews It is highly recommended as a showpiece and as a capable and functional all-around mid-tower gaming case.
The EVGA DG-77 deserves the BTR’s “Editor’s Choice” award. This is the case that we have picked for BTR’s flagship system and it will be featured in all of our future reviews It is highly recommended as a showpiece and as a capable and functional all-around mid-tower gaming case.
Our very special thanks go out to EVGA for supplying us with their DG-77 case before they are available for purchase. With this review, we now actually have an “all EVGA” system except for the video card, and we really like their company, their service, and their dedication to the great hardware they produce, and their support for gamers.
Stay tuned, we have plenty more coming from BTR this week. We have become dissatisfied with gaming on a 28″ 4K PC display and we purchased a 43″ LG HDR 4K TV on a Black Friday sale for use as a desktop display. We want to share our experiences with 4K TV gaming as a guide for our readers who are considering a 4K gaming upgrade for the holiday season.
Happy Gaming