The EVGA Nu Audio Sound Card Brings Entry-Level Audiophile Sound to the PC
EVGA released the high-end $249 Nu Audio PCIe sound card aimed at PC gamers who are also stereo music aficionados with better than average speakers and headphones. Critiquing audio hardware is a difficult yet important task and a challenge for any reviewer. Properly describing how music “sounds” on audio equipment is not about giving bitrate, synthetic tests, specifications, latency pings, or other measurements. High-quality audio components are created to reproduce music as accurately as possible in a way that EVGA calls “lifelike audio”.
The sound quality of high-fidelity audio components can only be properly judged in an A/B comparison with other similar hardware by using high-quality recorded media that a discerning reviewer is familiar with. Being able to pick out the often subtle nuances in the sounds of the music being reproduced takes years of training by auditioning hundreds of audio components. You won’t find a single synthetic test in this review because this EVGA Nu Audio card aspires to be called audiophile and it even uses analog circuitry where it makes sense.
The Nu Audio card was commissioned by EVGA working together with Audio Note, an audiophile company based in Sussex, UK since 1991. The Nu Audio sound card is aimed squarely at 2-speaker high-fidelity stereo enthusiasts who want a quality sound card for music listening and for gaming. So in addition to using Grado headphones, I purchased a pair of Edifier R1320T active desktop speakers to see if I could take EVGA’s challenge to “hear the difference” between my Z370 FTW motherboard’s integrated audio, a Diamond USB sound card, and the Nu Audio card.
The next page covers this reviewer’s high-end stereo and audiophile background, or the reader may choose to skip over it to see the unboxing, system specifications, music and game tests, and conclusion on the following pages.
Audio Background & Testing Methods
This reviewer started out as an audio consultant in the mid-1970s and soon specialized in the highest-end audio. I realized that good audio hardware choices can only be made by serious music lovers who invest their time listening and critically comparing components in the same environment. This means A/B testing – to instantly switch between components being compared at the same volume.
An audiophile generally uses two speakers, sometimes with a subwoofer. And audiophiles are probably not reading this review as they rarely audition music on a PC. Dedicated high-end stereo equipment using 2 speakers provide the best imaging. The highest-end systems can even fool a listener into believing that they are listening to a live performance which is the holy grail of music reproduction – “lifelike audio”.
An audiophile doesn’t use an equalizer – their goal is a straight wire with gain as the purest path for an audio signal. Audiophiles will often tweak their listening area by getting the right floor and window coverings for optimum sound reproduction, and they are known to spend many hours adjusting the precise position of each speaker in pursuit of audio perfection.
My Mark Levinson modified tube pre-amp had no tone controls, and even the balance control was removed. Audiophiles of the 1970s laughed at the early CDs, and could clearly hear the superiority of an analog recording on vinyl as they bemoaned the loss of transients and the dullness of the upper audio spectrum of digitally reproduced music.
Many of the audiophiles in the 1970s knew each other, and so we held listening parties and critiqued each others systems. We concluded that there is no single perfect system suitable for all listeners. For example, Magnaplanar speakers can produce the most incredibly detailed and transparent midrange and high end, but its crossover to a slower piston-driven bass speaker is always an issue, and it takes a huge amount of power to stack multiple and increasingly difficult to place large panels. There are always trade-offs, and discerning audiophiles tend to match the strengths of their audio equipment to the kind of music they like best.
A group of us even rented a plane and flew from Southern California to Las Vegas to check out the audiophile offerings at the first Winter CES in 1979. Very little has changed over the past 40 years, and some audiophiles today still prefer listening to music on analog vinyl over digital.
The one overriding realization we hold as absolutely true throughout many decades is that any component’s audio specifications have absolutely nothing to do with how they actually sound when reproducing music. High-fidelity, “lifelike”, and audiophile audio components are the product of skilled design by engineers who hear well and who love music. The audio companies that employ them often gain a dedicated following over decades because of their uncompromising dedication to using only the finest components available.
I always borrowed stereo components for critical listening at home so that I could be a better audio consultant. Very early, I bought a pair of Klipsch La Scala speakers which produced an impressive larger-than-life sound stage. This meant I could reproduce the volume of a rock concert in my room much to the dismay of my neighbors. In time, I came to appreciate jazz and especially fusion bands like Steely Dan, besides loving rock and most other music genres. I also attended live concerts regularly.
I upgraded my home audio components after auditioning and comparing the very best audio equipment that I could afford. A Mark Levinson modified tube pre-amp became my centerpiece powering Dahlquist DQ-10 stacked and imaged speakers driven by 1000W per channel Great American Sound (GAS) bridged amps. The source was always well-recorded pristine vinyl played on a Thorens Turntable with multiple phono cartridges including Grado Signature. And although I vastly preferred loudspeakers to headphones for music listening, Grados were always my choice for late at night.
Unfortunately, it costs significantly more today to pursue audio perfection than it did 40 years ago. After I quit my job as an audio consultant, I sold my audiophile setup and resigned myself to listening casually to music using computer audio and CDs. I stayed close to the music scene as I became an on-air DJ in Honolulu, and I well remember the Radio Free Hawaii sponsored parties in the mid 1990s as well as the live concerts I attended every weekend courtesy of Golden Voice.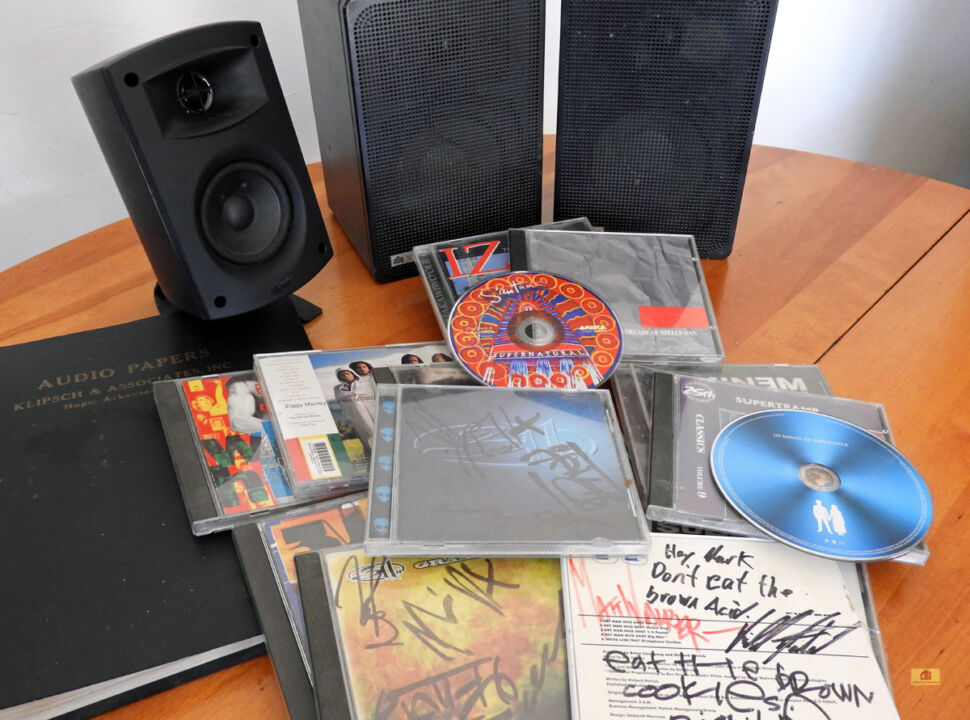
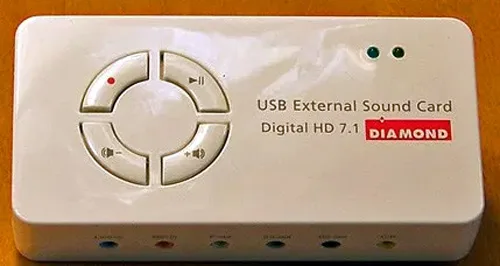
I owned my share of Creative sound cards with problematic drivers, and I finally got a Diamond USB card so I did not have to listen to what is usually awful generic motherboard integrated audio. Motherboard designers usually devote an inexpensive, small, and very generic chip to audio, and they usually make many compromises with the sound that can be addressed by a dedicated sound card.
I stopped listening to music since PC audio did not sound close to what I once had even although I owned a Klipsch v.2-400 4.1 400W system. It was decent for home theater and for gaming, but not so great for music reproduction.
I had been looking forward to evaluating the EVGA Nu Audio sound card entry into high-end audio using my Grado SR60e headphones and my legacy ADS 300C speakers, but my Yamaha receiver failed. So I purchased a $99 pair of active (self-powered) Edifier R1320T speakers primarily for A/B comparison in this evaluation.
The Edifier R1320T speakers are surprisingly neutral with a clean midrange and a decently implemented crossover with a complementary tweeter. They do not produce deep bass although it is a ported design, but what they do reproduce is relatively accurate, clean, and solid from 4″ woofers. With a matched built-in amplifier producing 24W per channel RMS, they can get quite loud since they sit quite close on either side of my desktop gaming display.
Surprisingly, the R1320T’s stereo imaging illusion is excellent. To me they sound better than any other pair of active desktop speakers that I have heard in their price range, and even to twice their price! Having a built-in amp means that there may be less overall distortion as this active speaker system is simply made to plug directly into a sound card.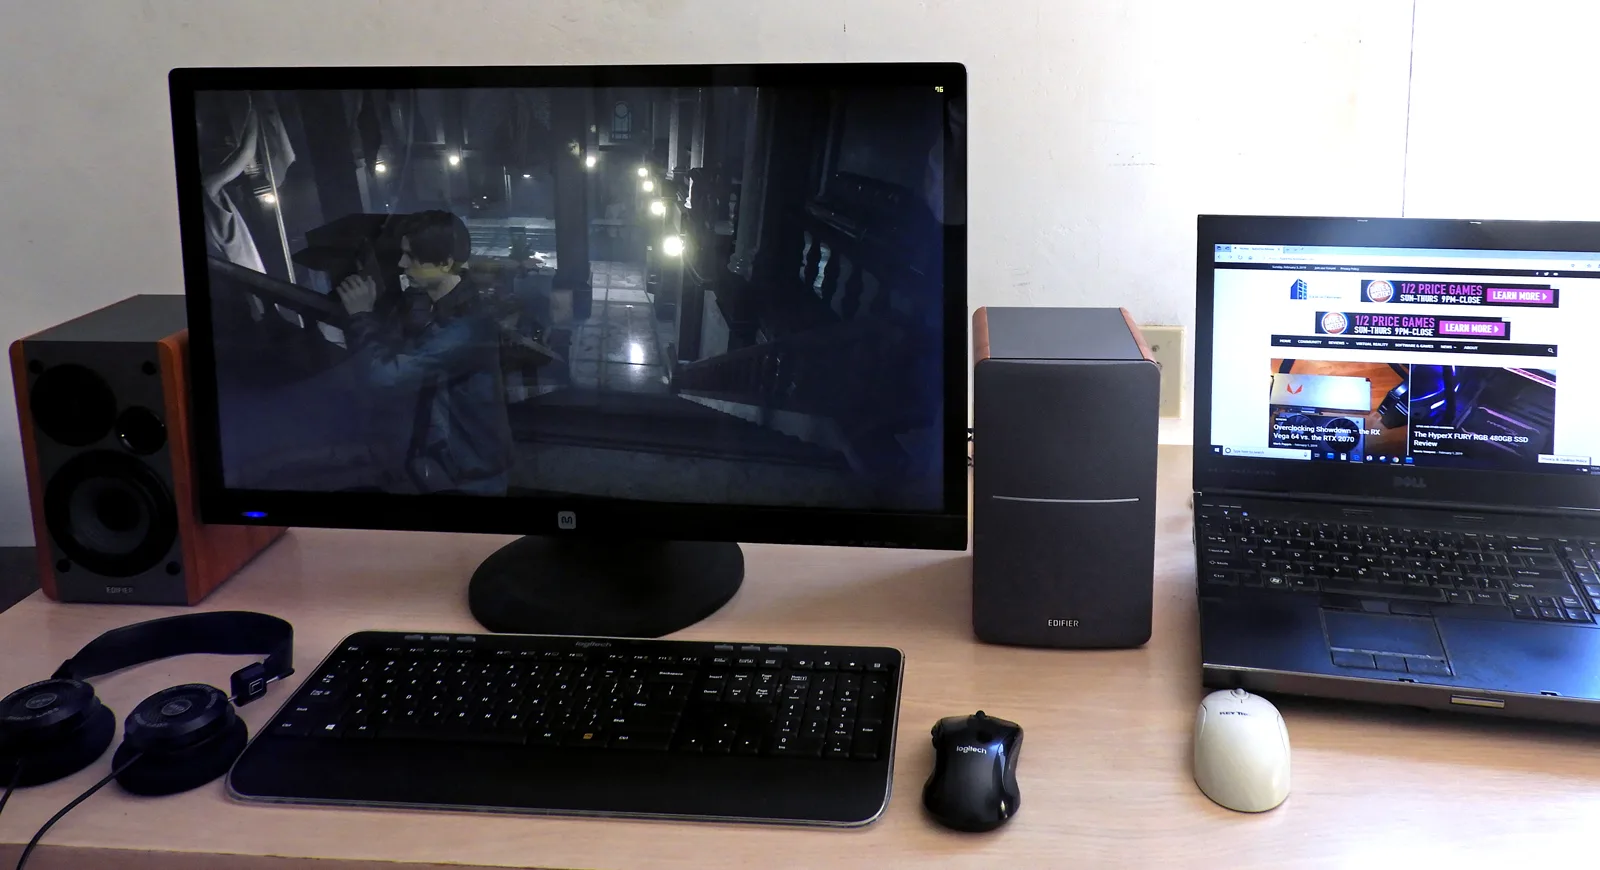
Since we use Windows software to instantly switch between the output from any two sound cards, it is easy to A-B their sound on our speakers since two inputs can be used simultaneously; either from the mini-plug or RCA cables. Our challenge is to determine if we can hear the difference using our Edifier PC speakers by switching between our 3 PC audio card solutions: the motherboard’s Realtek integrated audio, the Diamond USB 7.1 soundcard, and the PCIe Nu Audio card.
In addition, we used a pair of Grado SR60e headphones which make it easier than using inexpensive speakers to hear the differences between sound cards. We also played Metro Exodus from start to finish, switching back and forth for more than 30 hours to discern the audio characteristic differences between our three PC sound solutions.
Let’s take a look at our test configuration.
Test Configuration – Hardware
- Intel Core i7-8700K (HyperThreading and Turbo boost are on to 4.7 GHz for all cores; Coffee Lake DX11 CPU graphics).
- EVGA Z370 FTW motherboard (Intel Z370 chipset, latest BIOS, PCIe 3.0/3.1 specification, CrossFire/SLI 8x+8x, Realtek ACL-1220 audio), supplied by EVGA
- HyperX 16GB DDR4 (2×8 GB, dual channel at 3333 MHz), supplied by HyperX
- RTX 2080 Ti 8GB FE, stock Founders Edition clocks, on loan from NVIDIA
- 480 GB Team Group SSD
- 1.92 TB San Disk enterprise class SSD
- 2 TB Micron 1100 SSD
- Seasonic 850W Gold Focus power supply unit
- EVGA CLC 280mm CPU water cooler, supplied by EVGA
- EVGA Nu Audio stereo PCIe sound card, on loan from EVGA
- Diamond 7.1 USB sound card.
- Edifier R1280T active desktop speakers
- Grado SR60e headphones
- EVGA DG-77, mid-tower case supplied by EVGA
- Monoprice Crystal Pro 4K
Test Configuration – Software
- Nvidia GeForce 417.01 WHQL drivers
- Highest quality sound (stereo).
- Windows 10 64-bit Home edition. Latest DirectX
- Metro Exodus patched to its latest build.
Primary PC Game
- Metro Exodus
Primary Music (CDs)
- A Decade of Steely Dan
- Supernatural, Carlos Santana
- IZ the Man and His Music in Concert, Israel Kamakawiwo’ole
- Songs of Experience, U2
- Audio tracks courtesy of EVGA (wav. audio)
Primary Comparison Method
Unboxing, Specs, & Software
 The premium components for “true-to-life” audio are highlighted on the back in multiple languages.
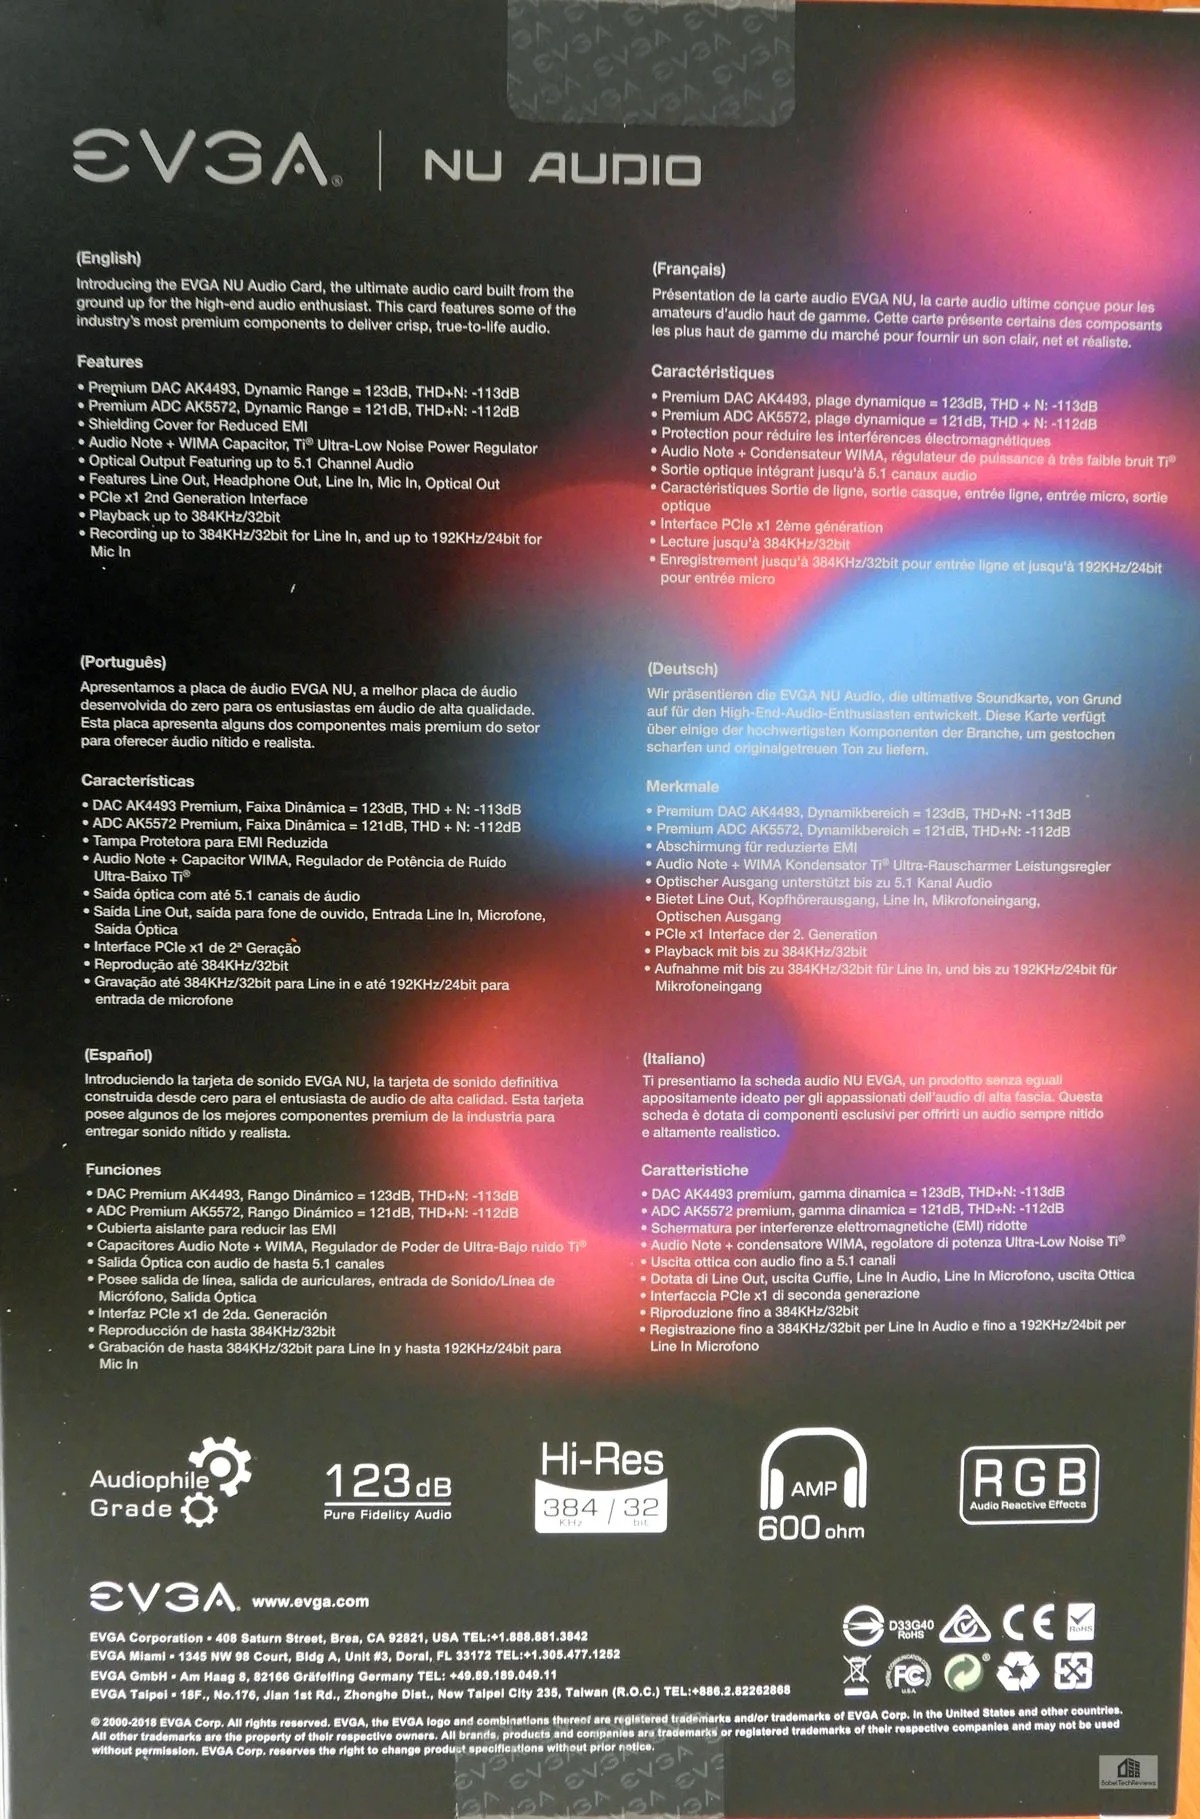
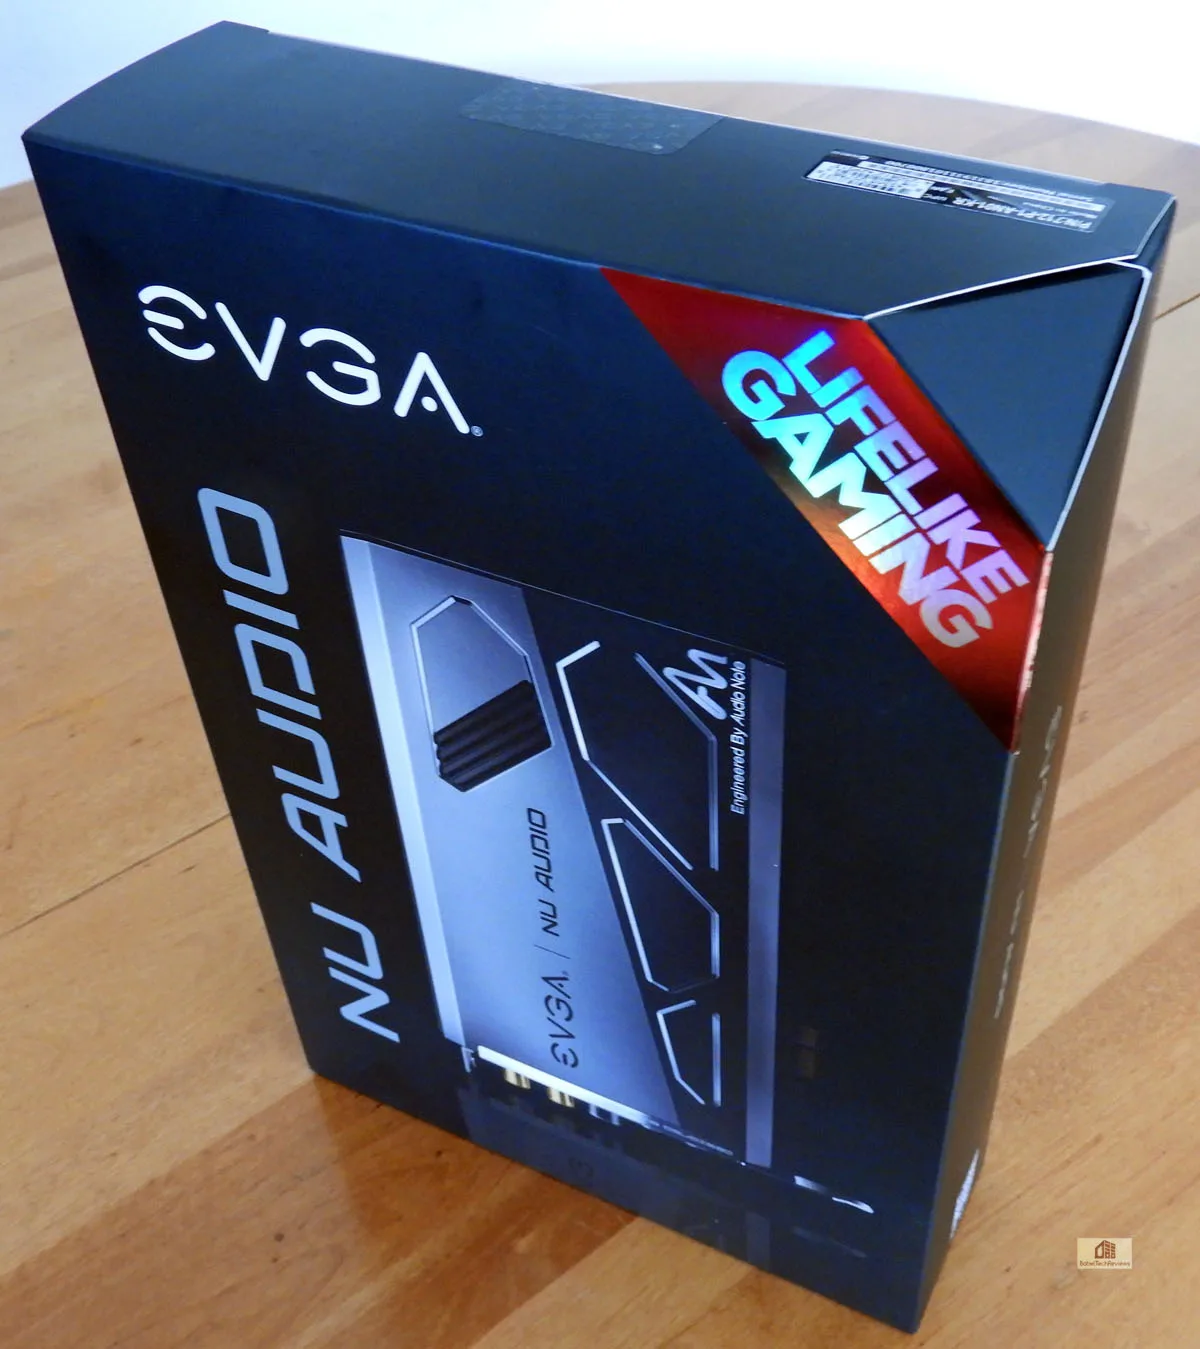
The Nu Audio card arrives well packed in what looks like a display box.
 Here is the bundle outside of the box showing the card, the manuals, and the two included adapters.
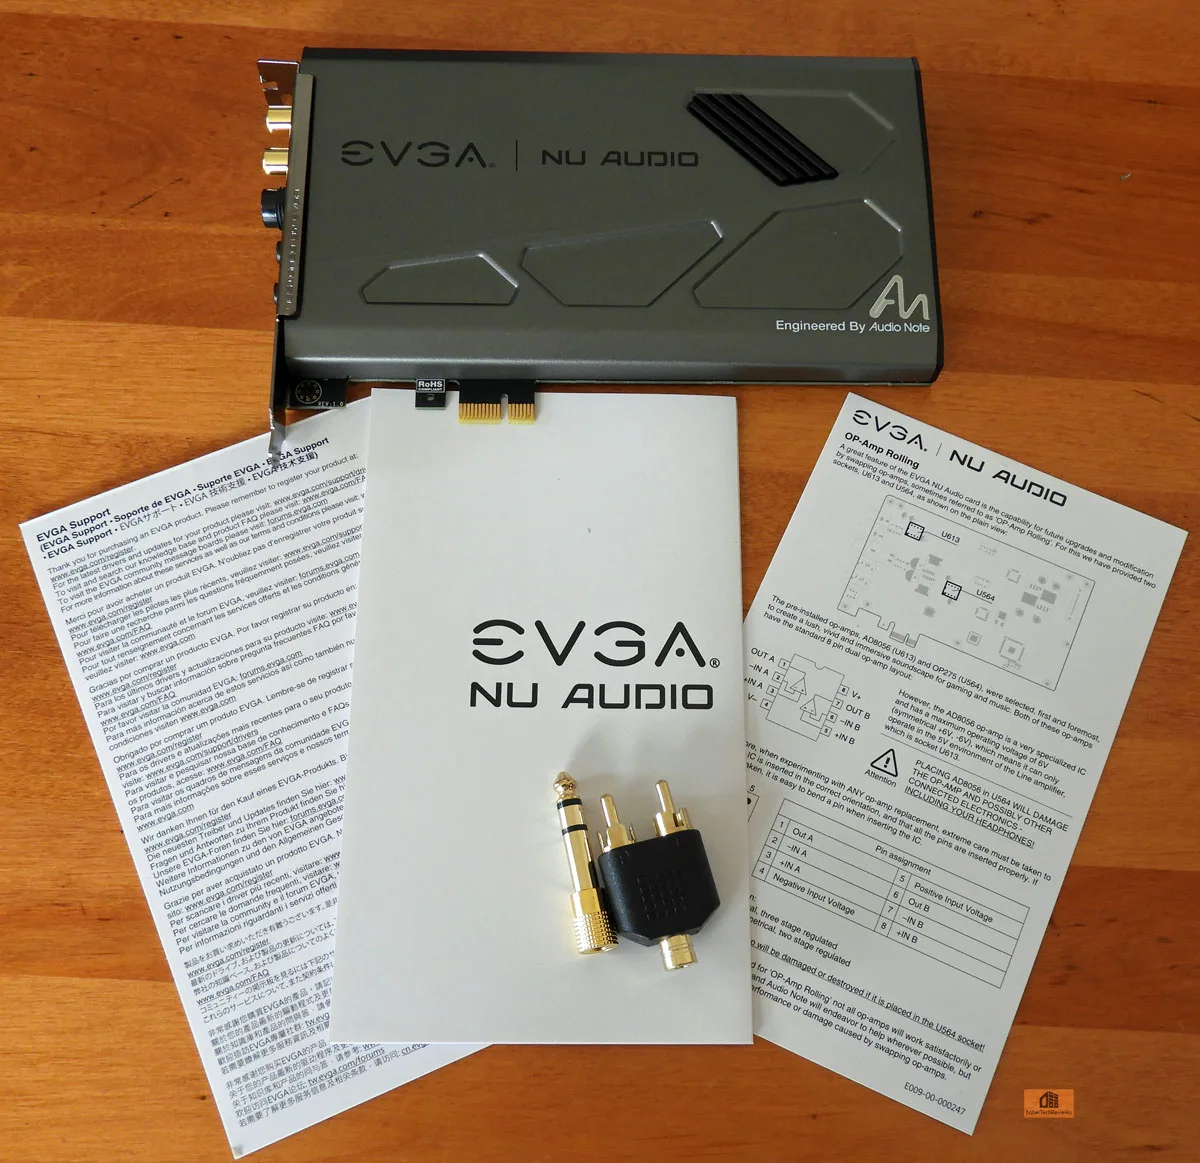

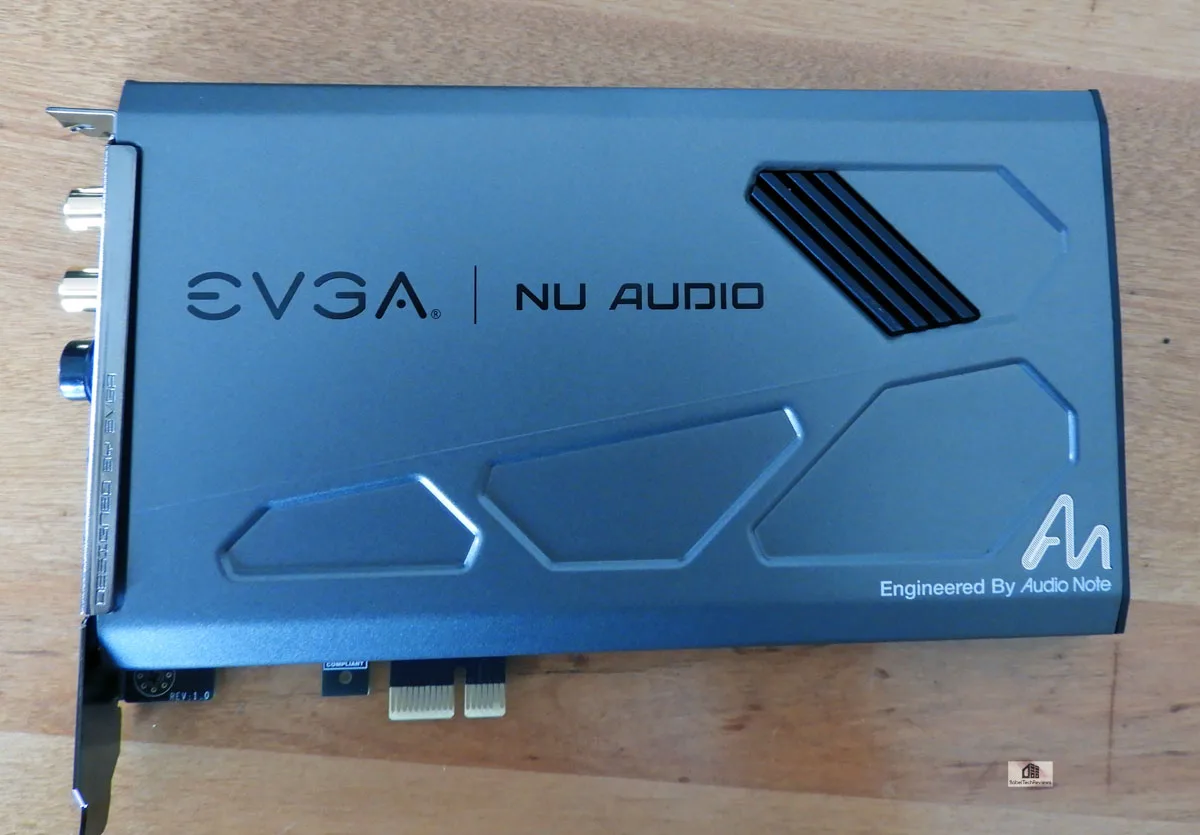
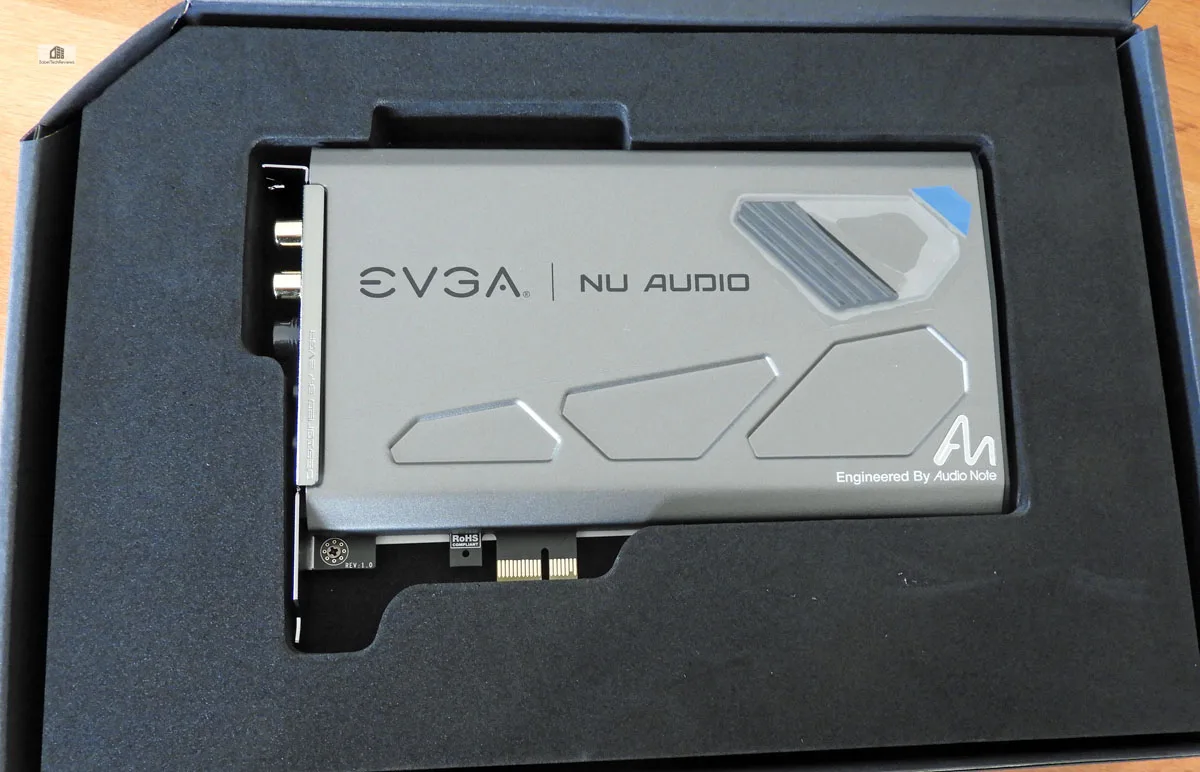
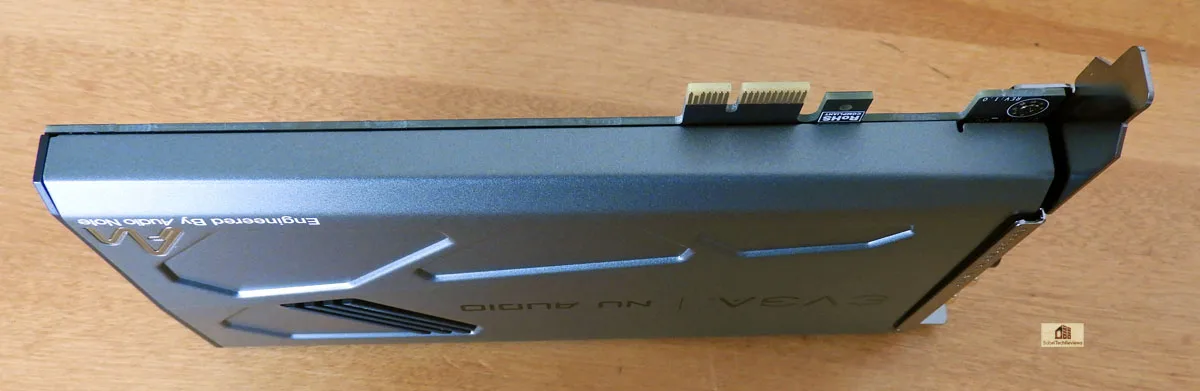
Here is a closeup of the card and it proudly states “Engineered by Audio Note”. Here is the other side and we see that it is quite clean but we would have preferred a backplate to show it off better in our case.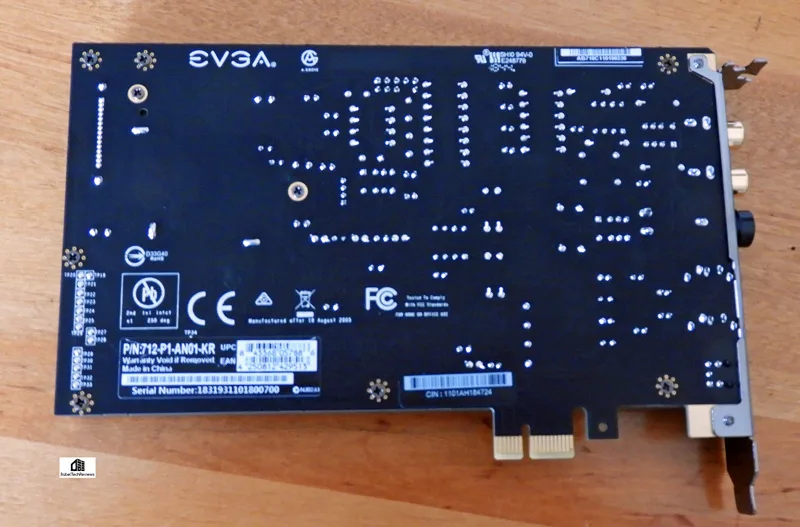

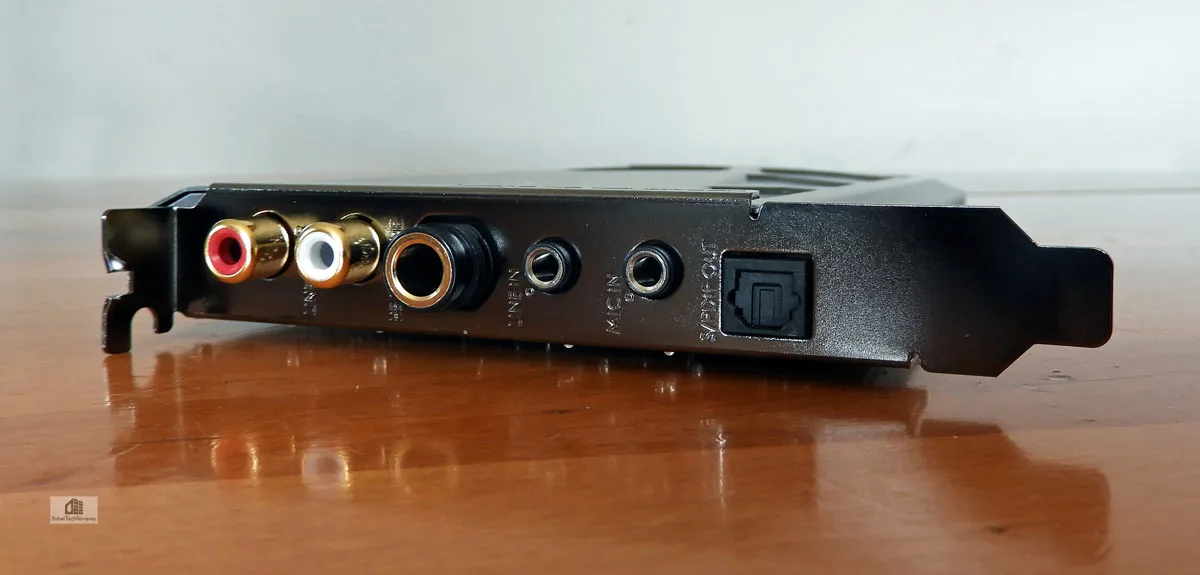
The panel is very basic. Two line out RCA jacks, a full sized headphone input (use the adapter provided for mini-plug headphones). Line-in and Mic-in mini-plugs and a S/PDIF out optical connector are included for 5.1 home theater audio.
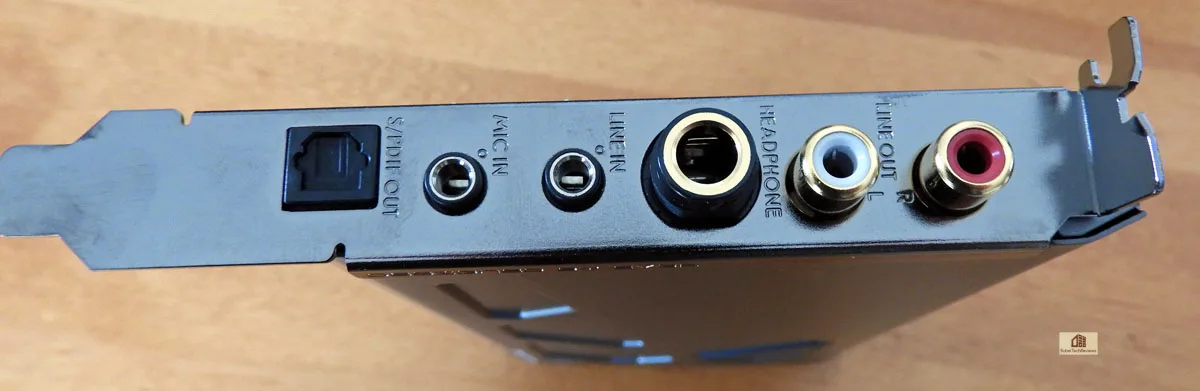 Here is another view. We would have liked to see a headphone lock for stability, but this solution is practical and adequate for our uses.
The EVGA Nu Audio PCIe sound card is fairly small but you will want to allow yourself nearly 9 inches because it requires external power using a SATA power connector which plugs into one end.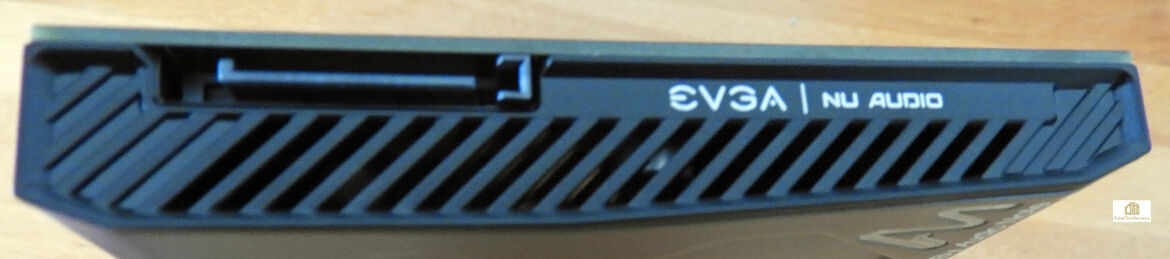 The Nu Audio card uses the PCIe x1 slot and it will fit neatly in-between other cards as it is a single-slot solution. Technically, it is a USB sound solution on a PCIe interface, but that is likely done to shield its internal components better.
 It is solid and well built and it uses premium components as shown by EVGA’s image.
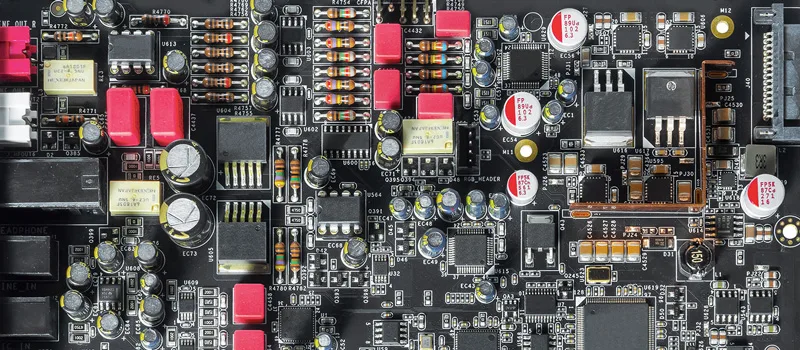
Let’s check out the EVGA Nu Audio sound card specifications.
Specifications, Features & Important Information
Specifications:
- Audio DSP:
- XMOS xCORE-200
- Native DSD Support (up to x256)
- Output Configuration:
- 2 Channel (Analog)
- 5.1 Channel (Digital via S/PDIF)
- Dynamic Range (DNR) / Signal-to-Noise (SNR):
- 123dB (Stereo Playback)
- 121dB (Line-In Recording)
- Playback Format:
- Up to 384kHz, 32bit (Stereo)
- Up to 192kHz, 24bit (Optical)
- Headphone Amp:
- 16-600ohm (Independent Analog Control)
- Maximum Voltage:
- 8Vrms
- Maximum Current:
- 250mA
- Recording Format:
- Up to 384kHz, 32bit (Line-In)
- Up to 192kHz, 24bit (Mic-In)
- RGB Lighting:
- 10 – Mode w/ Audio Reactive Lighting
- I/O:
- Stereo Out (RCA L/R)
- Headphone Out (6.3mm)
- Line-In (3.5mm)
- Mic-In (3.5mm)
- Optical Out (TOSLINK Passthrough)
- Front Panel Header
- Premium Components:
- DAC – AKM AK4493
- ADC – AKM AK5572
- OP-AMP (Headphone) – ADI OP275
- OP-AMP (Line Out) – ADI AD8056
- Capacitors – WIMA, Audio Note(UK), Nichicon
- Power Regulators – Texas Instruments TPS7A47/TPS7A33 ultra low-noise power solution
- Switchable OP-AMPs:
- Headphone, Line out
- Interface:
- PCIe x1 Gen2
- Power Connector:
- 1x SATA Power
- Supported OS:
- Windows 10, 8.1, 7
The takeaway from the specifications is that EVGA uses premium audio components and is not skimping anywhere. The Nu Audio sound card is set up to be a premium audio card that provides native DSP support and 5.1 audio through digital. However, its primary purpose is to serve as an audiophile card by using premium analog 2-channel audio with a low distortion and high signal to noise ratio plus a premium headphone output.
Everything looks good. Let’s plug it in, screw it down securely, and attach the SATA power cable. The next step was to install the driver package and check out EVGA’s included software before we listened to it.
Software
Installing Nu Audio card is almost as simple as plug and play but you must install the dedicated software from EVGA’s download center to use all of its features. After Windows recognizes it and you reboot, you will want to check out the NU Audio software by right clicking on it from your icons on the Windows 10 task bar at the extreme bottom right.

After you reboot your PC, you can set up the Nu Audio software by checking out the setup screen which looks like and is set up just like EVGA’s Precision X1 or Flow Control. 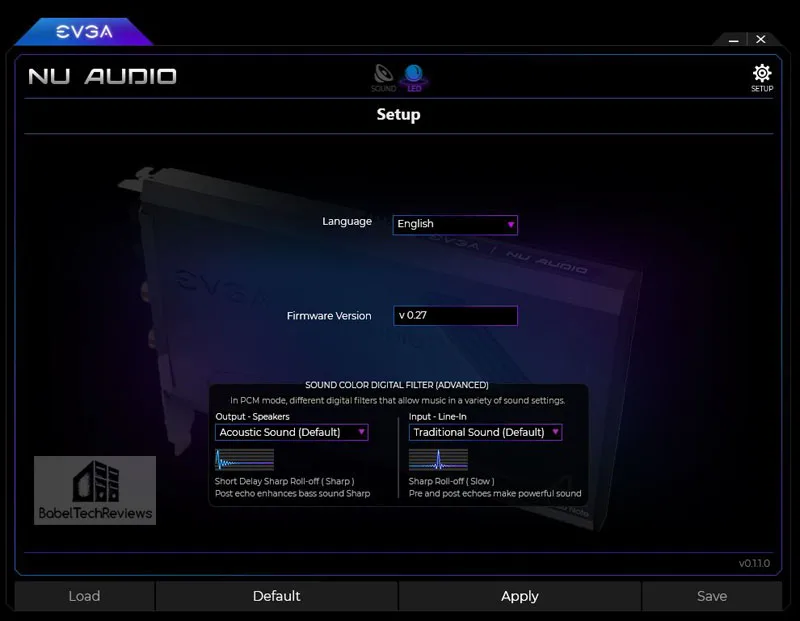


Make sure that you have the highest quality sound available for your needs. Here is the Main screen to access speaker/headphone output and microphone/line in input for recording.

After you set up your speakers you can adjust the rather basic equalizer to compensate for your room or speaker acoustics. You can save up to 6 custom presets.

RGB lighting is available and there are many color and timing combinations you can make. 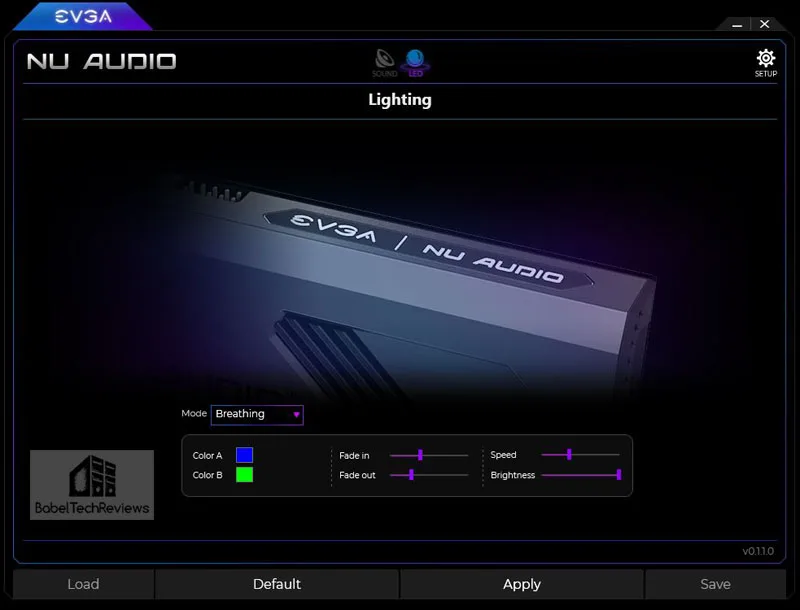
 We had the Nu Audio card lights cycle similarly to our EVGA CLC and video cards which made for a nice RGB lightshow inside of our EVGA DG-77 case.
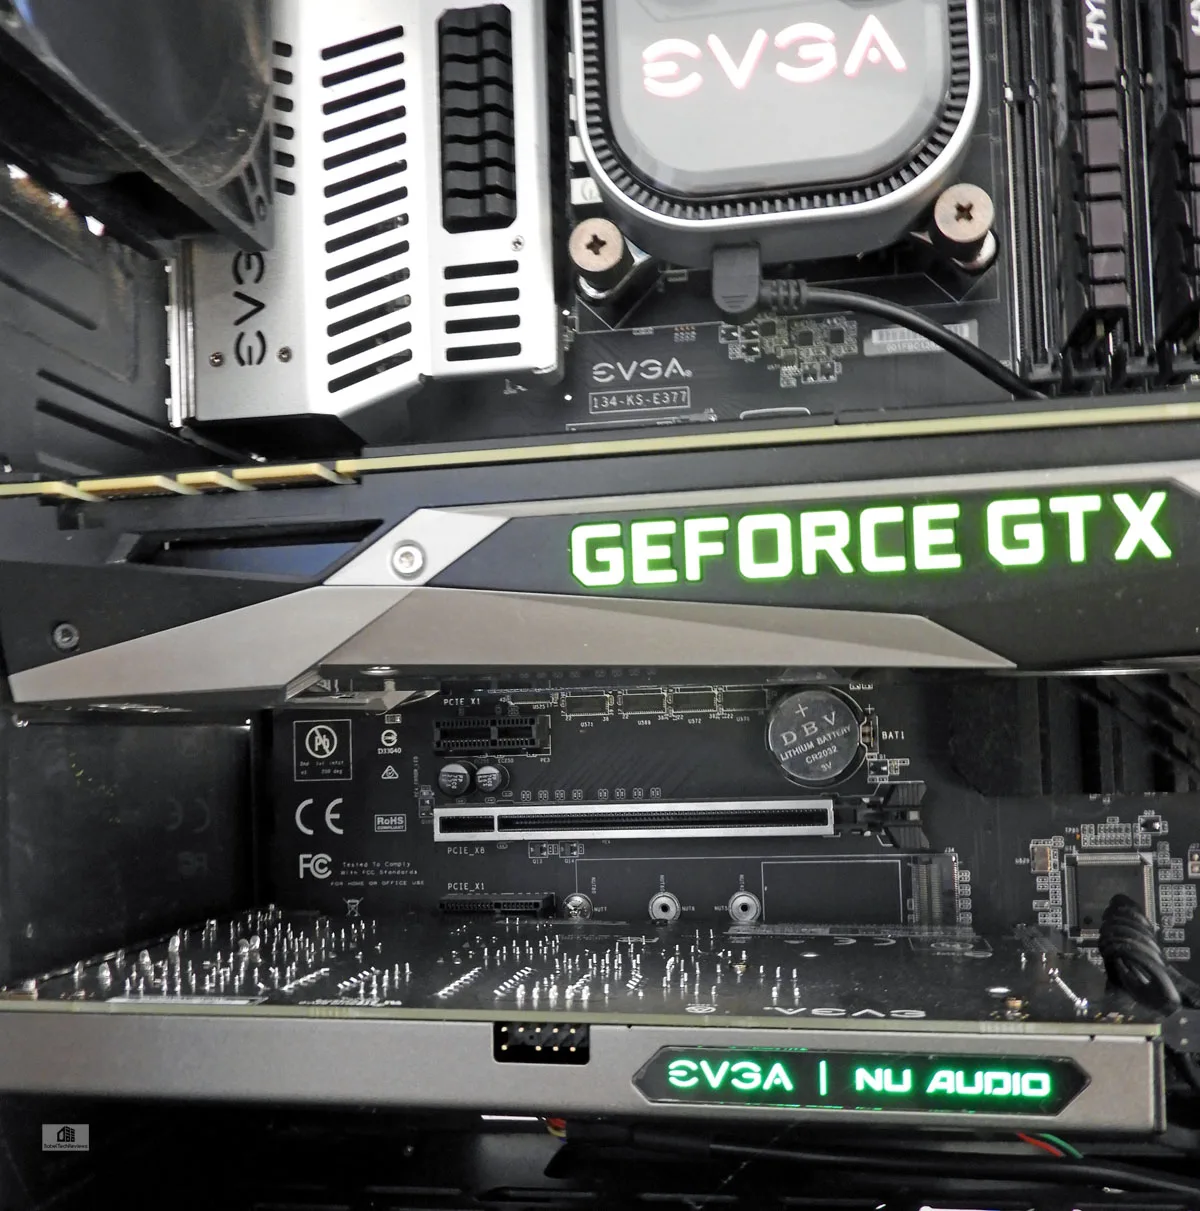 The connector on the front of the card is for a connection to your case’s front panel headphone jack should you somehow wish it. We would have preferred that it be placed on the end for easier cable routing.
UPDATED 02/22/2019 08:00 AM PDT
EVGA just updated their audio driver with new functionality. We understand that EVGA is going to continue to update and improve their software.
EVGA NU Audio Driver – v0.1.2.3
Release Notes –
- Added functionality for independent mute options for Line-Out and Headphone Out*
- Optimized EQ functionality by adding a 30ms delay after changing values
- Fixed an issue where the PCM filters (located on the setup page) would not save after changing to a different filter
- Fixed various audio issues in specific situations
- Updates NU Audio Firmware to V28
*Note – The speaker icon in the Master Volume section mutes the Line-Out signal (RCA), while the speaker icon under the Headphone Volume section mutes the Headphone Out signal. At this time, there is no mute button directly for the System Volume. Also, the Line-Out mute is done at a hardware level, which will cause the Nu Audio Card to “click” every time the Line-Out mute is enabled or disabled. This is normal and expected behavior.
Now that we have our Nu Audio sound card set up, let’s subject it to critical listening tests to compare how it sounds in contrast to the motherboard’s integrated Realtek audio and also compared with the Diamond USB sound card.
Listening Tests
For our many hours of auditioning our favorite well-recorded CDs, we primarily used our reasonably accurate Edifier R1230T active speakers. These speakers were plugged into two sound cards at the same time by using their two sets of mini-plug and RCA inputs for instantaneous A/B switching comparisons using Windows software at the same volume.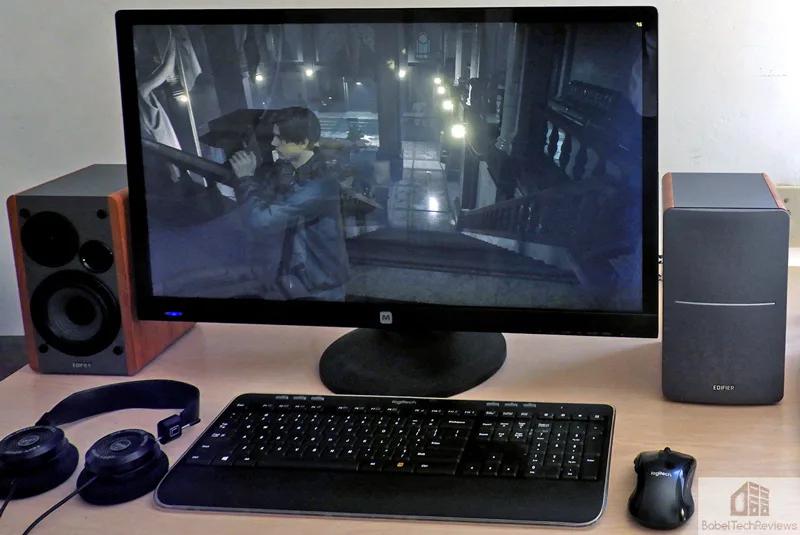
Our challenge is to determine if we can “hear the difference” using our Edifier PC desktop speakers by switching back-and-forth between our 3 PC audio card solutions: the FTW motherboard’s Realtek integrated audio, the Diamond USB 7.1 soundcard, and the PCIe-based Nu Audio card. We also use a pair of entry-level audiophile Grado SR60e headphones which make it even easier than using inexpensive speakers to hear the differences between sound cards.
Will we be able to hear the musical superiority of the Nu Audio card over a USB sound card just using our desktop speakers, or would we have to resort to Grado headphones to hear any improvement?
First of all, there is absolutely no comparison between what we hear on motherboard audio and the music produced by the Nu Audio sound card. There are only stark contrasts. If the Nu Audio sound is “lifelike”” than integrated sound is mostly dead and lifeless. It is harsh and it grates on nerves after a prolonged high volume listening session. It is flat, distorted, lacks definition or imaging, and you cannot easily distinguish many instruments on a small and rather collapsed sound stage. The bass may be muddy and there is no zing nor any transients that the higher frequencies should deliver.
In contrast with the hiss and distortion in the background of the integrated audio, there is dead silence with the Nu Audio card. Our low-end integrated motherboard audio goes boom-boom, tink-tink, but that is about all it can be expected to deliver. A USB digital sound card is a much better choice and it is an attempt to get a more musical sound – the bass becomes more solid and you can differentiate sounds and instruments from each other instead of the sounds smearing together. Games also sound better and there is better audio directionality experienced by a better sound card.
In a progression up from our USB sound card, the Nu Audio card exhibited far more musical nuances. The sounds became crisper and I can hear the transients start to shimmer. The cymbals sizzle, the guitars sing, and the piano notes are crystal clear with just the right amount of delay and reverberation. The low-end bass is far better on the Nu Audio card, and the sound stage images better to open up and become more musical than the USB card using the same desktop speakers.
If you are one of the rare few that cannot hear any difference, then you have probably never really listened to music. It appears that EVGA is making a rather safe $100 bet. Music from motherboard audio is mostly suitable for background music, for videos, light gaming, and for compressed MP3 music. Motherboard integrated audio is generally not designed for music listening or for pleasure at any realistic volume with decent speakers, and it is just barely adequate for gaming.
However, even a fifty dollar Diamond USB sound card sounds much better than motherboard integrated audio for music and for improved positional gaming, so our real test comes when we compare the Nu Audio card with a better-than-integrated audio solution and when we played Steely Dan at high volume. At the click of our mouse, we switched back-and-forth between the USB sound card and the Nu Audio card.
It was easy to tell that the sound produced by the Nu Audio card is superior, more accurate and detailed, and definitely more musical. Switching back to the USB sound card found that the sax solo in “Deacon Blues” became harsher. At the same time, the vocals became less open, the percussion less snappy, and the drum beats became less tight and well-defined. The soundstage is more natural while listening on the Nu Audio card than hearing the same music produced by the USB sound card. It was then even easier to spot and confirm these sound card audible differences using Grado headphones for the rest of the album.
Using the Nu Audio card, Lauryn Hill’s rap on Santana’s “Supernatural” album found her vocals open and crystal clear. The recording projects her presence perfectly and it doesn’t wander nor lose its natural progression. The imaging is impressive on the Nu Audio card as the speaker soundstage remains focused and the instruments are natural in their relation with each other. However, switching back from Nu Audio to USB collapsed the sound stage during the orchestral crescendo. Although the USB card still sounds decent, is clear that the Nu Audio card is far more musical and less tiring to listen to.
Listening to CD after CD and even listening to EVGA’s high end demo wav. tracks confirmed that the Nu Audio sound card sounds better and that it is easy to “hear the difference” over a USB sound card never mind its stark contrast with the awful-sounding free audio solution provided by many motherboard manufacturers.
It is very clear that EVGA and Audio Note intend to deliver a high-fidelity PC audio solution in a PCIe card that would primarily address gamers who also love music and own quality speakers and headphones. They succeeded and the Nu Audio card may even be considered by some to be entry-level audiophile. I did not try out Nu Audio’s native DAC playback capabilities, but listened mostly to CDs that I know very well.
Unlike with other PC audio sound card companies whose intention is to “process” the sound with a lot of software options, EVGA and Audio Note have pursued the “pure” sound approach. The Nu Audio card works at reproducing the sonic vision of the artist and recording engineer unaltered and as pristine and as natural as possible delivered to the music listener. This is the approach that we applaud and appreciate and this Nu Audio card’s audio even rivals some more costly dedicated external DACs.
For gaming, we prefer 2 speakers and a stereo stage on which to hear the relative positions of the enemy NPCs. Over the 30 hours that we played Metro Exodus, we appreciated the excellent positional imaging of the Nu Audio card as well as our new ability to hear the finest details contained in the audio cues that were completely missing from the motherboard audio and only partially reproduced by the USB sound card. The superiority of the Nu Audio card was clearly discernible by using the Edifier desktop speakers or the Grado headphones, and also with the Logitech G Pro and HyperX Cloud headsets.
We were impressed that we were able to hear the difference with music and gaming between the USB sound card and the Nu Audio card and that it was significant on decent quality $100 PC active speakers. Using Grado headphones, the differences and superiority of the Nu Audio card became even more pronounced and we would expect that a much nicer stereo setup would benefit even more. The RGB lighting is just a plus and it can also be turned off.
From our experience, the audio quality of the Nu Audio card rivals some even more expensive standalone DAC units. $249 is certainly expensive for a sound card, but not for the gamer and music lover who has spent a small fortune on speakers and headphones to say nothing of their music collection. EVGA Elite members can save $50. We also understand that there is a guarantee of $100 EVGA bucks for those who purchase the Nu Audio card that has not yet been fully detailed by EVGA.
We can hear the Nu Audio improvement using a relatively inexpensive set-up that should be even more noticeable with better speakers or headphones. But what has been the most surprising outcome of this review of the Nu Audio card is that this editor is enjoying his music on his PC again!
Conclusion
EVGA Nu Audio Pros
- Well-built and engineered entry-level audiophile card that brings better sound than either motherboard integrated sound or a USB sound card to a good quality 2-speaker PC stereo system or to headphones
- Easy to install software, high-quality hardware, and great flexibility in an good-looking RGB package
- It’s easy to hook up the connections to active speakers or to an amp
- Excellent musical sound with 2 speaker 2.0 or 2.1 audio possible from your PC and also set up for a 5.1 home theater system using its optical out.
- The Nu Audio card is well-engineered and built to provide well-above average music reproduction characteristics that clearly sounds superior playing music on above-average speakers or headphones rivaling the sound of expensive standalone DACs
Cons
- Price. High-quality sound does not come cheaply. It would also be nice to have a backplate included just as with high-end video cards.
![]() If you want to listen to music on your PC and already have a decent pair of speakers or headphones, I highly recommend the Nu Audio card. You will do your ears a big favor by dumping your integrated sound or even upgrading your USB sound card for more alive-sounding music.
If you want to listen to music on your PC and already have a decent pair of speakers or headphones, I highly recommend the Nu Audio card. You will do your ears a big favor by dumping your integrated sound or even upgrading your USB sound card for more alive-sounding music.
EVGA has succeeded in their partnership with Audio Note to bring a high-end stereo PC sound card to market. If you love music but don’t love your soundcard, audition this card. We are pretty sure you can tell the difference. This editor certainly can and thanks to the Nu Audio card, he is again thoroughly enjoying his music collection.