Measuring the Vive Pro Wireless Adapter’s Latency with FCAT-VR
We just received a Wireless Adapter from Vive and we have been putting it through its paces with the Pro. The freedom from being tied down by a cord to a PC is exhilarating in VR. Not getting tangled up by a movement-limiting cord greatly adds to VR immersion, and a wireless VR option is an advantage that differentiates Vive HMDs from headsets like the Valve Index.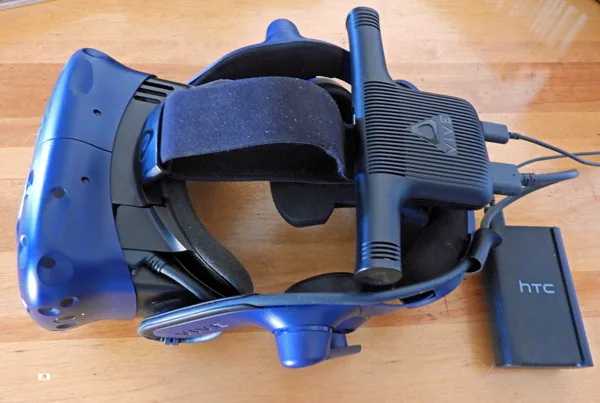
We were particularly interested to see if FCAT-VR can measure the performance impact of the Wireless Adapter’s additional latency, and we used four VR games and a RTX 2080 Ti/[email protected]/16GB DDR4-3866MHz for our testing. Our performance testing results are preliminary as we plan to spend a few more weeks evaluating the Vive Wireless Adapter and will use multiple AMD and NVIDIA video cards. In addition, we just upgraded to a Core i9-10900K and we will see if a faster CPU makes any difference when we post our final review of the Wireless Adapter.
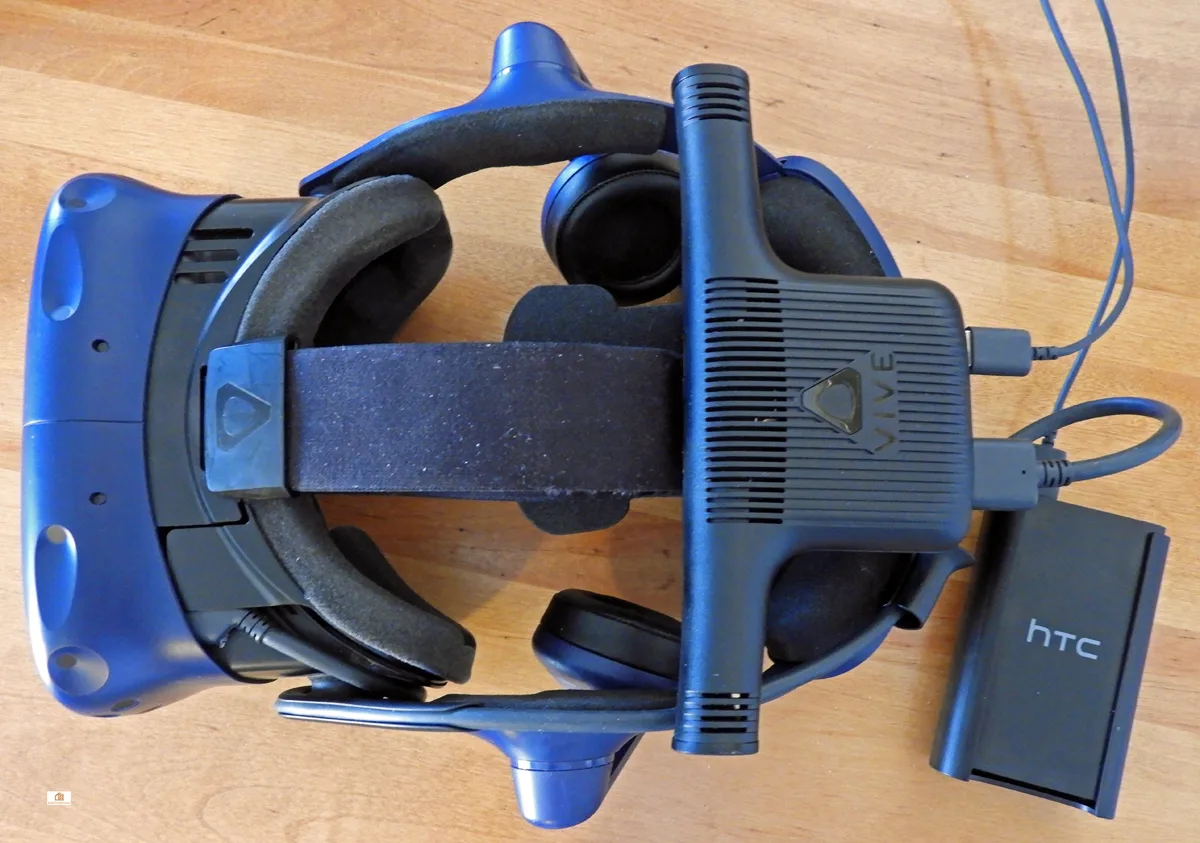
The Vive Pro Wireless Adapter
The Vive Pro Wireless Adapter arrives in a box with a lot of components, some of which are used only for the original Vive. The instructions on Vive’s site are rather unclear but it’s easy to search for Youtube videos. Here is what comes in the box:
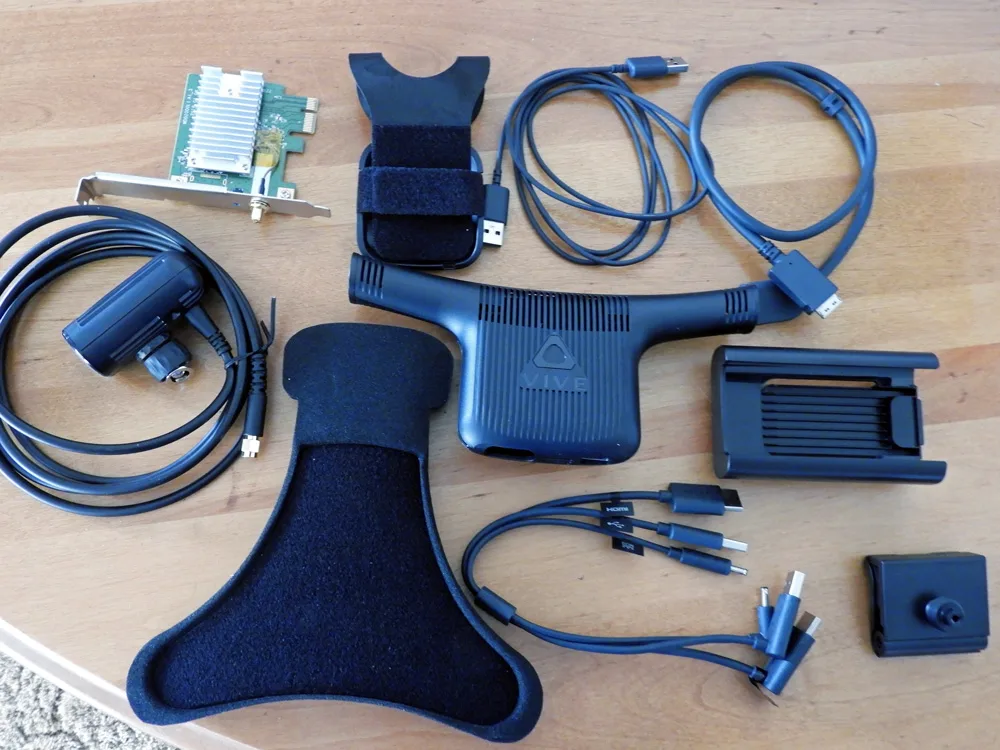
The primary goal is to install the PCIe card and transmitter, remove the cable from the HMD to the PC link box, and replace it with a short cable running to the Wireless Adapter which in turn fastens directly to the top of the HMD.
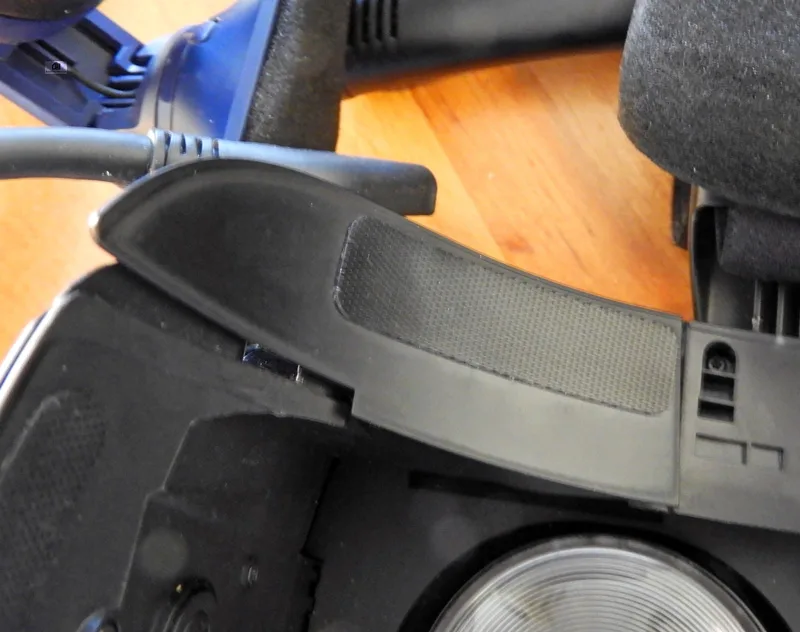
Here is the proper way to insert the cable.

Reinstall the cover plate, the faceplate, attach the Wireless Adapter unit to the top of the Pro, and hook up the battery, and turn it on. You will also need to install Vive Wireless software that works seamlessly with SteamVR.
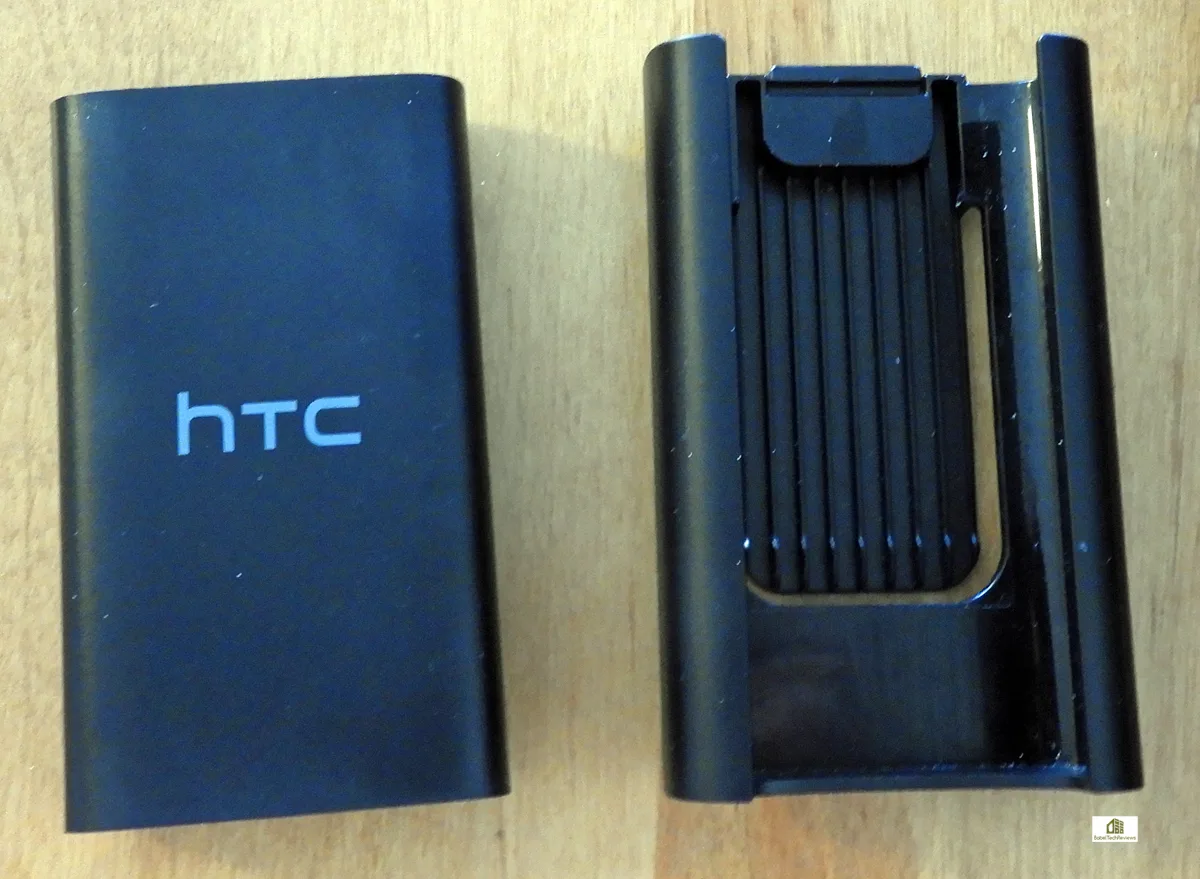
The battery sits in a belt clip and a short cord extends to the Wireless Adapter. The Wireless Adapter only adds about 4 and 1/2 ounces to the HMD’s weight. Just put the HMD on and feel free to walk about in your VR space without any further consideration for your former ball and chain.
 Freedom!
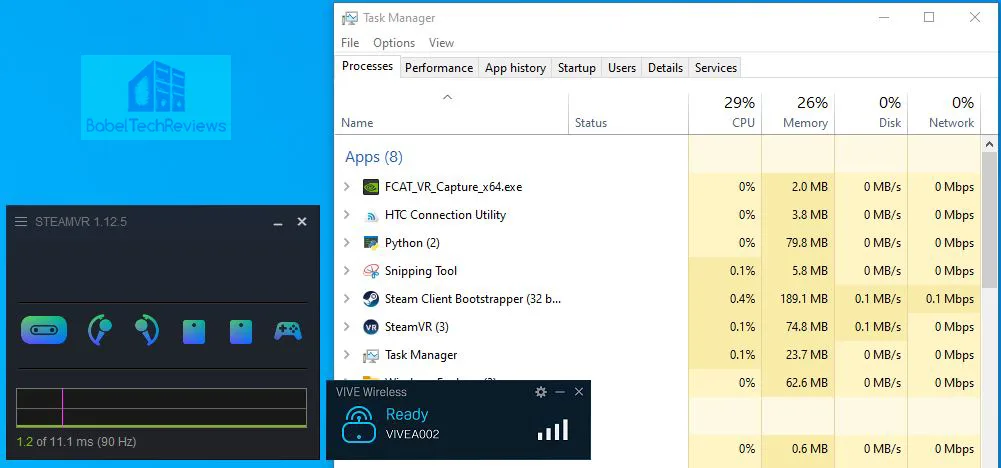
Wireless freedom comes at a price. The Wireless Adapter uses a lot of CPU cycles – the above screenshot shows CPU cycles used while idling on the desktop, not in game! And it costs $350.
Testing the Wireless Adapter Performance with FCAT-VR
We were unsure if FCAT-VR could measure additional latency that a wireless adapter adds as it depends on OpenVR’s feedback mechanism. If it reports a figure based on when the center row of pixels is scanned out to the display and treated as average, FCAT-VR would use those built in functions from the API for its results. So let’s see what it actually reports when we run identical benchmarks with the only difference being using the stock wired connection versus using the Vive Wireless Adapter.
For this evaluation, we used 4 VR games with especially repeatable benchmarks. We use maximum detail settings with higher than usual Supersampling/Super Resolution/Pixel density options to push a RTX 2080 Ti to the brink of reprojection to stress the card and to see if we notice any additional latency the Wireless Adapter may add.
- The Vanishing of Ethan Carter
- The Walking Dead: Saints & Sinners
- Skyrim
- Project CARS 2
It is important to remember that BTR’s frametime plot charts use frametimes in ms where lower is better, but we also compare “unconstrained framerates” which shows what a video card could deliver (headroom) if it wasn’t locked to either 90 FPS or to 45 FPS by the HMD. In the case of unconstrained FPS which measure one important performance metric, faster is better.
Let’s look at each of our four VR games’ performance individually using FCAT-VR. First up is a less demanding game, The Vanishing of Ethan Carter.
The Vanishing of Ethan Carter
The Vanishing of Ethan Carter is built on the Unreal 4 engine and it boasts amazing visuals even for entry-level cards. Although it superficially looks like a walking simulator, it is also an excellent detective game with great puzzles. Be aware that its style of locomotion tends to make some of its players VR sick.
There are just a few in-game graphics options available, so we picked 130% super resolution with TAA.
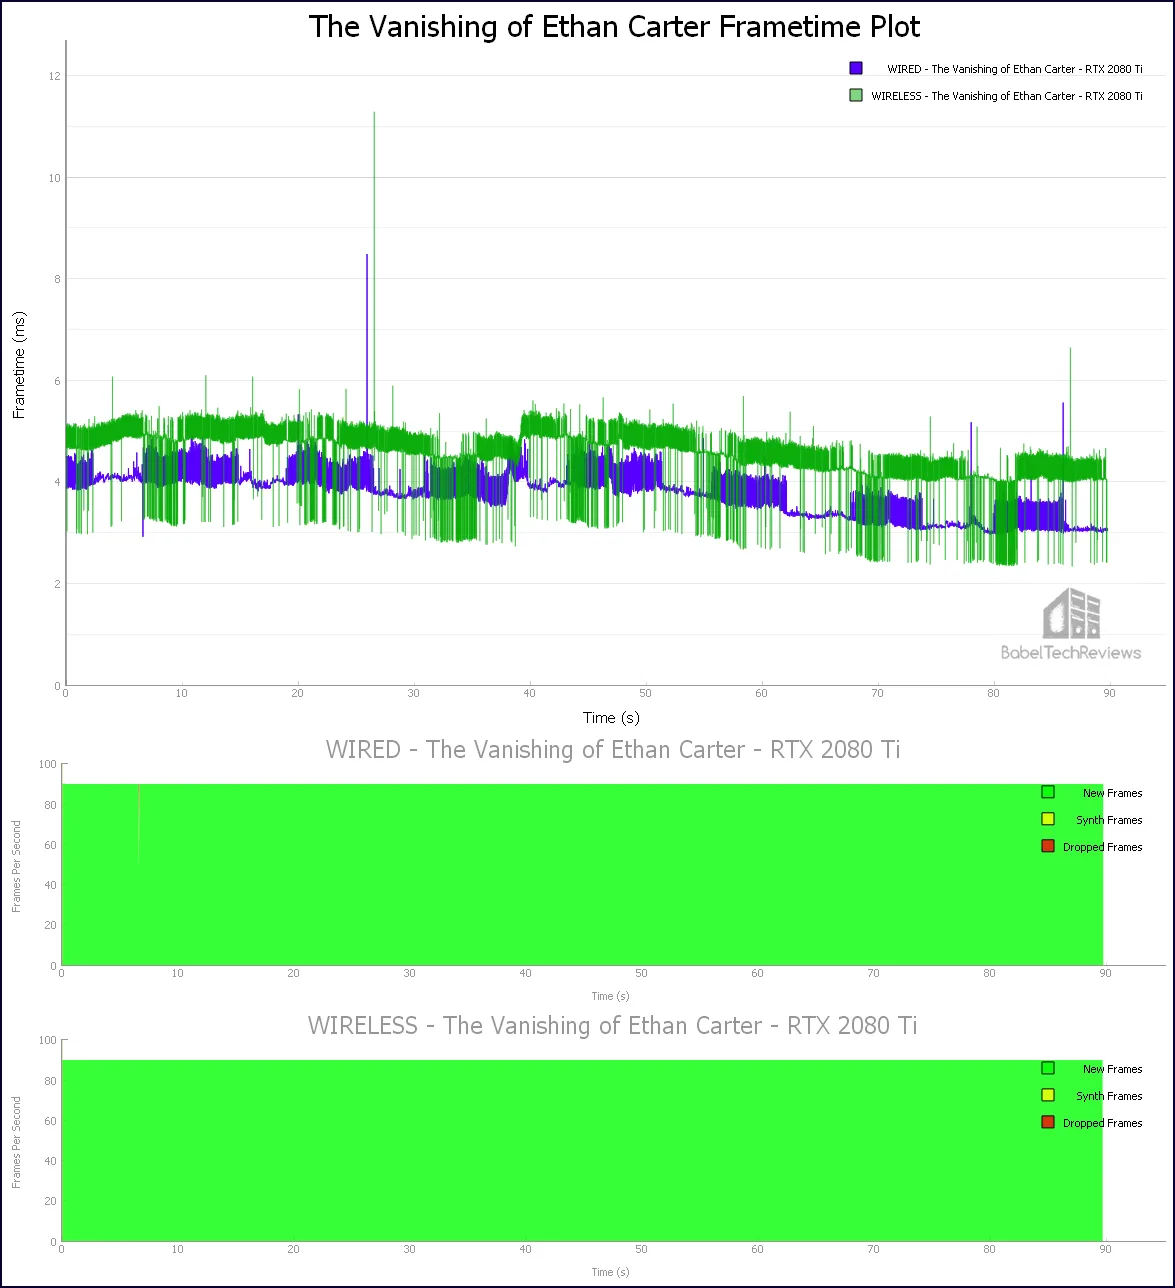
When looking at the frametime plot, faster time (lower) in ms is better. The wired experience performance is technically superior.
Here are the details.

The Wireless Adapter evidently adds some latency and slight instability compared to wired as the frametimes bounce around a little within a very narrow range. However, since 90 FPS/90Hz are delivered consistently to the viewer, the experience is fluid and it probably isn’t possible to practically tell the difference between a wired and a wireless experience in VR in The Vanishing of Ethan Carter using our settings.
Next up a more performance demanding game, The Walking Dead: Saints & Sinners.
The Walking Dead: Saints & Sinners
The Walking Dead: Saints & Sinners is the latest of BTR’s 12 VR game benching suite. It is a first person survival horror adventure RPG with a strong emphasis on crafting. Its visuals using the Unreal 4 engine are outstanding and it makes excellent use of physics for interactions.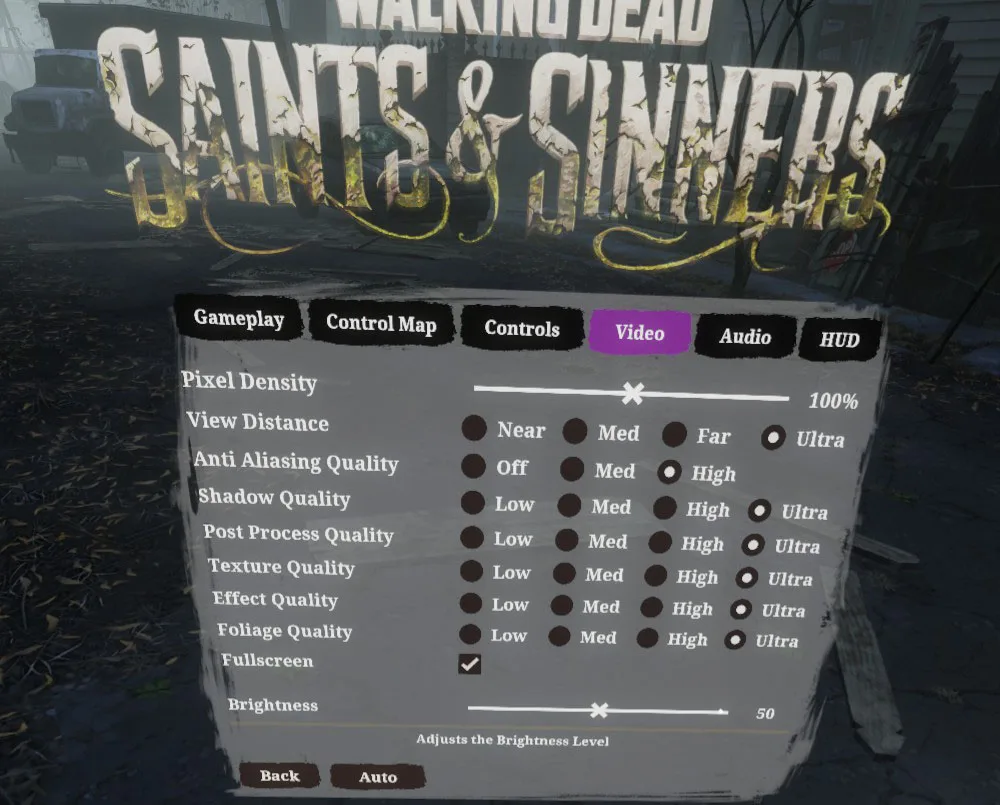
We benchmarked TWD: Saints and Sinners using its highest settings, but we left the resolution at 100%.
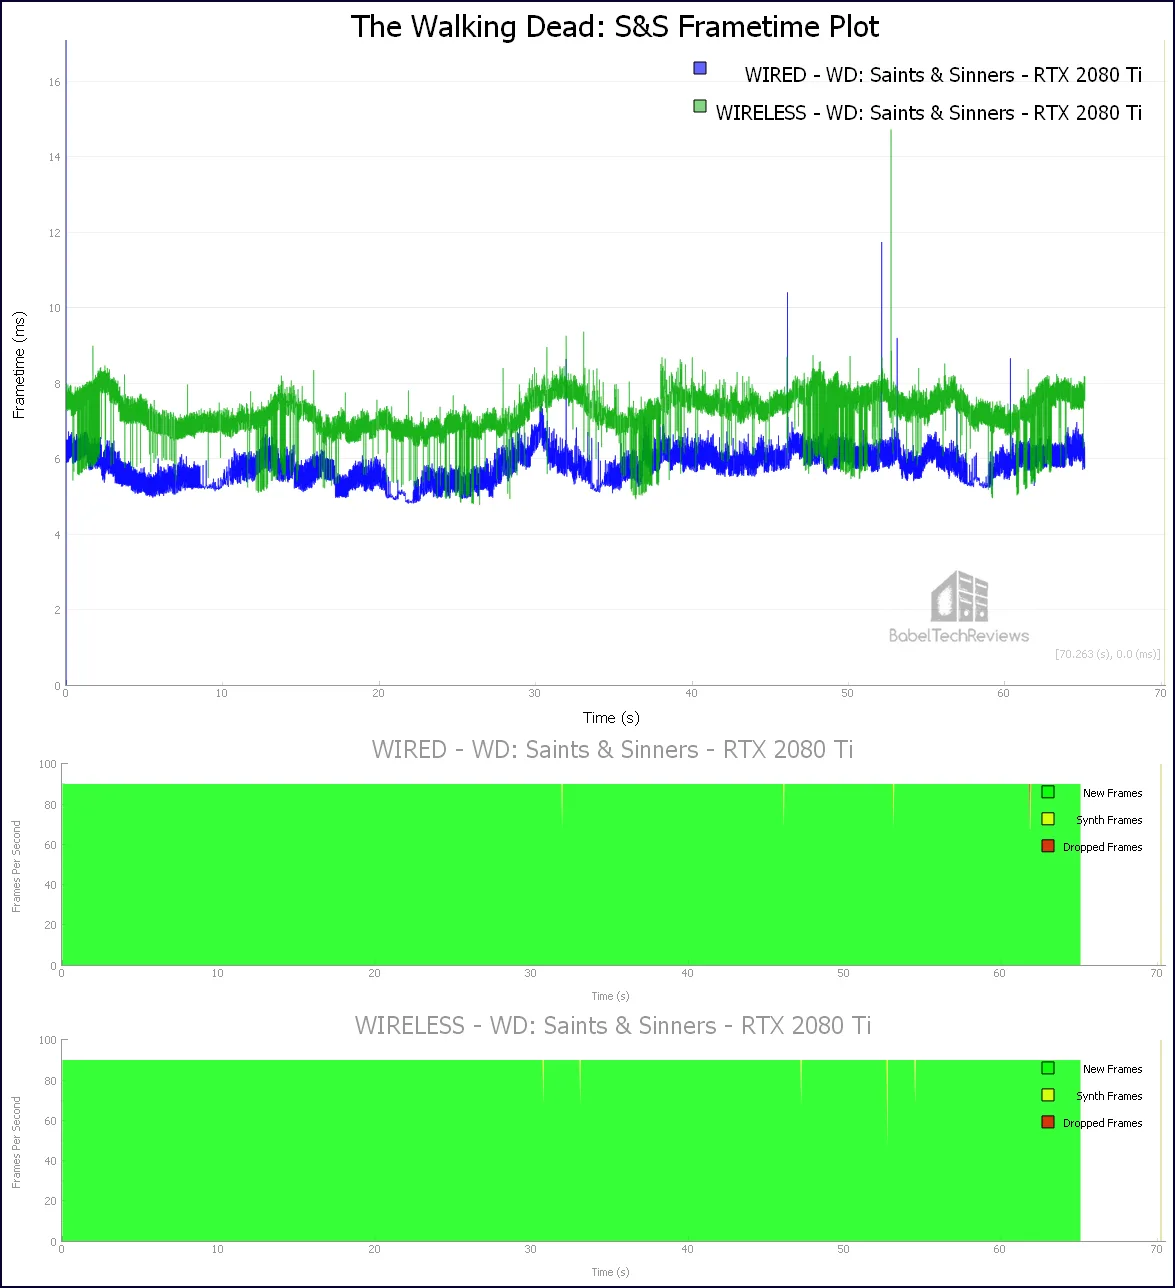
Except for 1 dropped frame and 1 warp miss, the frames are delivered at a proper 90Hz cadence via wire or wirelessly although technically the wired experience performance is better. Here are the details.
The difference between the wired and the wireless experience is probably imperceptible while playing The Walking Dead: Saints & Sinners using our settings.
Let’s benchmark Skyrim VR.
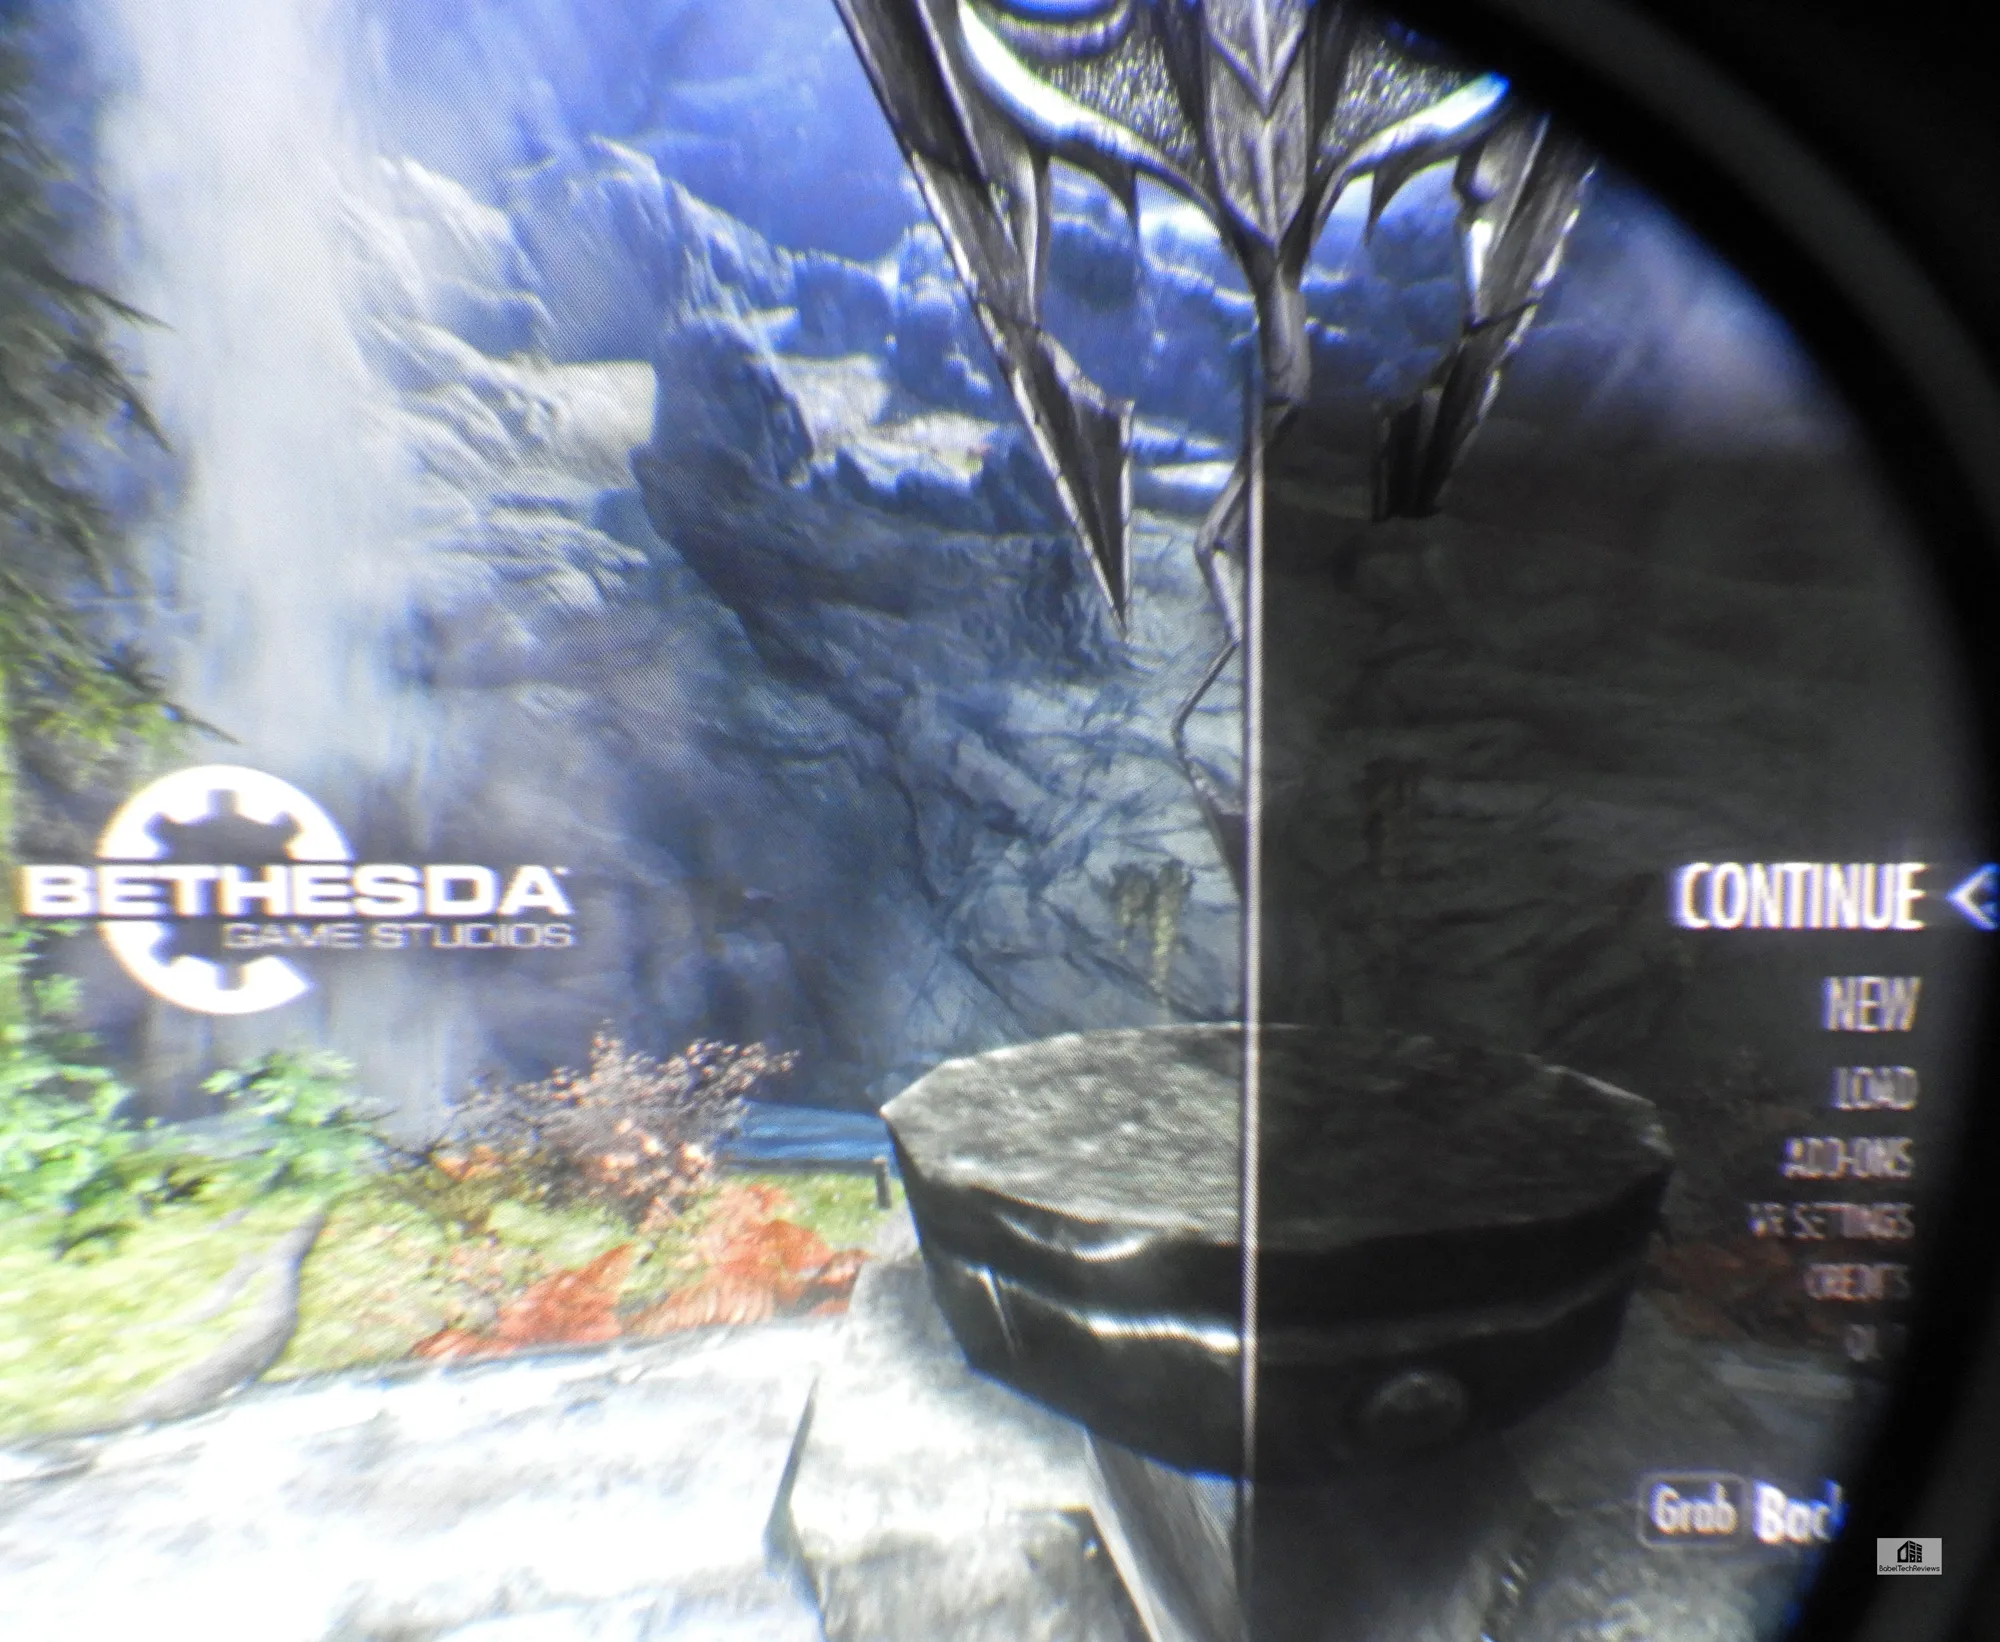
Skyrim VR
Skyrim VR is an older game that is not as demanding as many of the newer VR ports so its performance is still very good on maxed-out settings using its Creation engine. However, we maxed out the settings and cranked supersampling to 200% to really put a strain on our RTX 2080 Ti since many players use mods that can be very demanding and will also affect performance.
Here is the Skyrim VR frametime plot.
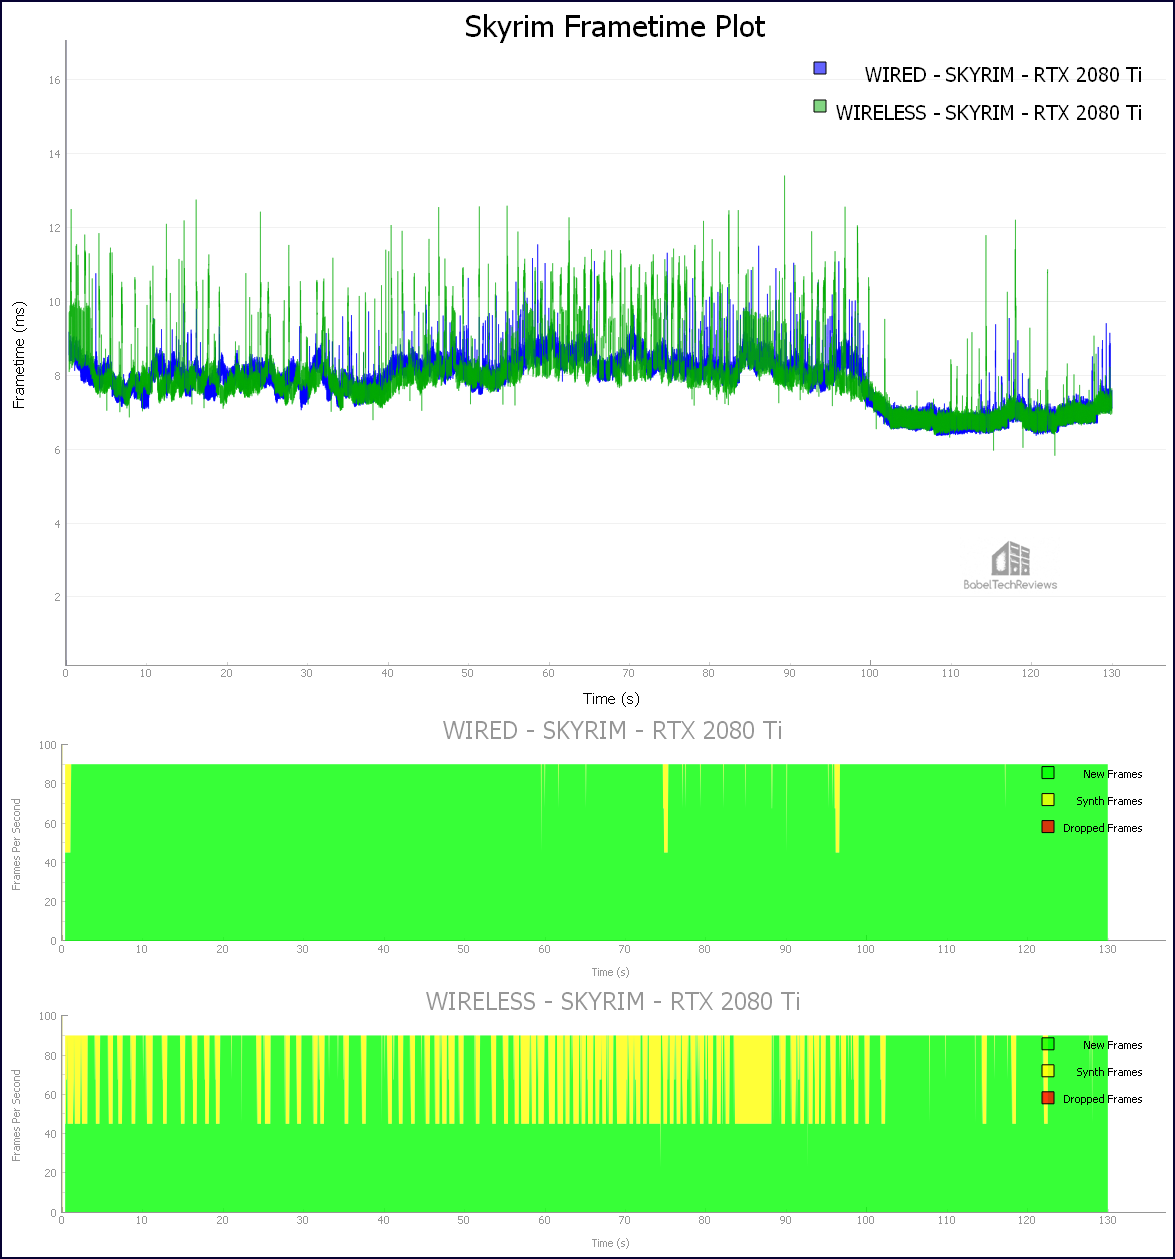
The wireless experience required 20% of its frames to be synthesized while the wired solution only needed 2%. Here are the details.

The difference between the wired and wireless experience became noticeable while playing Skyrim as synthetic frames were being generated together with some temporal artifacting. The solution is to back down on the settings or supersampling especially when using the Vive Wireless Adapter.
Last we test our most demanding VR game, Project CARS 2.
Project CARS 2
There is no way to convey the incredible sense of immersion that comes from playing Project CARS 2 in VR using a wheel and pedals. It uses its in-house Madness engine and the physics implementation is outstanding.

Project CARS 2 offers many performance options and settings and we prefer playing with SMAA Ultra.
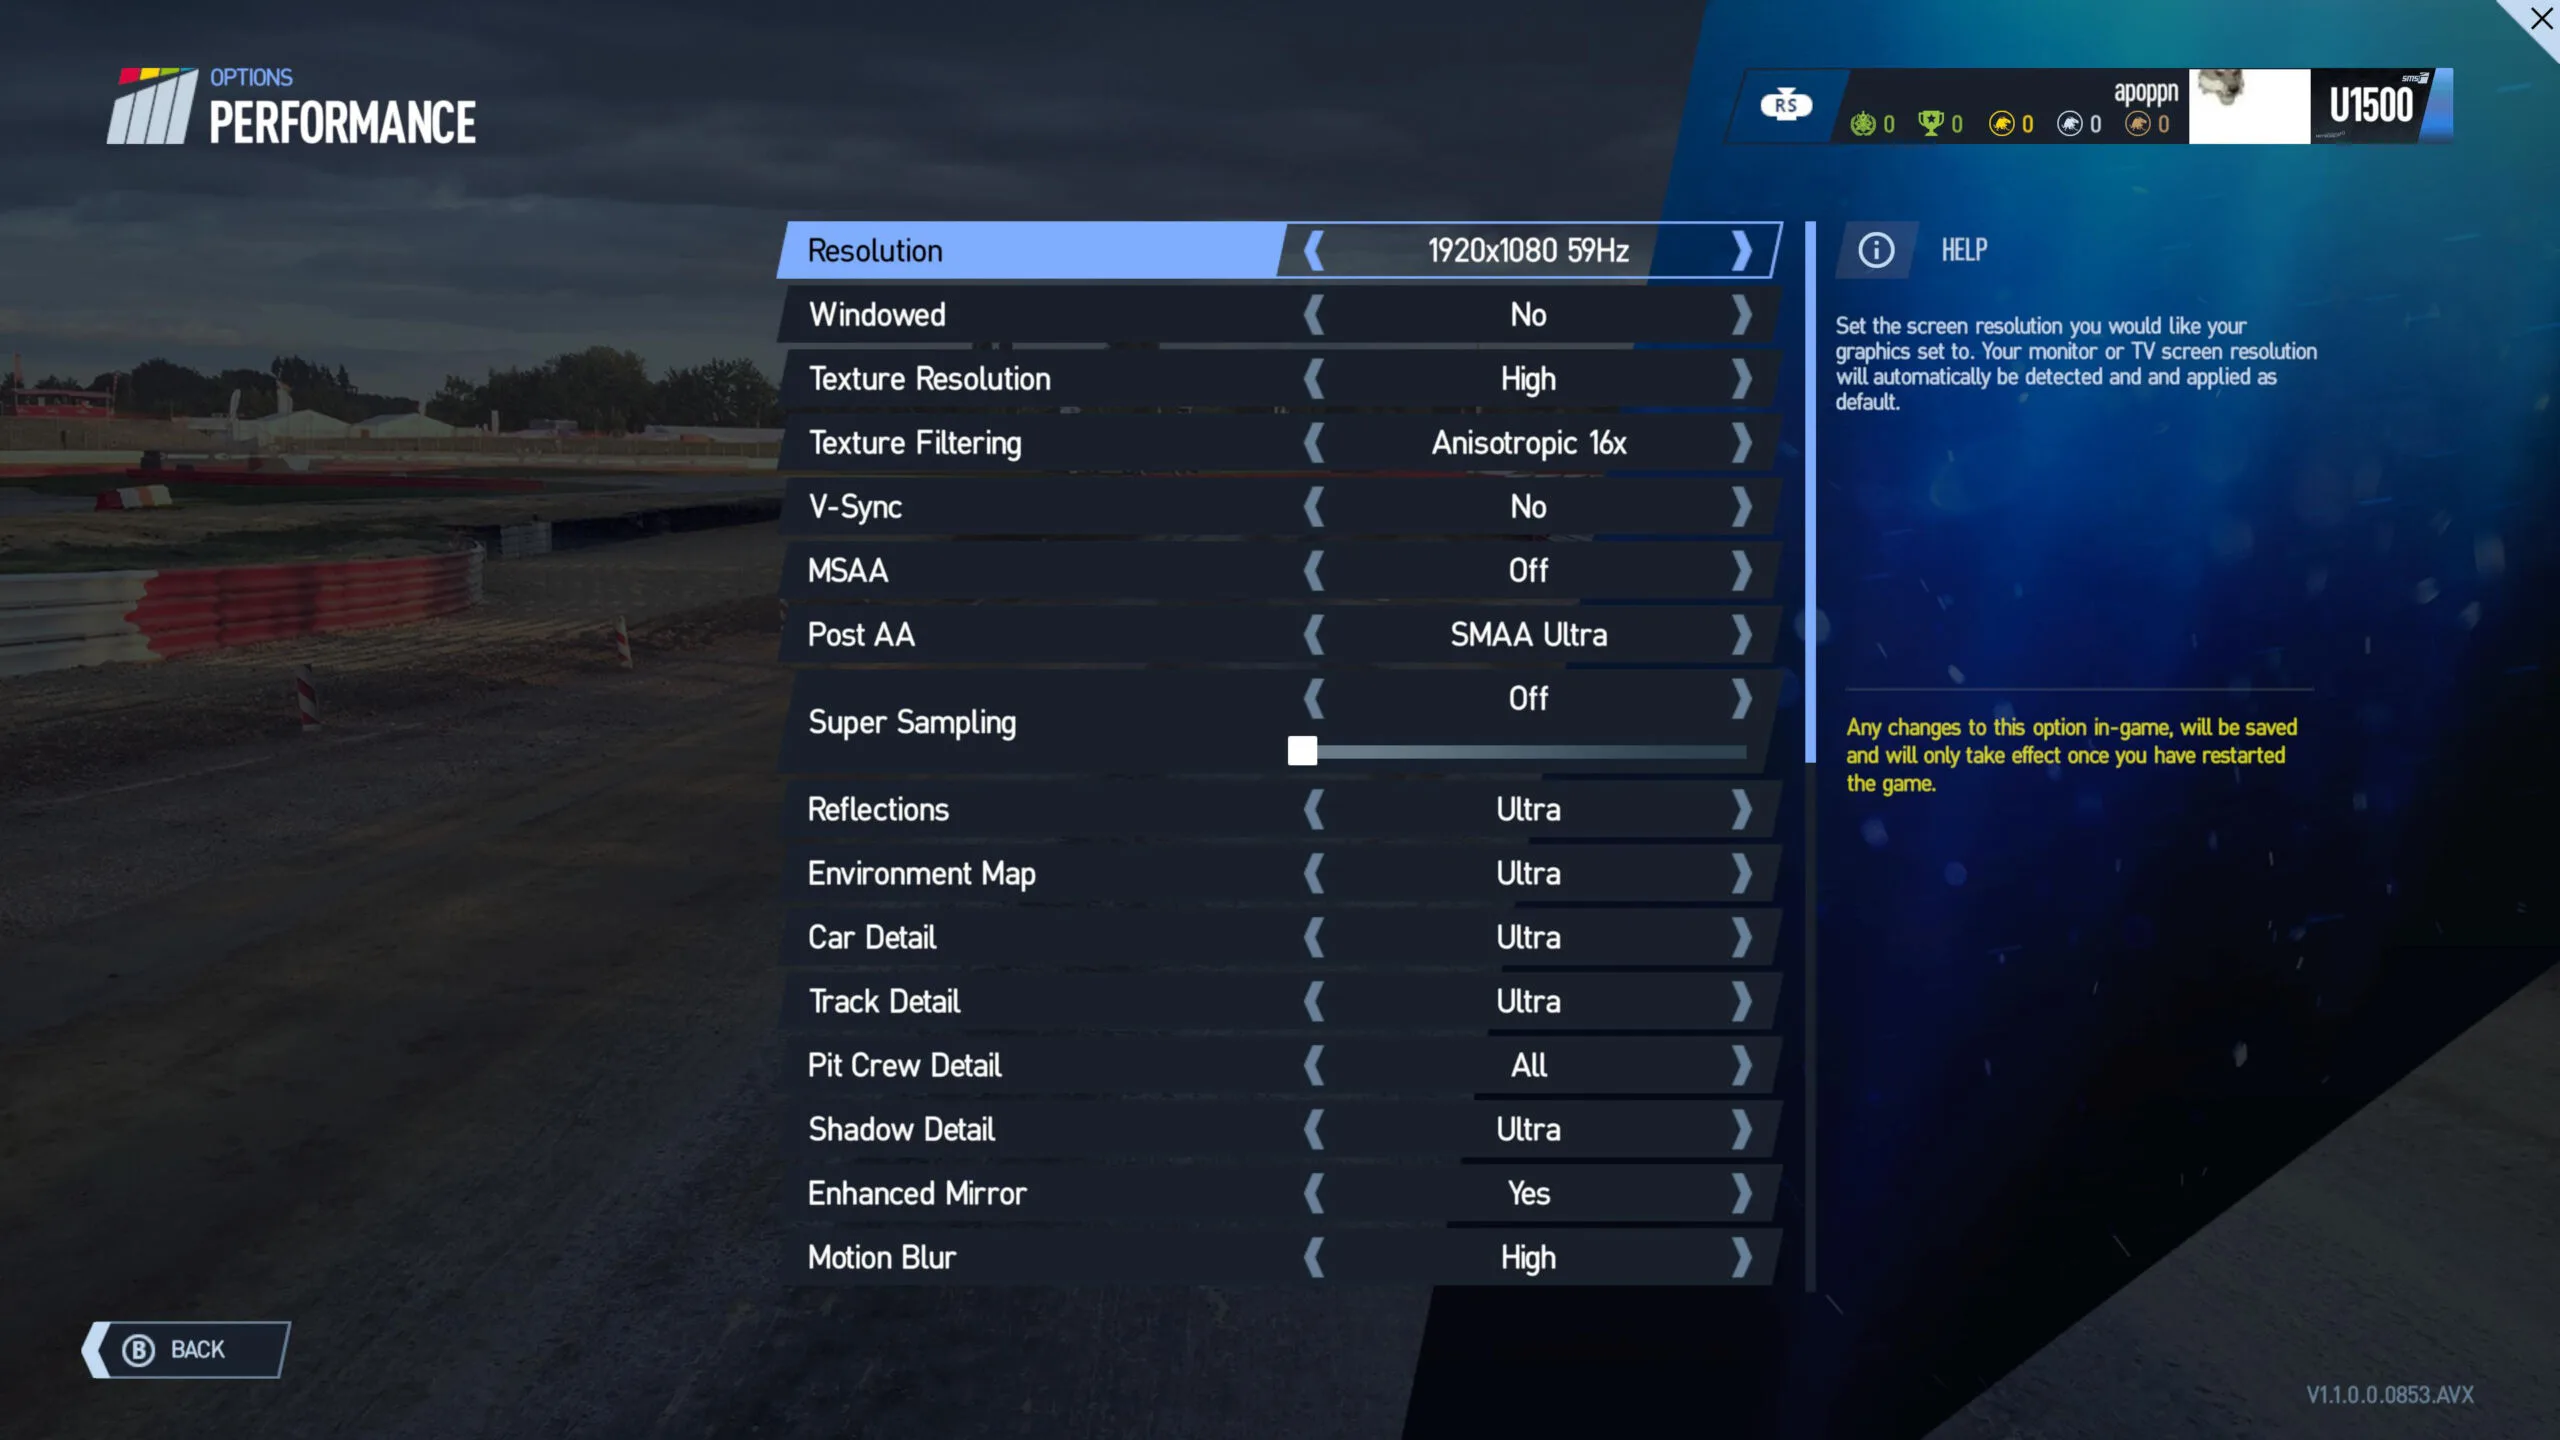
We used maximum settings to really stress our RTX 2080 Ti. We would recommend lowering grass, reflections, and motion blur to improve framerate delivery if necessary as motion smoothing or reprojection tends to cause visible artifacting.
Here is the frametime chart.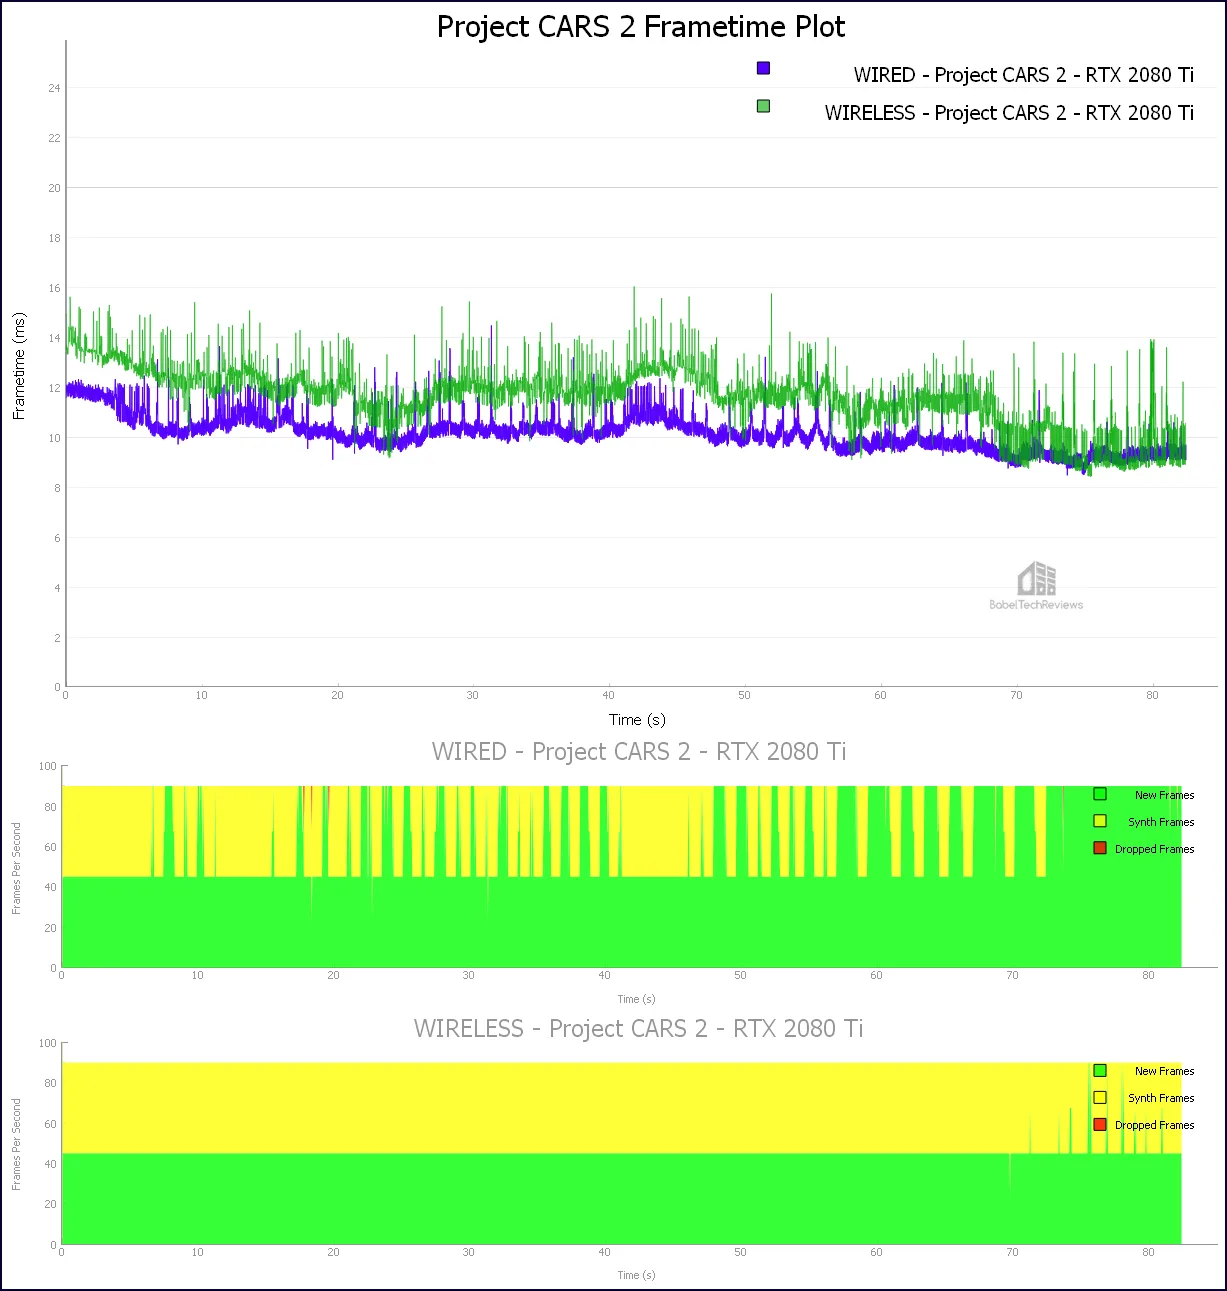
Here are the details.
From our experience, the wireless VR experience is excellent as long as the game doesn’t require motion smoothing or need to synthesize many frames. In the case of Project CARS 2, we would recommend backing down on the settings to get a minimum of 90Hz/90FPS delivered to the HMD.
Let’s look at our Unconstrained Framerates Chart.
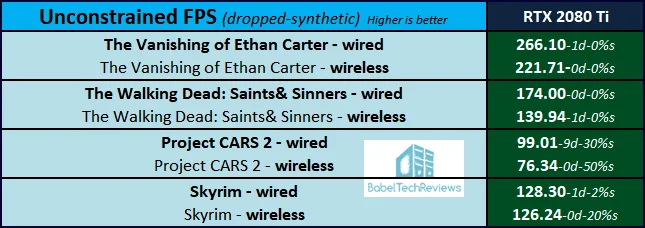
Unconstrained Framerates
This chart summarizes the Unconstrained Framerates of the RTX 2080 Ti with four tested games as measured by FCAT-VR which reports the performance headroom of a video card in frames per second. In our case, it reports what the RTX 2080 Ti could deliver if it were not constrained by the HMD to exactly 90Hz/90FPS (or 45Hz/45FPS with reprojection/motion smoothing).
These are our preliminary findings after setting up and using the Vive Wireless Adapter for only a few days. The Wireless Adapter is not quite a simple plug and play, and there may be potential tweaks and optimizations available to improve its latency and performance. We plan to spend several more weeks in VR using the Wireless Adapter and will test it with multiple AMD and NVIDIA video cards. We have also upgraded from Core i7-8700K to i9-10900K and will report on any differences we find using a faster CPU.
Let’s check out our conclusion.
Conclusion
Using the Vive Wireless Adapter is an amazing experience that makes VR experiences significantly more immersive and overall much better. No longer will a gamer reach the end of his rope with a cable that refuses to stay out of the way. It’s impossible to keep track of ones cable in VR all of the time, and there is little worse than suddenly reaching the end of a movement because of the cable. Using a chair instead of standing has its own frustration, and it’s easy to roll over the cable and also to tangle it while spinning around.
Wireless VR is Freedom! However, the wireless VR experience is excellent only as long as it doesn’t diminish performance so as to require reprojected frames. In addition, we have already experienced some other minor issues that may be due to our inexperience with the Wireless Adapter – or not. It runs hot, and its battery time seems to be limited to around three hours so we will explore the option to use a larger capacity battery. We will revisit the Vive Wireless Adapter in a full review next month to see if it is worth $350. If we like it, we will buy it for the awesome sense of freedom and joy of unhindered movement that it affords.
Next up is our last review using our Core i7-8700K to see it it is worthwhile to upgrade to a 32GB 3600MHz T-Force DARK Z memory kit over using 16GB 3600MHz DDR4. We have upgraded to a Core i9-10900K, so far with all cores at 5.1GHz, and are putting it through its paces so you can expect many new and interesting reviews on the way.
Happy VR Gaming!